Custom arcade machines have always been a fairly common project in the hacker and maker circles, but they’ve really taken off with the advent of the Raspberry Pi and turn-key controller kits. With all the internals neatly sorted, the only thing you need to figure out is the cabinet itself. Unfortunately, that’s often the trickiest part. Without proper woodworking tools, or ideally a CNC router, it can be tough going to build a decent looking cabinet out of the traditional MDF panels.
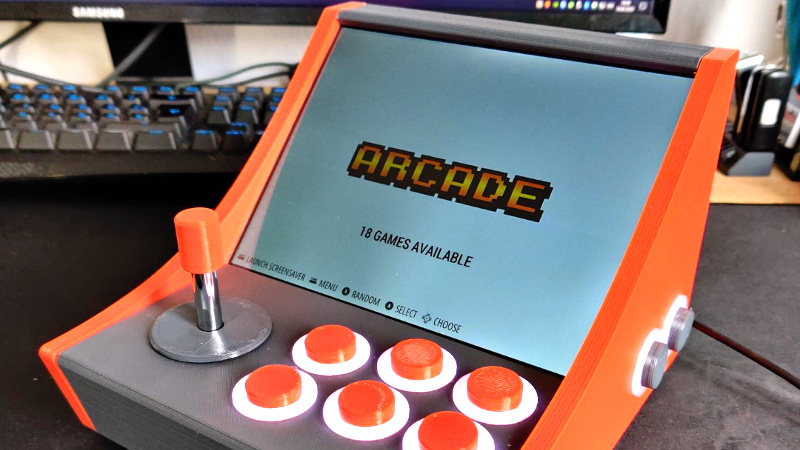
But if you’re willing to leave wood behind, [Gerrit Gazic] might have a solution for you. This bartop arcade, which he calls the simplyRetro D8, uses a fully 3D printed cabinet. He’s gone through the trouble of designing it so there are no visible screw holes, so it looks like the whole thing was hewn from a chunk of pure synthwave ore. He notes that this can make the assembly somewhat tricky in a few spots, but we think it’s a worthy compromise.
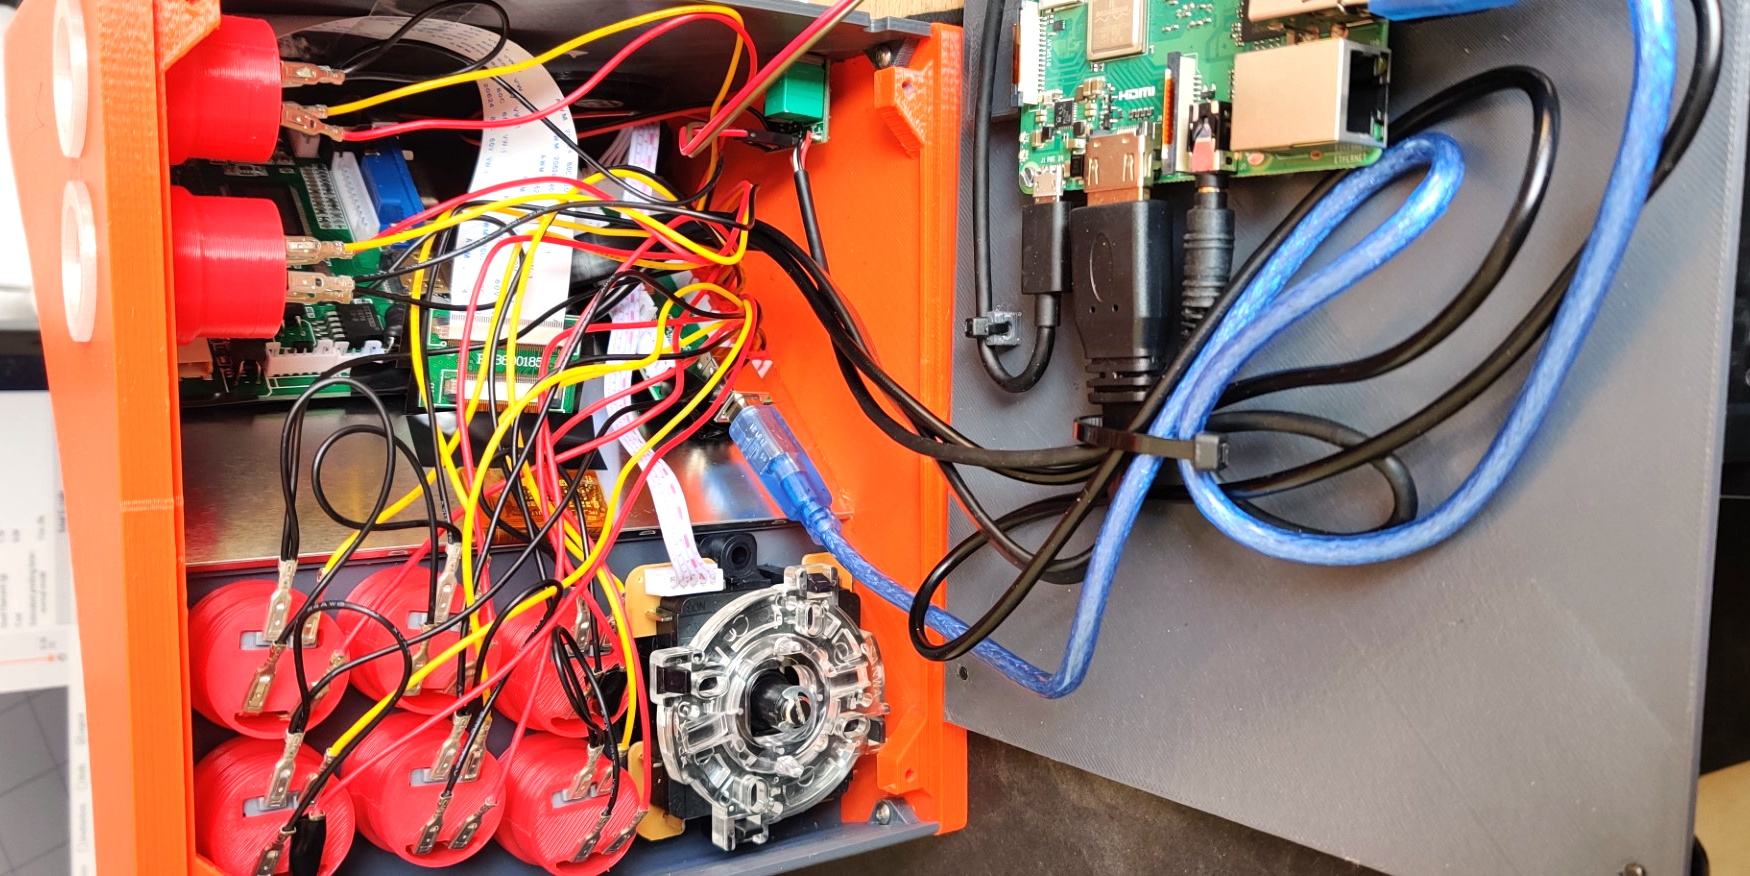
Given the squat profile of the simplyRetro, the internals are packed in a bit tighter than we’re accustomed to seeing in a arcade build. But there’s still more than enough room for the Raspberry Pi, eight inch touch screen HDMI panel, and all the controls. To keep things as neat as possible, [Gerrit] even added integrated zip tie mount points; a worthwhile CAD tip that’s certainly not limited to arcade cabinets.
[Gerrit] has included not only the STL files for this design, but also the Fusion 360 Archive should you want to make any modifications. There’s also a complete Bill of Materials, as well as detailed instructions on how to pull it all together. If you’ve ever wanted your own arcade machine but felt a bit overwhelmed about figuring out all the nuances on your own, the simplyRetro could be the project you’ve been waiting for.
Of course if you do have access to a CNC or laser cutter, then there are some designs you could produce quite a bit faster.


One probably only needs up to 1 Ghz of Pi oomph on the 8 and 16 bit emulation but for more than that, you’d probably want to arrange for more ventilation and cooling, and heatsink the Pi, or it will be bouncing off the thermal rev limiter all day.
Thank you so much for featuring it here! It is surely not perfect, but I love it! Playing on it is so much fun!
I love it!
Having just built a gameboy with PiZero inside, this should be a logical step up :)
Im borrowing the desing k,thanks,bye :DD
I will probably go DIY with audio, since I have a couple of PI Zeros in the drawer.