a render of the curved bartop arcade machine in fusion 360

Bartop Arcade Machine That Isn’t Afraid Of Change

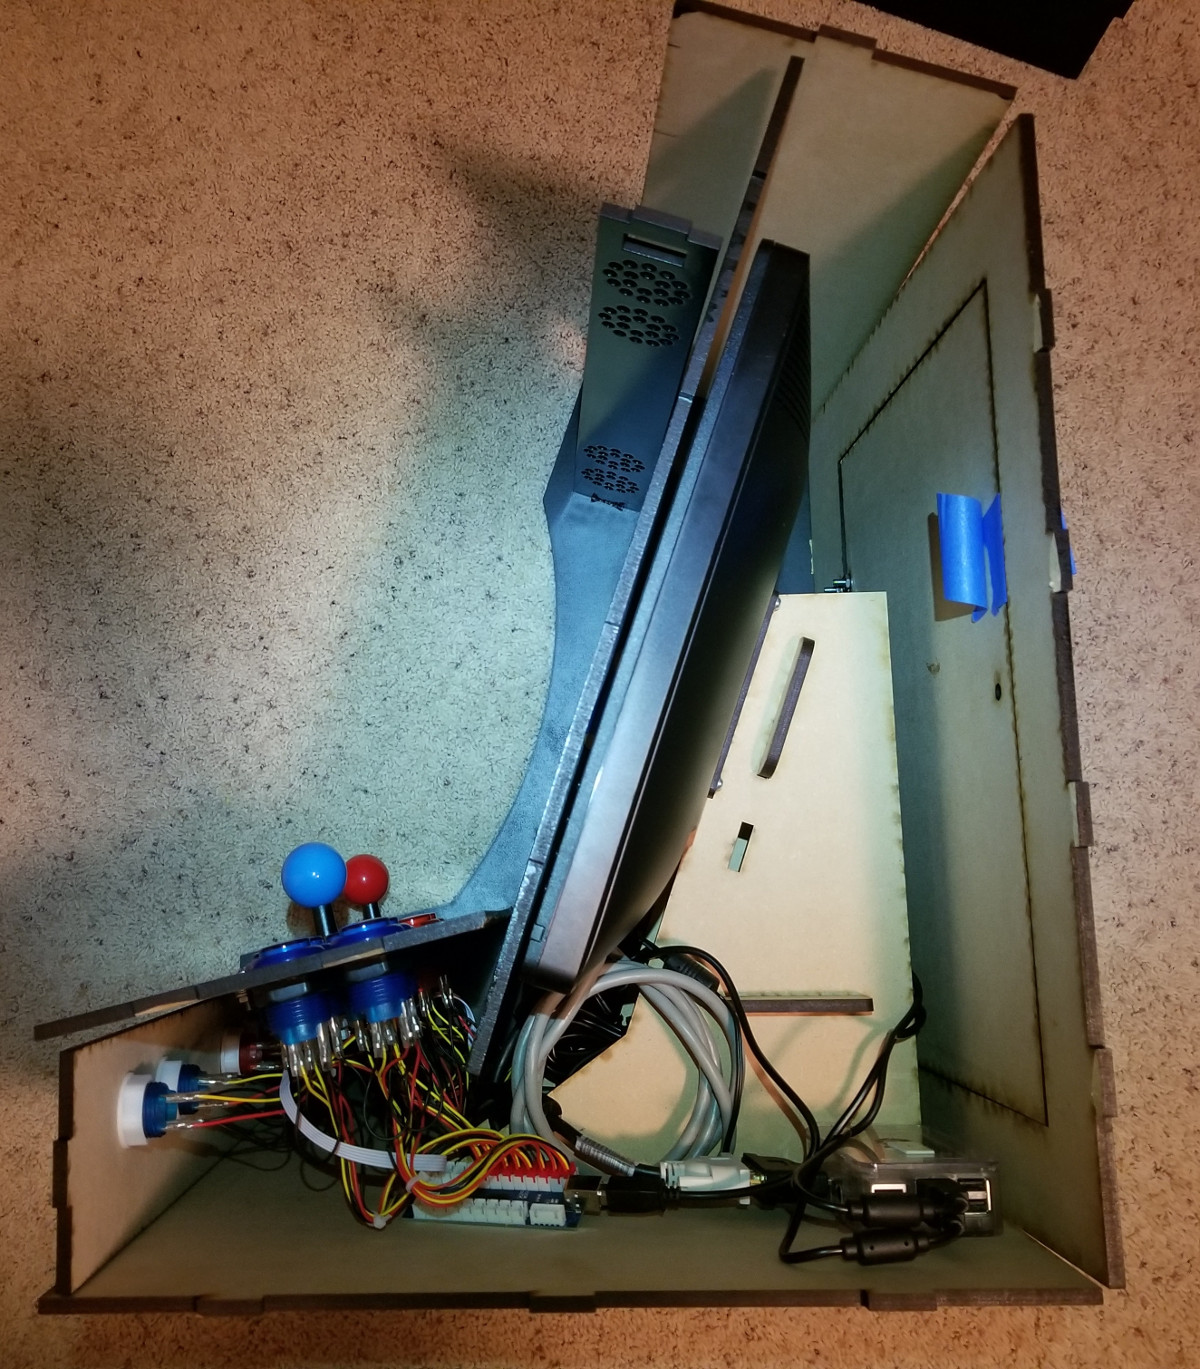
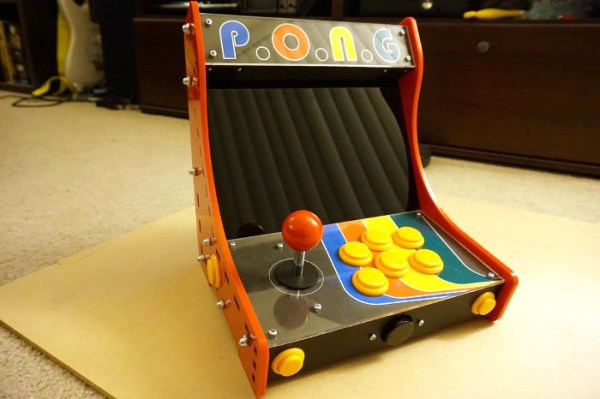
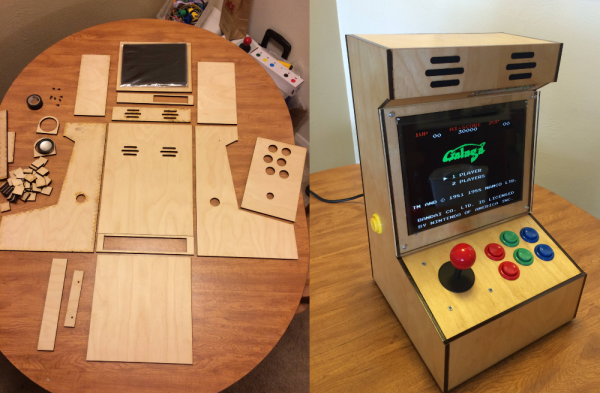
Arcade machines have a distinct look and feel with large imposing cabinets and smaller bartop machines that try to keep the look and feel of a traditional upright arcade cabinet while taking up less space. An entirely new aesthetic has been given for this engineering marvel of a bartop arcade that [DIY Engineering] has made. Gone is the expansive angular box, and in its place are sleek and slender curves. The key piece that makes this build work is the curved monitor.

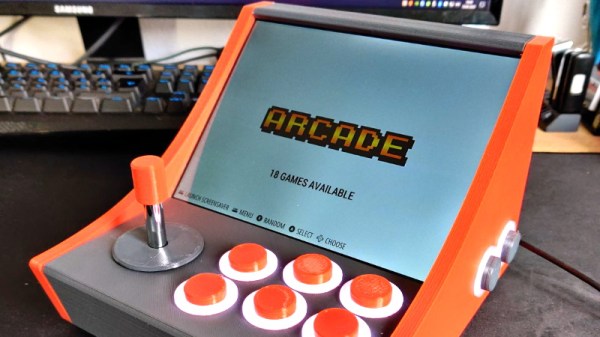
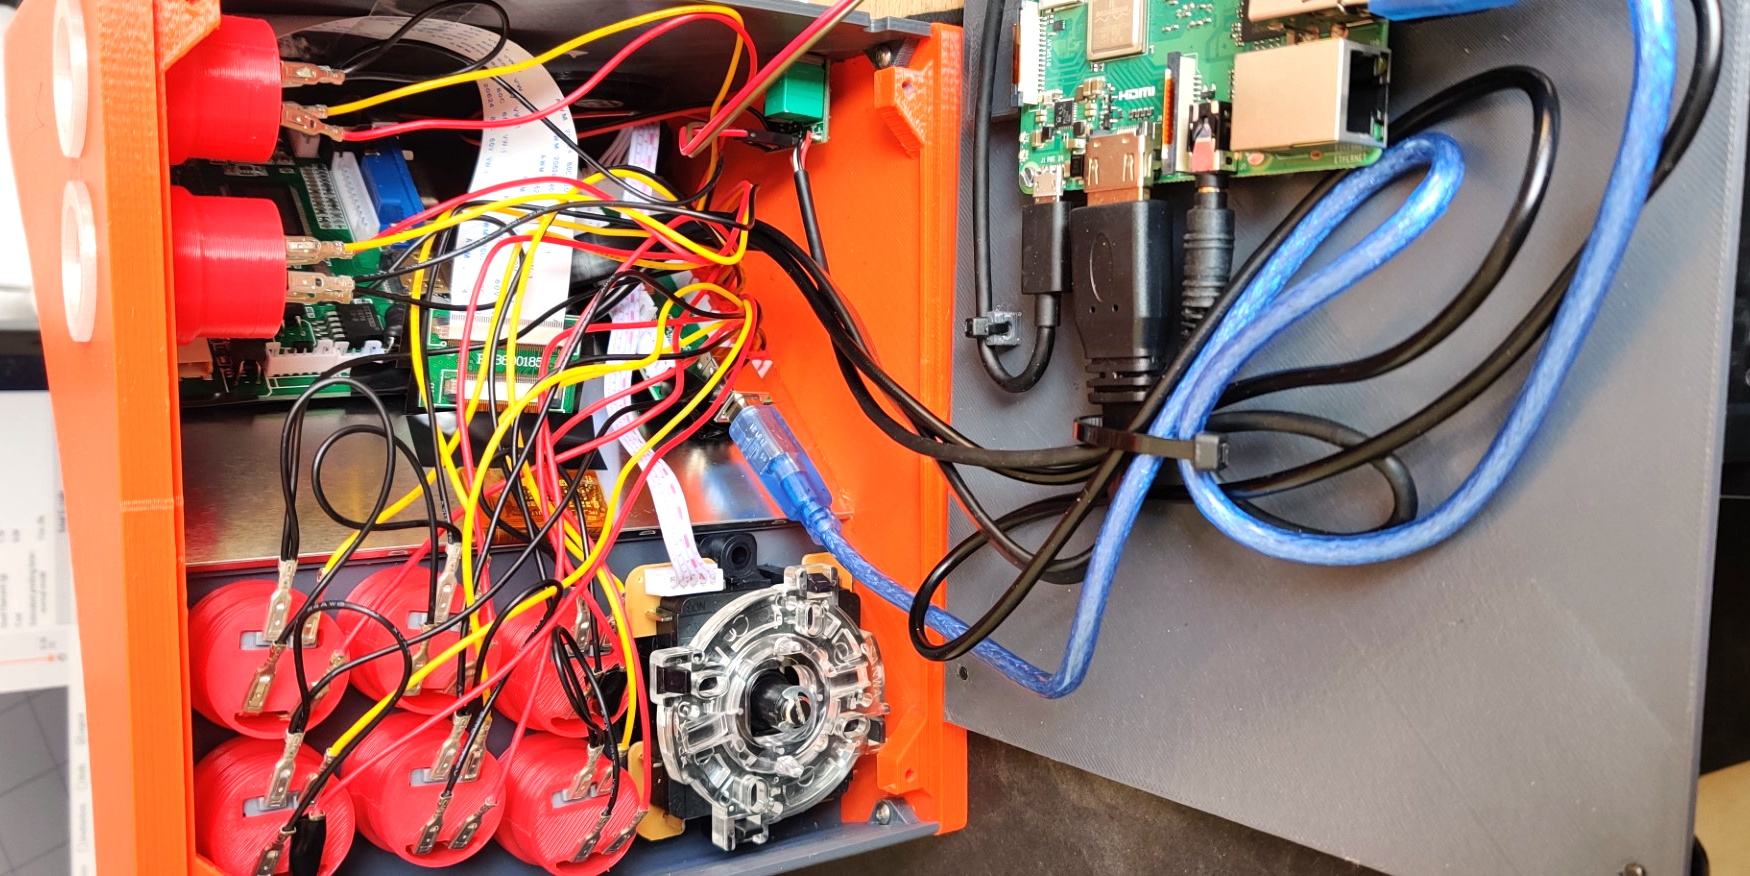
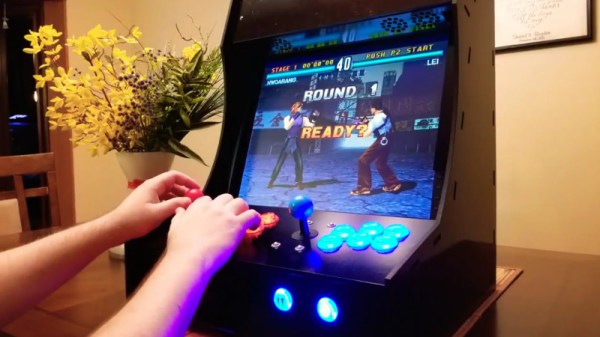
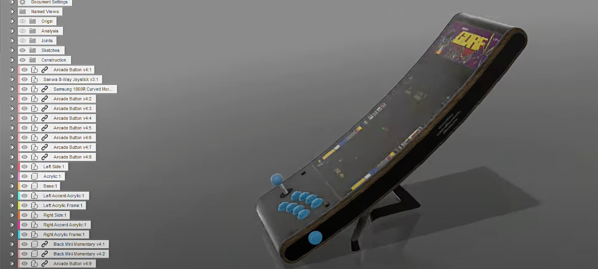
He started with a detailed design in Fusion360 that really focused on the tools and techniques that [DIY Engineering] knew would work. The backbone of the device was formed from wooden dowels around which 3d printed parts slid on. To the sides of the dowels, two pieces of acrylic are screwed on to act as an LED diffusor. To that acrylic, two pieces of CNC’d red oak are attached with two arcade buttons for pinball-style actuation. Over the top, cast acrylic was heated and then bent into the desired shape with the help of a two-part mold press. The screen slotted right in perfectly. Part of the display at the top was reserved for a marquee, and the look is extraordinary with the dark acrylic. Ten arcade buttons and an eight-way joystick offer an array of options for input.

Internally, a temperature-controlled fan and a Raspberry Pi are running the show. Controls are wired as GPIO and read by the Pi. So naturally, the games on the SD card tend to look best on a long vertical screen: vertical shooters and the like.

Arguably, the best thing about this project isn’t just the execution (which is fantastic) but the look behind the curtain at the process. So many potential problems were solved in the modeling stage, and fabrication went fairly smoothly as a result (or so we think youtube hides a multitude of sins). The results speak for themselves, and we think this is an enviable arcading machine. [DIY Engineering] has mentioned providing files in the future for you to build your own. If perhaps it seems a little intimidating, why not give a smaller 3D printable bartop a try?

Video after the break.

Continue reading “Bartop Arcade Machine That Isn’t Afraid Of Change”

3D Print Your Way To A Bartop Arcade Cabinet

Custom arcade machines have always been a fairly common project in the hacker and maker circles, but they’ve really taken off with the advent of the Raspberry Pi and turn-key controller kits. With all the internals neatly sorted, the only thing you need to figure out is the cabinet itself. Unfortunately, that’s often the trickiest part. Without proper woodworking tools, or ideally a CNC router, it can be tough going to build a decent looking cabinet out of the traditional MDF panels.

But if you’re willing to leave wood behind, [Gerrit Gazic] might have a solution for you. This bartop arcade, which he calls the simplyRetro D8, uses a fully 3D printed cabinet. He’s gone through the trouble of designing it so there are no visible screw holes, so it looks like the whole thing was hewn from a chunk of pure synthwave ore. He notes that this can make the assembly somewhat tricky in a few spots, but we think it’s a worthy compromise.

Given the squat profile of the simplyRetro, the internals are packed in a bit tighter than we’re accustomed to seeing in a arcade build. But there’s still more than enough room for the Raspberry Pi, eight inch touch screen HDMI panel, and all the controls. To keep things as neat as possible, [Gerrit] even added integrated zip tie mount points; a worthwhile CAD tip that’s certainly not limited to arcade cabinets.

[Gerrit] has included not only the STL files for this design, but also the Fusion 360 Archive should you want to make any modifications. There’s also a complete Bill of Materials, as well as detailed instructions on how to pull it all together. If you’ve ever wanted your own arcade machine but felt a bit overwhelmed about figuring out all the nuances on your own, the simplyRetro could be the project you’ve been waiting for.

Of course if you do have access to a CNC or laser cutter, then there are some designs you could produce quite a bit faster.

Bartop Arcade Cabinet Build Skips The Kit

An arcade cabinet is one of those things that every gamer wants at home, but few ever get. Getting a real arcade cabinet is usually expensive, and building one yourself is no small feat. There are kits you can get now which help the process along, generally taking the form of pre-cut cabinet parts, but with them comes the quiet shame of kit-building. What if your friends found out you used a kit instead of designing it yourself? The drama is almost too much to think about.

That’s how [Bogdan Berg] felt about it, at least. Not content with just getting a pre-cut cabinet kit from eBay, he decided to design and build his own bartop arcade machine in just one week: fast enough for him to fit the whole thing into his Christmas vacation. We don’t know what Christmas was like for his friends and family this year with him toiling away on this beautiful build the whole time, but we can confidently say his Christmas was awesome.

He designed the cabinet in Fusion 360, working around the limitation that the laser cutter he had access to had a work area of 24 inches by 18 inches. Some interesting design choices were made here, including going with a tab and slot construction method. While [Bogdan] admits that this aesthetic isn’t always popular, he liked how sturdy it makes the final product.

He was originally going to use plywood for the cabinet, but owing to the fact that he couldn’t find any pieces that weren’t warped locally, he switched over to MDF. Using MDF did mean he had to seal all the cut pieces with shellac before painting, but in the end he’s happy with the final lacquer paint job; even if it did take more work and materials than he anticipated.

The hardware is pretty much the standard for DIY arcades these days: a 17 inch LCD monitor he had laying around is used for the display, a two player joystick and button kit from Amazon provides the user interface, and emulation is provided by a Raspberry Pi 3 running RetroPie. A recessed door in the rear allows him to get into the machine will still maintaining a finished look on the backside.

While the size of them may vary wildly, DIY arcade cabinets are always a popular project. Whether shamelessly emblazoned with our logo or playing host to glorious LED lighting, it seems like the design of these cabinets provide as much entertainment as the games they play.

Continue reading “Bartop Arcade Cabinet Build Skips The Kit”

Bartop Arcade RetroPie Powered Laser Cut

[hhtat] wanted to build an arcade cabinet since his days in high-school. Only recently have the tech planets aligned. Looking into the night sky he saw a laser cutter, the Raspberry Pi, and lowering prices on key components and thought, “this is the year.”

Much like an arcade cabinet we posted earlier, this one sits on a counter top. With full controls and a nice screen, it provides a lot of the experience without the additional explaining to the SO why the living space should house a giant decaled MDF box.

The frame was designed in SketchUp and vectors were made in Inkscape. The frame was lasercut out of MDF and Acrylic. Decals were printed and applied. The resulting case, build from tab and slot construction, is attractive.

The internals are simple. A Raspberry Pi with a fast SD card acts as the brain. Rather than make it difficult on himself, [hhat] bought a pre-made controls kit from eBay. Apparently there is a small market for this stuff. He also purchased an IPS screen with built in controller. The IPS panel gives the arcade cabinet a desireable wide viewing angle.

The final product looks like a lot of fun and we can see it turning at least one person into an unintentional loner at any house party.

Bartop Arcade Honors Aspect With 4:3 IPad Screen

Let’s face it, we all love arcades, but not all of us can fit a full size stand-up in our homes. [Bentika] knew the solution was a bartop style cabinet, but it had to be designed and built to his specifications. You see, he’s a bit of an aspect ratio nerd. Only a proper 4:3 screen would do for emulating games designed for just such a display. Modern 4:3 displays are hard to come by, unless of course you have an iPad handy. The 1024 x 768 screens used on the early model iPads are perfect for the task.

Driving these screens used to be a chore, but thanks to hacker reverse engineering and overseas manufacturing, these days, controllers are only a few clicks away. [Bentika] ordered a controller for the iPad 1 screen from eBay. What he got was a controller that only worked with the iPad 2 screen. Thankfully he had a pile of old iPads to play with, so it wasn’t an issue.

[Bentika] designed his cabinet using AutoDesk 123D based upon a basic outline provided by [Joshendy]. His final cut patters were created with Adobe Illustrator. He was able to get the entire cabinet laser cut for around $160, including materials. Cabinet assembly was easy, thanks to plenty of square gussets used to align the various pieces.

The controller for this arcade is of course a Raspberry Pi 2 running RetroPie. [Bentika] used a control block to interface the joystick and buttons to the Pi itself. RetroPie lends itself to “keyboardless” operation, he didn’t have to bring any of the Pi’s USB ports outside the case.

We have to say the final results are very nice. This system has all the portability of a CRT based bartop setup without the weight. You can check out more discussion of this hack over on Reddit, or click past the break for the video.

Continue reading “Bartop Arcade Honors Aspect With 4:3 IPad Screen”