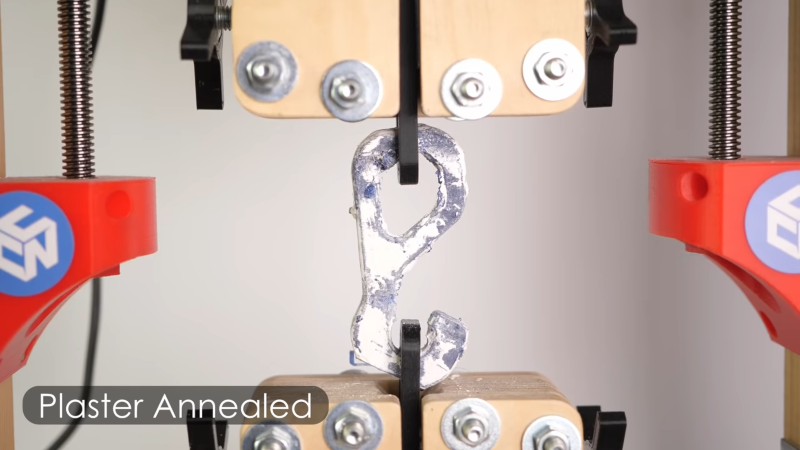
[Stefan] is always trying to make stronger 3D prints. Annealing can strengthen prints, but often at the expense of the part’s exact dimensions. His latest approach is to embed the prints in plaster and then anneal in an attempt to fuse the plastic together without changing its shape or size. Did it work? See for yourself in the video below.
He’s done a lot of work we’ve taken note of before where he measures the strength of parts after different post-processing steps. His test plastic parts used both PLA and PETG.
In general, the parts were made with 100% infill to prevent the plastic from collapsing on itself during the heating process. Getting the plaster bubble-free took a few attempts. This isn’t a fast technique. The plaster had to be dry before annealing and even with a dehydrator, it was well over 36 hours before the parts were ready for the oven.
Getting the parts out of the plaster turned out to be harder than you’d think. Mechanically removing most of it and then washing away a little residue turned out to be the best way. The tests showed the PLA reference parts — those not treated — were stronger than the annealed parts. But the PETG parts were transformed and nearly three times as strong as they had been.
[Stefan] thinks that further drying of the plaster casts might result in even stronger PETG parts. Although the PLA parts were somewhat weaker, the annealed parts became much more temperature resistant, surviving 170 degree temperatures.
The only downside we see is that it isn’t a quick or simple process. But if you need stronger or more temperature resistant materials, this is very achievable with common equipment.
If you follow our coverage of this topic, the hooks might look familiar. We always enjoy [Stefan’s] videos as he does a lot of interesting experiments.


> Getting the parts out of the plaster turned out to be harder than you’d think. Mechanically removing most of it and then washing away a little residue turned out to be the best way.
Break off what you can, then dip in a mild acid ?
That problem has been solved, see the video comments where I point out that you just need to coat the part in a shell of plaster rather than a block. This is not a particularly original idea either as it derives from methods used for lost wax casting of bronze sculptures. Welcome to 1400 BC. :-)
Dipping vs. potting the parts would probably make it easier to remove the plaster later. Possibly also improve drying time.
One lesson I learned from my 1897 victorian is what we call plaster today is pretty complex and drying has no bearing. It is a chemical reaction converting plaster powder into solid gypsum by hydrating with water. Properly mixed it has a compressive strength in the range of 2800 psi, similar to low range concrete and hydrates to a solid in about 5 minutes. If mixed with additional water to make a thin slurry, it may have a small fraction of that strength because of residual microscopic voids from excessive water. Once hydrated to gypsum it may retain moisture which can be baked out.
I watched a “how it’s made” where they were dipping wax positives into a plaster slurry many multiple times over a period of a few minutes to create a lost wax mold for steel for handguns.
It is amazing what can be done with plaster.
Watch out for water or air voids. Maybe run through a screen to make sure it’s completely mixed. Watch out. It tends to set quickly when properly mixed.
I might suggest dipping multiple times to build up a shell and packing with dry fine sand in a form after it is solid. Might make it easier to remove the plaster when done.
I’ve seen a technique, where you wet your part then sprinkle with dry plaster powder. Repeat several times to build up solid thick coat. Should avoid all voids and perfectly resolve small surface details.
But, how does it compare with salt?
https://hackaday.com/2020/09/23/reforming-3d-prints-with-salt-and-heat/
Beat me to it HAHA.
I liked the salt method better and it seems MUCH easier and cheaper to do.
https://youtu.be/nRLJ4ylGTFc
But a dimensional change is mentioned. That’s important in many cases. This is supposed to prevent dimensional changes.
Bentonite powder would probably work too. It can be rammed dry and holds it’s shape. I use it to make rocket nozzles.
I’d be inclined to try sandbox sand, green sand, kitty litter (Un-used LOL) packed tight. Thing I always found with heating plaster though was that it seemed to force out the H2O that made it set up in the first place and revert to powdery stuff, so surprised it was hard to get off… unless it didn’t get hot enough for that.
The problem he had was heating the plaster too much converted some of it back. Then when he tried using water to wash it off, it hardened again.
Would work much better to use the type of plaster used for lost wax (or lost PLA) casting but instead of having a sprue and vent holes and melting / burning the plastic out, the idea is to melt the plastic so it better bonds together while the plaster shell forces it to retain its shape.
A problem with that is even a 100% infill FDM print is filled with a huge number of tiny voids. That’s what he was seeing with the PETG. The plastic all melted but the tiny voids joined up to make larger bubbles.
Your larger bubbles are most probably cavitation holes caused by crystallization. When the polymer crystallizes, it gets denser and occupies less volume. It’ll normally shrink and warp with sink marks and bent shapes. In some cases, if the skin is cooled rapidly and the center of your part cools slowly, it’ll crystallize and shrink. Since it’s got no place to shrink to, it’ll leave these voids.
You can see this effect in all kinds of parts, most often when cutting a thick waked injected plastic part, where you find big holes in the middle and smaller holes radiating from the center until you get to the skin which is normally hole free. Example: https://www.recycledplasticbuildingmaterials.co.uk/user/products/100-x-35-brown.jpg
That’s basically the process how the plaster is made at first: heating to f´drive off the crystal water.
just a day there was a Post about somebody doing this with ground down powder salt. Unlike plaster the salt washes off and most can be reused.
It was less annealing and more like remelting/recasting in place at 200+°.
I’d be more impressed if the part he made wasn’t easier to produce using a CNC. The benefit of 3D printing would be in more interesting shapes which are hard to CNC, but then removing the plaster without damaging the part would be much harder.
The part was designed for easy testing of layer adhesion. It’s not a final product, it’s just a test of a process. No one is saying that producing more of these hooks is the end goal.
I think its more about the fact that if you do have a part which is hard to CNC, its likely that the features that make it hard to CNC also make it hard to remove the plaster, whatever the actual shape is. This is one major advantage that the salt project had.
Understanding PLA goes a long way onto getting the most out of it.
In this case, the author is not only annealing the part, it’s degrading the polymer at an accelerated rate, for an extended period of time, via hydrolysis.
PLA is a hydrophilic material that readily hydrolyses at temperatures higher than 55°C. This we all know, but to what extent and how fast this is you can measure using expensive equipment. Or for example by putting a PLA part which is at its equilibrium humidity level of around 1200 ppm and just put it in the oven like the author did. It’ll degrade, and it’ll be fast, and it’ll be noticeable.
Drying PLA is not easy, but can be done with the right equipment or the right frame of mind for it. You can find more information on drying PLA in this link:
http://www.natureworksllc.com/~/media/Technical_Resources/Processing_Guides/ProcessingGuide_Crystallizing-and-Drying_pdf.pdf
Once the part is dry, then you can anneal it, and the improvement will be massive, but make sure the part never comes in contact with air in the oven. There’s a lot of ways to go around this but that will depend on the tools at hand.
I really liked the plaster idea on the other hand. Pity it’s also quite hydrophilic. Really fond of the salt solutions as well. What about a silica gel enclosure?
What do you exactly mean with “never comes into contact with air”? Is it the oxygen or humidity, you want to keep out? Then it is a possibility to flood the oven with dry nitrogen. If you think, that nitrogen is also a problem, then argon would be possible.
Nitrogen is fine, as long as there’s no source of water available. If you have any other gas such as co2 or even dried air you could use those as well. I presume nitrogen would be the cheapest one.
The important part is removing the sources of water. Your gas is dry. The PLA part is the first remaining source of water. Plaster is the second one. The tricky bit about plaster is that it’ll still release water after your PLA part is dried and you start heating up to anneal. The oven could be a source of humidity as well unless it gets dried first to the maximum annealing temperature.
Once all the water is displaced from the oven, the part could be potentially dried in nitrogen at 50°C for 12 hours. Longer time could be required since it’s a thick walled part but 12 hours should be a good start. PLA pellets only need 4-6 hours but the specific surface area matters.
Once the part is dry, then you can heat up to your annealing temperature without any significant degradation. Mechanical properties should be much better.
I love loading up this website and watching the knowledge-bombs getting sent down-range. This stuff is what I come to school for. Thanks for sharing!
I’m wondering why he’s hydrating the plaster at first. It seems to me that, instead, he should be including his gizmo in powder plaster, press the whole stuff, and anneal them like this. Cleaning will be very easy (since no water means powder is kept, a brush is the right tool for that).
I don’t know what “plaster” means here. But if it’s gypsum (calcium sulphate), then an acid won’t do anything to it.
That depends on the acid, if it is stronger than sulfuric acid, the process would liberate H2SO4 and convert it to another – hopefully water soluble – Ca salt. Of course H2SO4 is already a pretty strong acid and I am not sure if e.g. HCl (muriatic acid) attacks CaSO4.
According to Wikipedia, the pKs of HCl is -6 and of H2SO4 it is -3 (lower is stronger), so it should work.
The result would be readily water soluble CaCl2.
That was highly satisfying to watch. I have a 3D printer here at the office lab but it never occurred to me to try something like this. I’ll give it a try
How should a PLA part survive 170°? That’s already close to the printing temperature of 200°, it must be already really soft.
Why not using foundry sand, as has been used for ages?