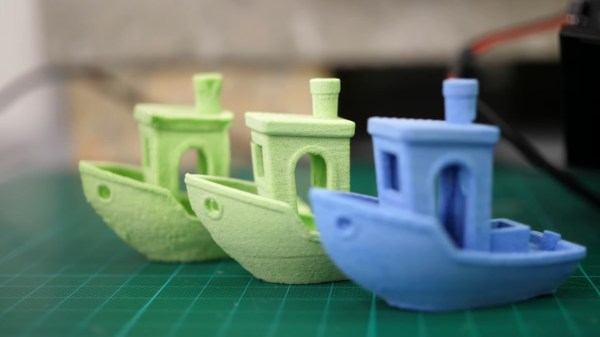
Printed Propeller Blades Repair Indoor Flyer

Fair warning for readers with a weak stomach, the video below graphically depicts an innocent rubber band airplane being obliterated in mid-air by a smug high-tech RC helicopter. It’s a shocking display of airborne class warfare, but the story does have a happy ending, as [Concrete Dog] was able to repair his old school flyer with some very modern technology: a set of 3D printed propeller blades.

Now under normal circumstances, 3D printed propellers are a dicey prospect. To avoid being torn apart by the incredible rotational forces they will be subjected to, they generally need to be bulked up to the point that they become too heavy, and performance suffers. The stepped outer surface of the printed blade doesn’t help, either.

But in a lightweight aircraft powered by a rubber band, obviously things are a bit more relaxed. The thin blades [Concrete Dog] produced on his Prusa Mini appear to be just a layer or two thick, and were printed flat on the bed. He then attached them to the side of a jar using Kapton tape, and put them in the oven to anneal for about 10 minutes. This not only strengthened the printed blades, but put a permanent curve into them.

The results demonstrated at the end of the video are quite impressive. [Concrete Dog] says the new blades actually outperform the originals aluminum blades, so he’s has to trim the plane out again for the increased thrust. Hopefully the extra performance will help his spindly bird avoid future aerial altercations.

On the electrically powered side of things, folks have been trying to 3D print airplane and quadcopter propellers for almost as long as desktop 3D printers have been on the market. With modern materials and high-resolution printers the idea is more practical than ever, though it’s noted they don’t suffer crashes very well.

Continue reading “Printed Propeller Blades Repair Indoor Flyer”

Heat Turns 3D Printer Filament Into Springs

The next time you find yourself in need of some large-ish plastic springs, maybe consider [PattysLab]’s method for making plastic springs out of spare filament. The basic process is simple: tightly wind some 3D printer filament around a steel rod, secure it and wrap it in kapton tape, then heat it up. After cooling, one is left with a reasonably functional spring, apparently with all the advantages of annealed plastic.

The basic process may be simple, but [PattysLab] has a number of tips for getting best results. The first is to use a 3D-printed fixture to help anchor one end of filament to the steel rod, then use the help of an electric drill to wind the filament tightly. After wrapping the plastic with kapton tape (wrap counter to the direction of the spring winding, so that peeling the tape later doesn’t pull the spring apart), he suspends it in a pre-heated oven at 120 C for PLA and 160 C for PETG. How long does it stay in there? [PattysLab] uses the following method: when the spring is wound, he leaves a couple inches of filament sticking out to act as a visual indicator. When this segment of filament sags down, that’s his cue to begin the retrieval process. After cooling, the result is a compression or extension spring, depending on how it was wound before being heated.

[PattysLab] shared a short video on this Reddit post that shows both springs in action, and the process is all covered in the video, embedded below.

Continue reading “Heat Turns 3D Printer Filament Into Springs”

Take This 3D-Print Post-Processing Method With A Grain Of Salt

There’s a lot of folklore around post-processing of prints from FDM printers. Proponents swear by their methods, which are generally intended to either strengthen the part or to improve its appearance, or both. But do they actually work?

Knowing that a collection of anecdotes is no substitute for actual data, [Stefan] from CNC Kitchen has again performed some valuable experiments, this time testing the strength of parts that have been annealed in salt. This was a follow-up to his recent experiments with baking prints after entombing them in plaster, which yielded mixed results in terms of strength gains. Viewers commented that common salt makes a good medium for annealing prints, so he set about finding the right kind of salt. It turns out that the finer the grain, the better — powdery salt packs tighter and leaves little space for the softened plastic to flow — but that powdery salt is not easier to find. He ended up making his own by pulverizing table salt in a blender. He also had to play around with temperatures and times until coming up with a good process.

The results are impressive. PETG, ABS, and two varieties of PLA prints tested with force applied perpendicular to the print layers all showed marked increase in strength after breaking, to the point of nearly matching the strength of parts printed with the layers parallel to the stress. As with the plaster, parts were printed at 100% infill; a Benchy printed at 20% was notably unseaworthy after annealing. Surface finish on the annealed parts is an interesting combination of pitting with white residue — not unattractive but still a bit weird.

Salt annealing might be a bit cumbersome, but it’s a neat method to add to all the other post-processing tricks that people have come up with for their 3D prints. Continue reading “Take This 3D-Print Post-Processing Method With A Grain Of Salt”

Plaster Annealing 3D Prints For Strength

[Stefan] is always trying to make stronger 3D prints. Annealing can strengthen prints, but often at the expense of the part’s exact dimensions. His latest approach is to embed the prints in plaster and then anneal in an attempt to fuse the plastic together without changing its shape or size. Did it work? See for yourself in the video below.

He’s done a lot of work we’ve taken note of before where he measures the strength of parts after different post-processing steps. His test plastic parts used both PLA and PETG.

Continue reading “Plaster Annealing 3D Prints For Strength”

Reforming 3D Prints With Salt And Heat

The biggest problem with fused deposition 3D prints is that while the layers should stick together, they aren’t the same as a solid piece of plastic you would get from, say, injection molding. You can anneal plastic using moderate heat, but it is likely to cause the part to deform or change size. [Free Spirit 1] has a solution for this. Using a powdered salt, the part is packed on the inside and out and put in an oven. The results in the video below look really impressive.

In addition to making the part look solid and — we assume — adding strength, the resulting prints are also water- and gas-tight which was the purpose of the effort. That alone would make the technique worthwhile.

The only thing we noticed is that the part has to have access to hold the salt. Anything not supported would be subject to deformation. However, the ground-up salt is so fine that it should be relatively easy to fill in most parts and, of course, print with 100% infill to avoid hollow internal areas.

[Free spirit 1] used a coffee grinder to get the salt powder, but apparently you can buy “flour salt.” We wondered if other powders might work well, too. Apparently, sand didn’t work out, perhaps because the salt dissolves out in water, so whatever you use, it should probably dissolve in something that won’t attack your plastic.

Annealing isn’t a new idea, and we’d love to see some objective tests on this new method.

Continue reading “Reforming 3D Prints With Salt And Heat”

Can A 3D Printer Print Better Filament For Itself?

3D printed parts are generally no way near the strength of an equivalent injection moulded part and techniques such as a sustained heat treatment, though effective usually distort the part beyond use.

[CNC Kitchen] was investigating the results (video, embedded below) of a recent paper, that described a novel ABS filament reinforced by a “star” shaped Polycarbonate core, an arrangement the authors claim is resilient to deformation during the annealing process often necessary to increase part strength. While the researchers had access to specialised equipment needed to manufacture such a composite material, [CNC Kitchen’s] solution of simply using his dual extruder setup to directly print the required hybrid filament is something we feel, strongly resonates with the now old school, RepRap “print your printer” sentiment.

The printed filament seems to have reasonable dimensional accuracy and passing the printed spool through a heater block without the nozzle attached, ensured there would be no obvious clogs. The rest of the video focuses on a very thorough comparison of strength and deformation between the garden variety Polycarbonate, ABS and this new hybrid filament after the annealing process. Although he concludes with mixed results, just being able to combine and print your own hybrid filament is super cool and a success in its own right!

Interested in multi-material filaments? Check out our article on a more conventional approach which does not involve printing it yourself!

Continue reading “Can A 3D Printer Print Better Filament For Itself?”

Annealing 3D Prints: A Scientific Approach

We’ve all been taught the scientific method: Form a hypothesis, do some experiments, gather some data, and prove or disprove the hypothesis. But we don’t always do it. We will tweak our 3D prints a little bit and think we see an improvement (or not) and draw some conclusions without a lot of data. Not [Josef Prusa], though. His team printed 856 different parts from four different materials to generate data about how parts behaved when annealed. There’s a video to watch, below.

Annealing is the process of heating a part to cause its structure to reorganize. Of course, heated plastic has an annoying habit of deforming. However, it can also make the parts firmer and with less inner tension. Printed parts tend to have an amorphous molecular structure. That is to say, they have no organization at all. The temperature where the plastic becomes soft and able to reorganize is the glass transition temperature.

Continue reading “Annealing 3D Prints: A Scientific Approach”