Rolling your own digital picture frame that loads images from an SD card and displays them on an LCD with a modern microcontroller like the ESP32 is an afternoon project, even less if you pull in somebody else’s code. But what if you don’t have the latest and greatest hardware to work with?
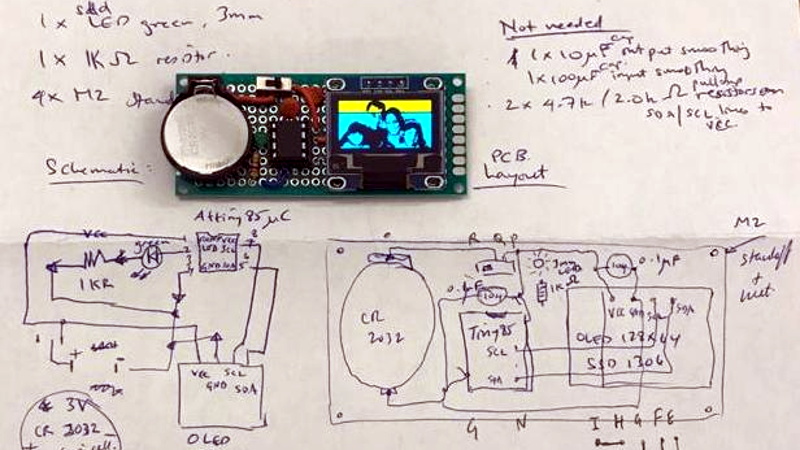
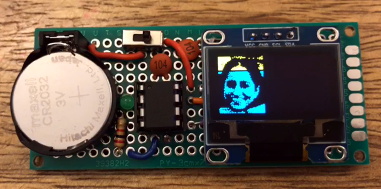
Whether you look at it as a practical application or an interesting experiment in wringing more performance out of low-end hardware, [Assad Ebrahim]’s demonstration of displaying digital photographs on an OLED using the ATtiny85 is well worth a look. The whole thing can put put together on a scrap of perfboard with a handful of common components, and can cycle through the five images stored on the chip’s flash memory for up to 20 hours on a CR2032 coin cell.
 As you might expect, the biggest challenge in this project is getting all the code and data to fit onto the ATtiny85. To that end [Assad] wrote his own minimal driver for the SSD1306 OLED display, as the traditional Adafruit code took up too much space. The driver is a pretty bare bones implementation, but it’s enough to initialize the screen and get it ready for incoming data. His code also handles emulating I2C over Atmel’s Universal Serial Interface (USI) at an acceptable clip, so long as you bump the chip up to 8 MHz.
For the images, [Assad] details the workflow he uses to take the high-resolution color files and turn them into an array of bytes for the display. Part of that it just scaling down and converting to 1-bit color, but there’s also a bit of custom Forth code in the mix that converts the resulting data into the format his code expects.
This isn’t the first time we’ve seen somebody use one of these common OLED displays in conjunction with the ATtiny85, and it’s interesting to see how their techniques compare. It’s not a combination we’d necessarily chose willingly, but sometimes you’ve got to work with whats available.


I absolutely love what one can do with a humple chip like the ATTiny85. My favourite project is the ATTiny weather station (by the same guy who did the other OLED project you’re linking to.
http://www.technoblogy.com/show?2F5D
<3 T85
I love the little thing, too. Most recently I replaced a 3 digit 7-segment display on a linear power supply with a cheap OLED and ATTiny85, as a voltmeter/current draw graph. Sure, we can do it with ESP or Arduino, but why waste the real estate if we don’t have to. Needless to say, my parts bin is full of ATTiny85’s and DIP sockets. Always on the hunt for cool stuff to do with them.
Very cool, definitely more than what I thought the tiny chip was capable of. Could definitively see applications for this if its easy enough to reuse the code/drivers.
I’m surprised at how low they claim the OLED power draw is, 10 mA for full-screen images. I’d have thought it would be much less battery friendly than that given the number of pixels and the driver chip.
Yes, it’s surprisingly good for low power battery-operated devices. The SSD1306 driver IC Integrated with the OLED display provides a sleep mode drawing uA as well as 256 levels of brightness. Per data sheet, max current sink with all pixels on at max brightness is 15mA. The 5-10mA range cited were operational measurements at the mid-level brightness setting (0x7F), displaying 64×64 and 128×64 photos.
The same displays are available with a single colour (blue or white) so you can avoid the black line through the heads in the images.
You can reduce the current of the OLED screen quite a lot. Some time ago I made a pair of earrings with similar OLED screens for the hackaday coin cell challenge.
The power budget was 2mA @ 3.7V for both T85 and 128×32 screen combined. However the T85 stays in deep sleep after copying the data over to the display once.
Update! TinyPhoto V3 is available with a 700 byte fixed-width font driver for OLED SSD1306 display. The updated code includes capability for a one-time startup screen. SSD1306 driver IC commands are given as constants instead of bytecode, for easier comprehension.
That looks like the display on an RCA Pearl audio player.