Rolling your own digital picture frame that loads images from an SD card and displays them on an LCD with a modern microcontroller like the ESP32 is an afternoon project, even less if you pull in somebody else’s code. But what if you don’t have the latest and greatest hardware to work with?
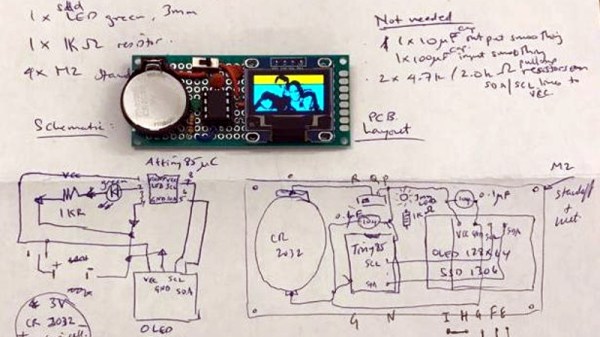
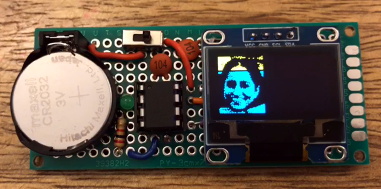
Whether you look at it as a practical application or an interesting experiment in wringing more performance out of low-end hardware, [Assad Ebrahim]’s demonstration of displaying digital photographs on an OLED using the ATtiny85 is well worth a look. The whole thing can put put together on a scrap of perfboard with a handful of common components, and can cycle through the five images stored on the chip’s flash memory for up to 20 hours on a CR2032 coin cell.
 As you might expect, the biggest challenge in this project is getting all the code and data to fit onto the ATtiny85. To that end [Assad] wrote his own minimal driver for the SSD1306 OLED display, as the traditional Adafruit code took up too much space. The driver is a pretty bare bones implementation, but it’s enough to initialize the screen and get it ready for incoming data. His code also handles emulating I2C over Atmel’s Universal Serial Interface (USI) at an acceptable clip, so long as you bump the chip up to 8 MHz.
For the images, [Assad] details the workflow he uses to take the high-resolution color files and turn them into an array of bytes for the display. Part of that it just scaling down and converting to 1-bit color, but there’s also a bit of custom Forth code in the mix that converts the resulting data into the format his code expects.
This isn’t the first time we’ve seen somebody use one of these common OLED displays in conjunction with the ATtiny85, and it’s interesting to see how their techniques compare. It’s not a combination we’d necessarily chose willingly, but sometimes you’ve got to work with whats available.


