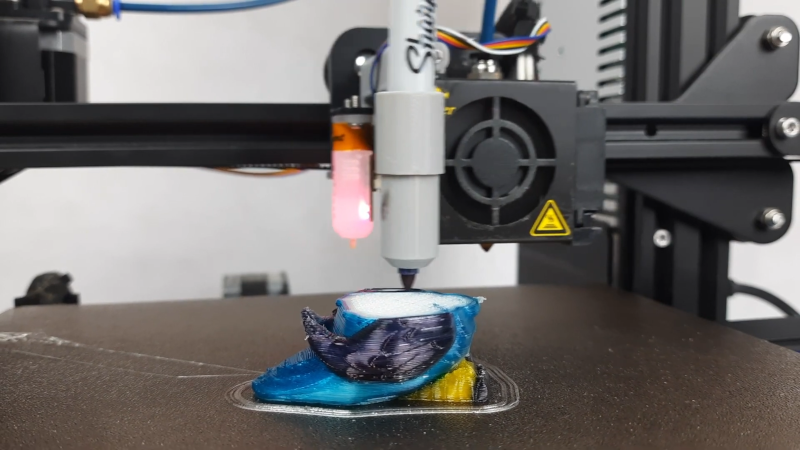
We’ve all seen 3D printed jigs that use a permanent marker to color filament as it goes into the hot end. [Sakati84] has a completely different idea. A holder on the print head can pick up one of several pens and use it to color the layer the hot end just laid down. In the video below, it looks like it works well and, although we imagine it will be a bear to calibrate on height, it seems like something you could replicate with nearly any conventional printer.
Logically, you print a layer with no pen in the holder and when you do pick up a pen, it will need to be somewhat lower than the print nozzle or else you’ll drag around in the fresh plastic.
You have to 3D print a rack and some pen holders depending on the brand of pen you want to use. There’s also the holder that fits on the hot end. You can see in the video how the head picks up and releases pens out of the rack. The rack will hold up to six pens.
To switch pens takes a lot of Z axis motion, so we expect print speed is relatively slow in aggregate. There’s talk in the project wiki about increasing Z speed and tips for calibration, but it still isn’t going to be that fast.
For software, there is a Cura postprocessing script. The software thinks there are seven extruders with the first one being for unpainted filament. Extruders 2-7 are virtual and will cause the print to get color after printing each layer.
Overall, this looks like a fun project even if we worry about the health of our Z axis rods. We’ll be interested to see if anyone takes up the challenge to adapt it for other printers.
We’ve played with virtual extruders in a more manual way before. Or, just bite the bullet and add some more real extruders.


What a great idea! I guess there’s some risk to interlayer adhesion but colors are much more vivid that the pens on filament while printing technique.
The results are pretty good, certainly more vibrant than the simpler pen driven techniques. So I guess its got some merit – it just seems like a great deal of work to do a tool changer build no matter what type – and going through that work for such a limited tool changer…
If you are going this far and fitting a tool changer seems like you could just tool change to a new hotend loaded with the right colour.
Perhaps a better option for this simple post print colouring would be alcohol inks or marker refills dripped into the nozzle tip area – have a tiny opening so the ink can’t leave without capillary action with the surface just laid down (or pressure from above). Then you just need to push the right ink into the tip at the right time, and to avoid blending colours do a quick purge. No tool changer there, infinite colour options – just blend the inks in the loader. Not sure how well it would really work, as that sort of fountain pen ink delivery around a whole lot of very hot plastic could get clogged up etc.. Using driven syringe filled with ink and a needle tip might work better – but adds lots of fairly beefy motors for extra colours.
The Z movement and pen changes make it painfully slow. Why not use an inkjet to colour a whole layer raster-fashion after each plastic layer is printed ?
That was going to be my suggestion as well. It would also go a long way to dealing with the height-calibration issue.
The colored prints take 2x the time of the non colored version. If you want to color the layers with a inkjet you can buy a Davinci color. It´s just a different price range.
I don´t really know what you mean with “great deal of work to do a tool changer”. You just print 3 parts – what´so hard about it? I also wouldn´t compare swapping a .25$ with swapping a hotend. For the other option you proposed: thats super complicated and needs special hardware and electronics. It´s definetly nothing you “just” do.
You can do swapping without lots of extra electronics and printed hardware – same as this system the head moves off and picks up other hot end, actually have seen some folk do that with pogo pins so the extruder/heater cartridges are all powered and the thermistor probed on the same wires and drivers. Personally don’t like that method much but it has been done.
Be nice if Material Jetting was affordable.
https://all3dp.com/1/types-of-3d-printers-3d-printing-technology/#material-jetting-mj
And he can augment that technique with https://hackaday.com/2020/05/27/improving-3d-printed-supports-with-a-marker/
I already started doing so. You can find a feature branch for this on my GitHub.
Originally saw this on Reddit and the amount of negativity on the post shocked me. The main complaint was the time it added to the print. I’ve never understood that criticism in 3D printing. Who actually has their printer cranking 100% of the time? If you do, you could probably justify going out and buying another $200 printer.
Then there was the “just post process your print!” crowd that just couldn’t understand that there are people out there that aren’t interested in painting.
This is a super creative, nearly free, well documented project and I am excited to try it out when my Ender 3 back up and running!
“Then there was the “just post process your print!” crowd that just couldn’t understand that there are people out there that aren’t interested in painting.”
This. I can create models and can 3D print. I’m not an artist that’s why I have a color mixing printer for when i want colors otherwise the single color prints of my other printers suffice. For color I use this https://www.bigbrain3d.com/
I can paint with a computer but not with a brush or airbrush.
This site is kind of the same way… no matter what gets posted here there’s always someone who just has to say “You should have done it this way.” yet the same people have probably never built anything themselves.
There is a significant issue with layer adhesion after you paint it with a sharpie, to the extent that you may use it as a support separator.
This can be countered with the right print settings – as described on the GitHub Wiki. With this it´s definitely not as good as pure PLA but Ok for decorative prints.
Great idea, surprised how effective it is compared to coloring the print after the fact, in that case the ink tends to run down the layer lines and smudges horribly.
I think with how light the markers are you could just have them be on the print head all the time and deploy them with some 9 gram micro servos, or solenoids. Would save a lot of print time.
Thought about this too. The main problems i see: You need to buy special hardware for this (Servos, Arduino) and syncing everything in Software is not easy. You would probably need to print with OctoPrint every time. These are some pretty heavy downside for me just to get from 2x to 1.5x the time of an uncolored print.
https://www.youtube.com/watch?v=yQwkHDDed0o
you should watch the video again