Teardown: Sling Adapter

The consumer electronics space is always in a state of flux, but perhaps nowhere is this more evident than with entertainment equipment. In the span of just a few decades we went from grainy VHS tapes on 24″ CRTs to 4K Blu-rays on 70″ LED panels, only to end up spending most of our viewing time watching streaming content on our smartphones. There’s no sign of things slowing down, either. In fact they’re arguably speeding up. Sure that 4K TV you bought a couple years back might have HDR, but does it have HDMI 2.1 and Dolby Vision?

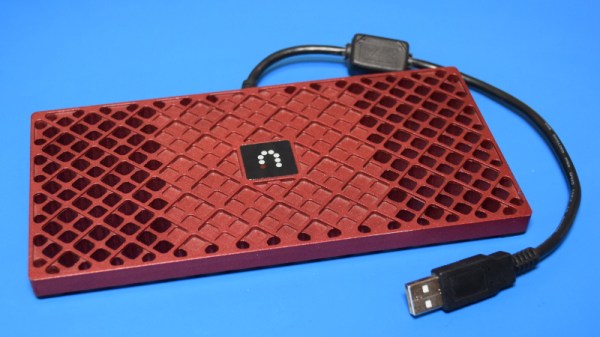
So it’s little surprise that eBay is littered with outdated A/V gadgets that can be had for a pennies on the dollar. Take for example the SB700-100 Sling Adapter we’re looking at today. This device retailed for $99 when it was released in 2010, and enabled Dish Network users to stream content saved on their DVR to a smartphone or tablet. Being able to watch full TV shows and movies on a mobile device over the Internet was a neat trick back then, before Netflix had even started rolling out their Android application. But today it’s about as useful as an HD-DVD drive, which is why you can pick one up for as little as $5.

Of course, that’s only a deal if you can actually do something with the device. Contemporary reviews seemed pretty cagey about how the thing actually worked, explaining simply that plugging it into your Dish DVR imbued the set-top box with hitherto unheard of capabilities. They assured the reader that the performance was excellent, and that it would be $99 well spent should they decide to dive headfirst into this brave new world where your favorite TV shows and movies could finally be enjoyed in the bathroom.

Now, more than a decade after its release, we’ll crack open the SB700-100 Sling Adapter and see if we can’t figure out how this unusual piece of tech actually worked. Its days of slinging the latest episode of The Office may be over, but maybe this old dog can still learn a few new tricks.

Continue reading “Teardown: Sling Adapter”

BFree Brings Intermittent Computing To Python

Generally speaking, we like our computing devices to remain on and active the whole time we’re using them. But there are situations, such as off-grid devices that run on small solar cells, where constant power is by no means a guarantee. That’s where the concept of intermittent computing comes into play, and now thanks to the BFree project, you can develop Python software that persists even when the hardware goes black.

Implemented as a shield that attaches to a Adafruit Metro M0 Express running a modified CircuitPython interpreter, BFree automatically makes “checkpoints” as the user’s code is running so that if the power is unexpectedly cut, it can return the environment to a known-good state instantaneously. The snapshot of the system, including everything from the variables stored in memory to the state of each individual peripheral, is stored on the non-volatile FRAM of the MSP430 microcontroller on the BFree board; meaning even if the power doesn’t come back on for weeks or months, the software will be ready to leap back into action.

In addition to the storage for system checkpoints, the BFree board also includes energy harvesting circuity and connections for a solar panel and large capacitor. Notably, the system has no provision for a traditional battery. You can keep the Metro M0 Express plugged in while developing your code, but once you’re ready to test in the field, the shield is in charge of powering up the system whenever it’s built up enough of a charge.

The product of a collaboration between teams at Northwestern University and Delft University of Technology, BFree is actually an evolution of the battery-free handheld game they developed around this time last year. While that project was used to raise awareness of how intermittent computing works, BFree is clearly a more flexible platform, and is better suited for wider experimentation.

We’ve seen a fair number of devices that store up small amounts of energy over the long term for quick bouts of activity, so we’re very interested to see what the community can come up with when that sort of hardware is combined with software that can be paused until its needed.

an image of the volume adjustment board

Is Your Movie Too Loud? Can’t Hear The Dialogue? This Circuit Can Help.

Everyone loves watching movies, that is, so long as you can hear what the characters on screen are saying. [GreatScott] found this second part difficult while watching through BladeRunner 2049, so he designed an automatic volume adjuster to assist.

At a high level, the solution is fairly straightforward; when there is loud music playing in a movie, turn the volume down. The challenge is how to actually achieve that. The first step was controlling the volume. To avoid having to modify or damage his sound system, [GreatScott] opted instead to mimic the volume up and down signals of his remote over IR. Using the very handy IRremote library for Arduino and its built-in decoding functionality, he was able to identify and replicate the signals with his own IR LED.

The second step in this process was measuring the volume of the movie. [GreatScott] achieved this with a microphone and amplifier circuit, that was then piped into one of the analog pins of the Arduino Pro Micro at the heart of the build. Since the audio being sampled could have a frequency as high as 20 kHz, the ADC Prescaler had to be adjusted from its standard value, which would have only permitted measurements at less than 5 kHz.

The third step was writing the algorithm to detect loud music and adjust the volume accordingly. The Arduino will measure the audio until a sound greater than the dead band value, set with one of the two onboard potentiometers, is detected. This then triggers the Arduino to start a timer, to see how frequently the upper limit is being surpassed. If it is just one or two occasionally loud noises (like a scream, a clap, whistling, etc.) the Arduino will not take any action, but multiple loud noises in rapid succession will then trigger the volume down command over the IR LED. A second potentiometer allows for adjustment of this timer’s critical value, so that you can make the system respond faster or slower depending on the movie.

Once the sound has been detected to have dropped down below a critical vaue, the Arduino assumes that the movie is back to dialog and will increase the volume by the number of times it decreased it before, leaving you back at the perfect volume.

Maybe you’re the type that cares more for the visuals of a movie, rather than the audio. In that case, this e-paper movie display will be perfect for giving you time to appreciate every frame!

Continue reading “Is Your Movie Too Loud? Can’t Hear The Dialogue? This Circuit Can Help.”