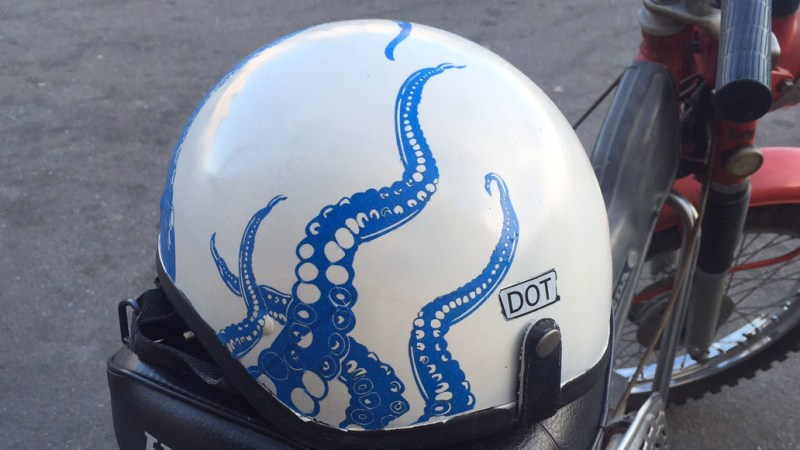
Want to make a sweet adhesive decal with a complex design and floating elements, but all you have is a laser cutter and some tape? Good news, because that’s all you need with this method of creating adhesive tape decals on a laser cutter demonstrated by the folks at [Lasers Over Los Angeles]. The overall technique is very similar to creating vinyl decals and using tape transfer to apply them, but is geared towards laser cutters and nice, cheap tape.
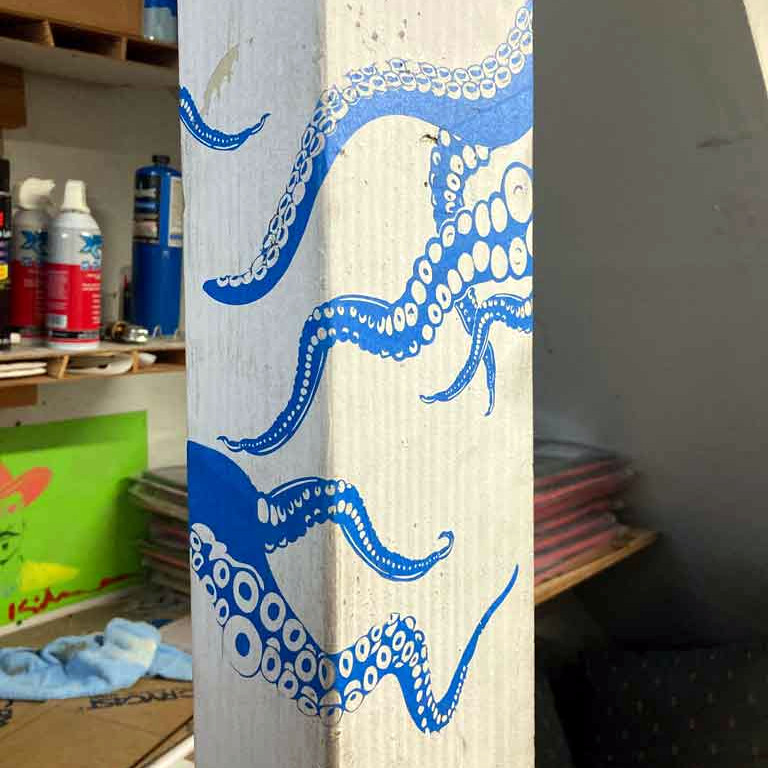
The way it works is this: paper-based tape (such as blue painter’s tape) is laid down in strips on the laser cutter’s honeycomb bed, forming a nice big rectangle big enough for the intended design. Then, the laser cutter cuts vector art into the tape, resulting in an adhesive decal ready to be stuck to some other surface. Transferring is done by using good quality clear packing tape to “pick up” the decal, then move it to where it needs to be.
To do this, one lays strips of packing tape onto the top of the design on the laser bed, then lifts the design up and away. Move the design to its destination (the clear packing tape helps in eyeballing the final position), press the decal onto the final surface, and carefully peel away the clear packing tape. This works because the packing tape sticks only weakly to the back of the painter’s tape; it’s a strong enough bond to hold the decal, but weak enough that the decal will stick to a surface even better.
It’s true that painter’s tape isn’t as durable as vinyl and the color selection is a bit limited, but design-wise one can go as big as the laser bed allows, and the price is certainly right. Plus it’s easily cut by even the most anemic of diode lasers.
Speaking of desktop vinyl cutters, they may have small working areas compared to most laser cutters, but they have some fantastic workshop applications. They can even do home PCB fabrication, by way of knocking out three essential pieces: the etching mask, solder mask, and solder stencil.


If you can get masks (frisket paper/painter’s tape etc.) down accurately, you can use that to play with layers of paint to create a very permanent image from a “negative”. Rattle-can paint is particularly easy, though picking the mask out of a complex design is finicky.
Can you cut vinyl with a diode laser?
You should never burn vinyl. It will release chlorine gas as it breaks down.
And chlorine gas turns into hydrochloric acid on contact with water, like the lining of your lungs.
Or with water vapor on the air. It will ruin your laser
Ah, by not all “vinyl” contain Chlorine.
PVC does (Poly Vinyl Chloride).
Also an *outline* cut thru a thin layer (such as tape or film) doesn’t vaporize a lot of material (compared to a deep *area* engrave on a large sign which vaporizes a *lot* of material).
https://healthybuilding.net/uploads/files/sorting-out-the-vinyls-when-is-vinyl-not-pvc.pdf
Yes you can, but only darker colours.I’ve made a few using black film.
However after reading the other two comments make sure you have lots of ventilation! Or maybe just use a blade.
Yes, I’ve tried cutting some cheap vinyl for car decals with a 500mW diode laser. It worked flawlessly and relatively fast, like cutting paper. If the laser is properly focused, you can get a very detailed cut: I’ve made a mask for etching writing a sentence in a font that was 3mm in height and it could be clearly read both in the vinyl and in the final etched part.
That said, as others pointed out, don’t do it in your house if you care of your health.
Why not using a Cricut?
Because lasers are awesome? I have an older Cricut, and will say it doesn’t do the super detailed stuff easily.
As an experienced laser owner, please remember that that if you use vinyl it is DEADLY do to the chloride fumes.
Vinyl fumes are dangerous if the vinyl is made from choride. Not all vinyl are made that way