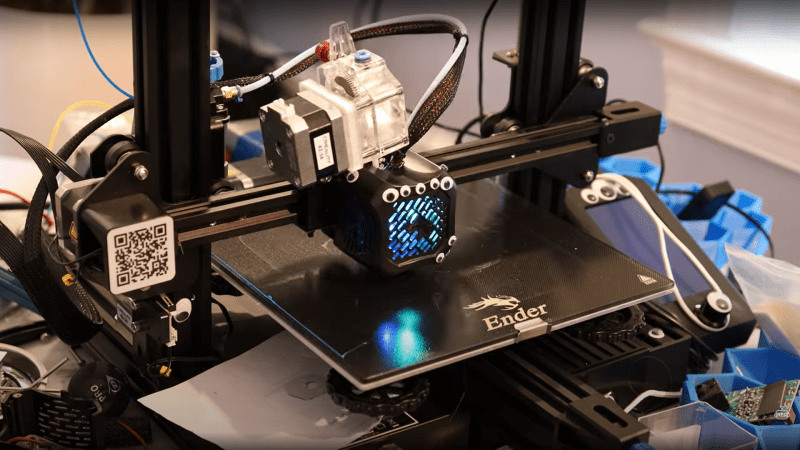
[Nathan] from Nathan Builds Robots on YouTube is no stranger to modding 3D printers, whether it’s a good idea or not, it’s just fun to find out sometimes. His latest escapade he calls the Double Ender (video, embedded below), where he not only doubles up the hotend, but the doubles up a few other bits too. The aim was to achieve dual material printing, with his specific goal to combine plain nylon and carbon fiber-loaded nylon in the same print, to get the best properties of both materials.
Taking a stock Ender 3 v2, [Nathan] first installs a dual Z axis kit, doubling up the Z axis screw and associated stepper motors. Likely this was needed to compensate for the additional weight of subsequent mods. Since the stock Ender mainboard has only one Z axis port, the less obvious solution was to just install a second mainboard! By leveraging the immense hackability of the Klipper printer firmware/software stack,he was able to get this weird configuration to work.
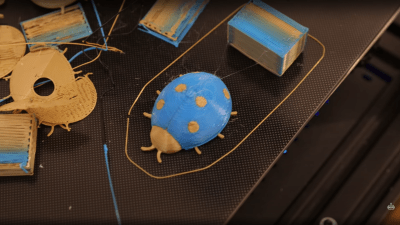
Next the main part of the build; the Phaetus Tai Chi dual hot end installation. For some reason, initially, it was decided to combine the stock bowden injector/extruder with a direct drive second unit, which we guess keeps the reciprocating weight down a bit and does let you directly compare bowden and direct drive print results on the same machine. Anyway, the first dual material prints came out pretty good after a few (quickly glossed over) fails, and did work well enough that dual-nylon printing could now be an option. After switching the build to a dual direct-drive setup, [Nathan] found it easier to get the machine to switch filaments more reliably, which makes sense when you think about the impact of all that extra filament in the bowden tube.
[Nathan] clearly has been burned (haven’t we all?) possibly literally, by the curious habit of some Chinese suppliers, of randomly assigning power supply polarity to red/black wire pairs. The solution, somewhat belt-and-braces, was to simply make up custom power cables with an embedded rectifier. Well, we guess that’s one less thing to worry about, but do look away when those PSU hacks are being shown!
Multi-material or multi-color FDM printer options are plenty, here’s a cool way of using a servo to swing a pair of hotends to the same point, and we also saw a while back, a way of using a sprung-loaded rocker to flip the unused hotend up out the way when not needed.
Thanks [Zane] for the tip!


Rather disappointingly that QR code isn’t anything sensitive.
That comes on the Ender 3 V2. I still haven’t scanned mine lol
LOL, I could only watch the first few minutes before concluding he has no idea what he’s doing. Removing the fan shroud will cause it to move less air than the fan re replaced. Secondly, his little regulator attempt doesn’t even use capacitors on the input or output of the regulator. A TOTAL fail!!!
If it’s a linear regulator and the supply is already smooth, then the caps are redundant, aren’t they?
If his is like my V2 or Pro, those supplies aren’t as stable as they seem. Took over a year to figure out the reason why the z-stop would randomly act as if it had moved was due to noise coming from the power supply. Not the worst problem since the firmware does have vars to tweak for that but it has made me weary of adding too much more to the system before swapping out the supply with a known good one.
Are you weary of it? As in tired of it? Or are you LEERY of it. Meaning cautious of it in the future.
Maybe he’s WARY of people correcting him online, as you should be
More likely that was an autocarrott for “wary”.
They are not, they are required to p[revent oscillation, read the datasheet…
Every linear regulator circuit I’ve ever seen coming from an already DC source doesn’t require filter caps. He’s pulling power from the 24V DC rail on the PSU and clipping it to 12V, not regulating AC. The only reason the rectifier is there is so he can hook it up in reverse and it still works because he’s had import power supplies with reversed polarity.
It’s a silly solution in that he doesn’t actually need a rectifier, he needs a multimeter, but the regulator will work absolutely fine.
Not redundant. The capacitors establish the source and load impedances seen by the regulator device; you do not want the regulator chip to oscillate! They need to be at the regulator pins, within half an inch or so, not at the other end of a cable.
Yeah, I cringed about 5 times during this presentation. He is really hacking at it. All of it.
Still, I admire his drive to get-er-done.
I cringed at him blithely assuming the caps were discharged without testing (the gun is ALWAYS loaded until proven otherwise), then shut it off when he started cutting away functional parts of the fan he was adding to the power supply.
This video has weapons grade ignorance on display, and should not be held up as an example, but rather a warning how not to approach projects. Hackaday should be ashamed of signal boosting this one.
I wonder why he went through all the hassle to install a second board for the dual Z. My dual Z kit came with a Y-cable. Both run off the same stepper driver. It’s been fine for months.
Those boards only have 4 motor outputs, so one is needed for X/Y/E/E1 alone. Guessing he used the splitter and a single port on MCU2. Seems like a waste since he could have had discrete Z control and used Z-tilt adjustment.
Looks like he ran the secondary MCU to get the extra motor pin outs, but used a Y-splitter to run the second Z stepper in sync. Series vs parallel stepper wiring aside, it’s definitely a missed opportunity to run discrete Z motor control and setup Z tilt adjust.
These types of videos will only lead to many broken printers, probably a few burned down houses as well.
Trash all around!
Comparing a direct drive vs bowden print with the same gcode one will always come out bad due to the differnt retraction settings needed.
This Tai Chi hotend clogs constantly despite everything I tried. Umteen different retraction settings, different fans, different filament.
It is going in the junk bin & goodby to the $120 buck I paid for it.
Going back to the Dragonfly hotends that work great & I will build a tool changer instead.