The early days of FDM 3D printing were wild and wooly. Getting plastic to stick to your build plate was a challenge. Blue tape and hairspray-coated glass were kings for a long time. Over time, better coatings have appeared and many people use spring steel covered in some kind of PEI. There seem to be fewer choices when it comes to resin printers, though. We recently had a chance to try three different build surfaces on two different printers: a Nova3D Bene4 and an Anycubic Photon M3. We learned a lot.
Resin Printing Review
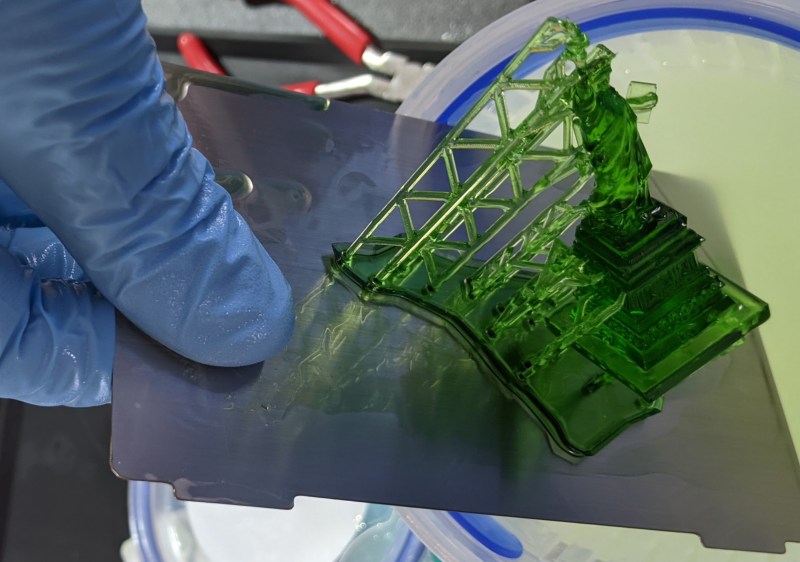
If you haven’t figuratively dipped your toe into resin yet — which would literally be quite messy — the printers are simple enough. There is a tank or vat of liquid resin with a clear film on the bottom. The vat rests on an LCD screen and there is a UV source beneath that.
The Trade-Off
Like all engineering, 3D printing is a series of trade-offs. In the case of the build plate, you want something that the hardened resin will stick to better than the film at the bottom of the tank. However, you also want something that will let go of the plastic when you want it to let go.
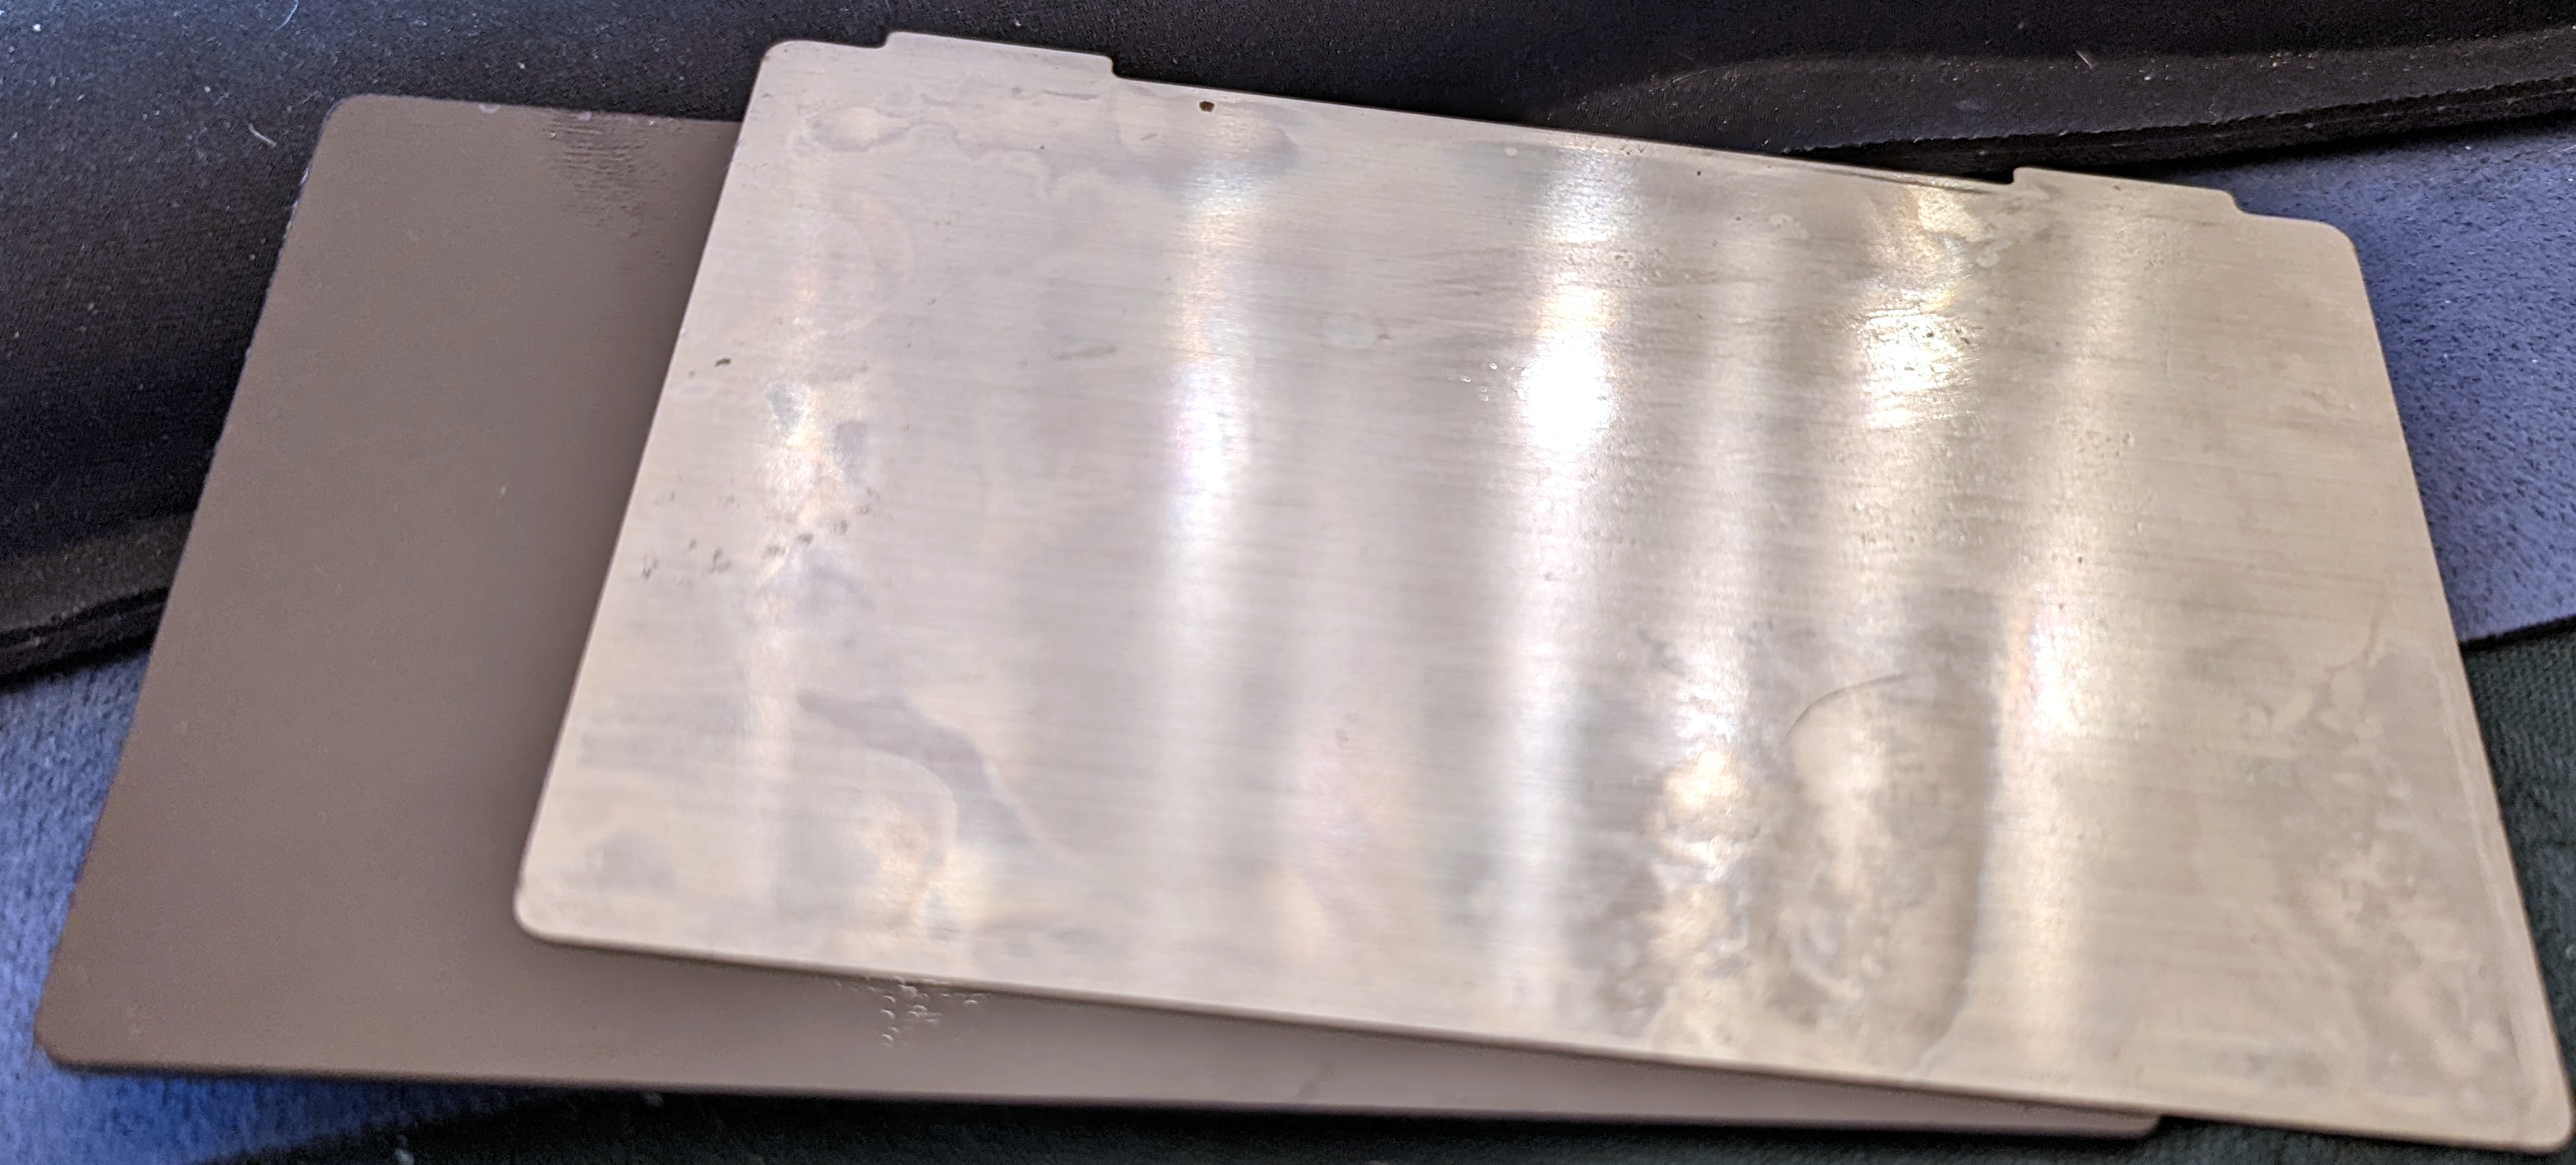
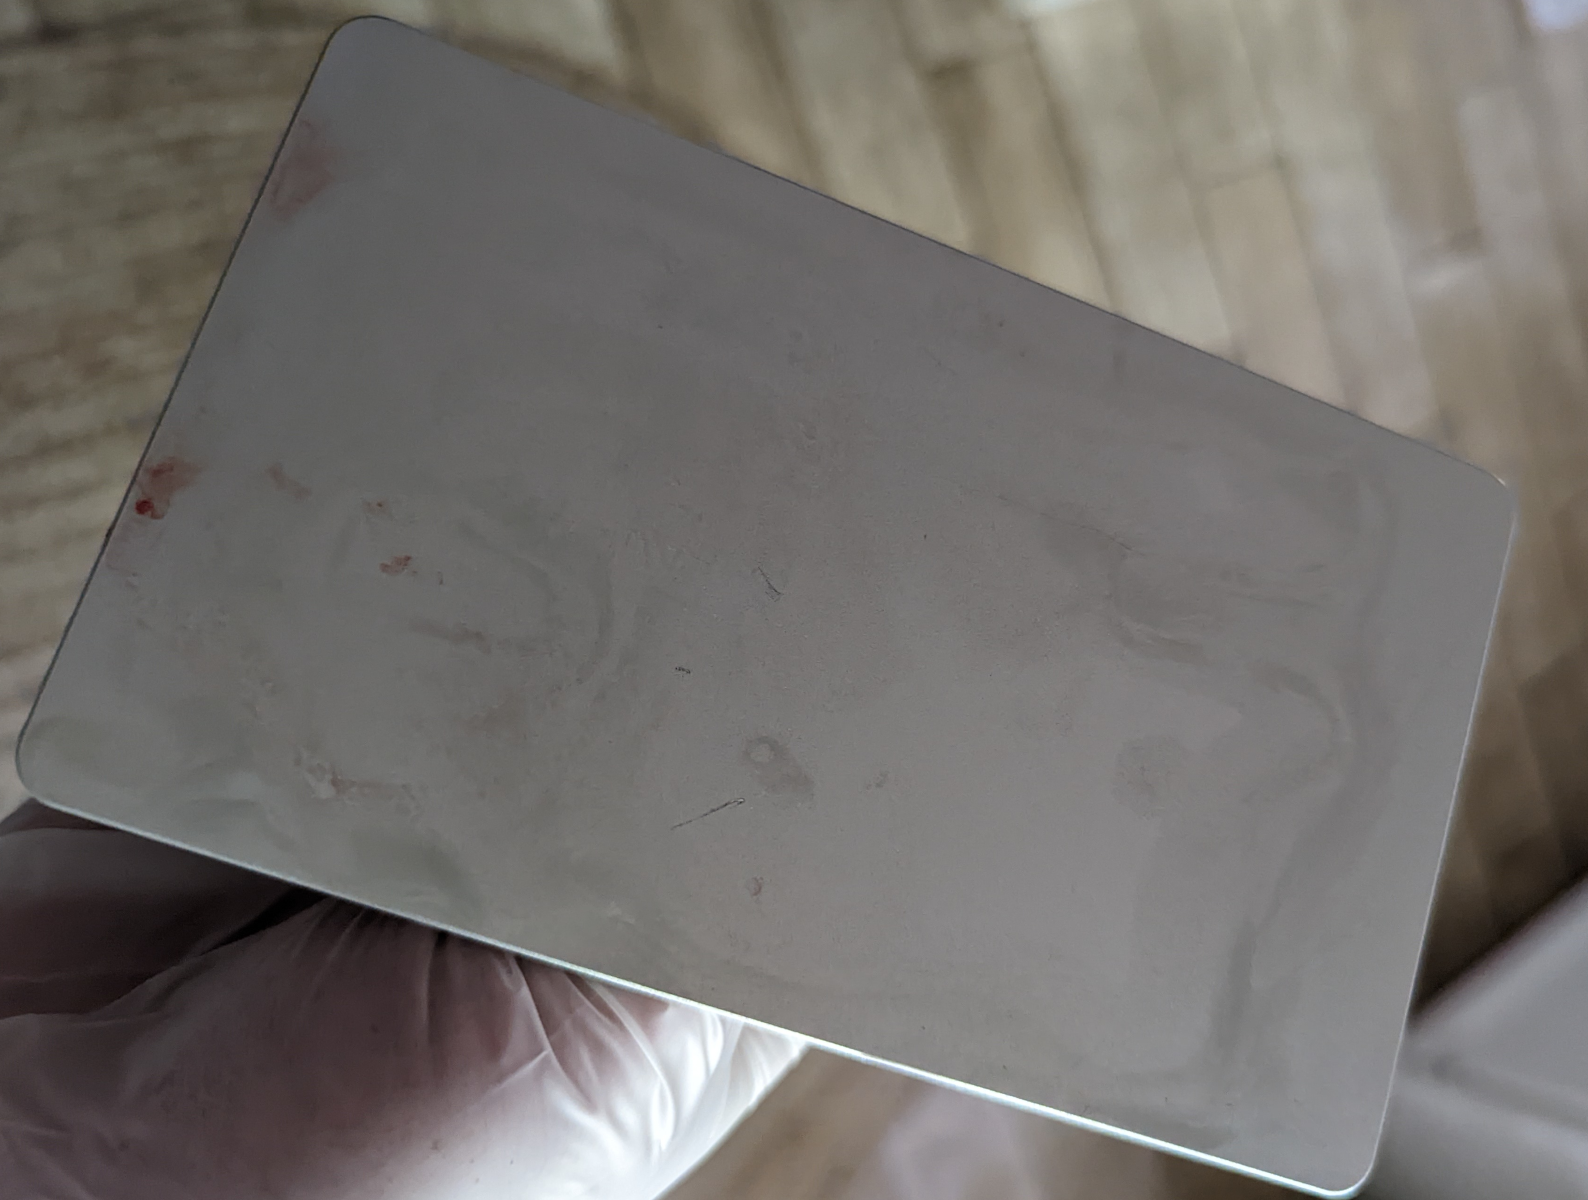
Most of the printers we’ve used just have a flat metal build plate. That works well, but it makes it very hard to remove prints. Using a scraper, you have to watch you don’t lose a finger or otherwise destroy the part. That’s the kind of build plate we found on the Nova3D printer. However, we quickly moved to a spring steel plate. It is similar in concept to what you do with an FDM printer. A magnetic sticker goes on the real build plate and the spring steel sticks to it. The only problem is you have to tell the printer that the build plate is now thicker than it thinks it is.
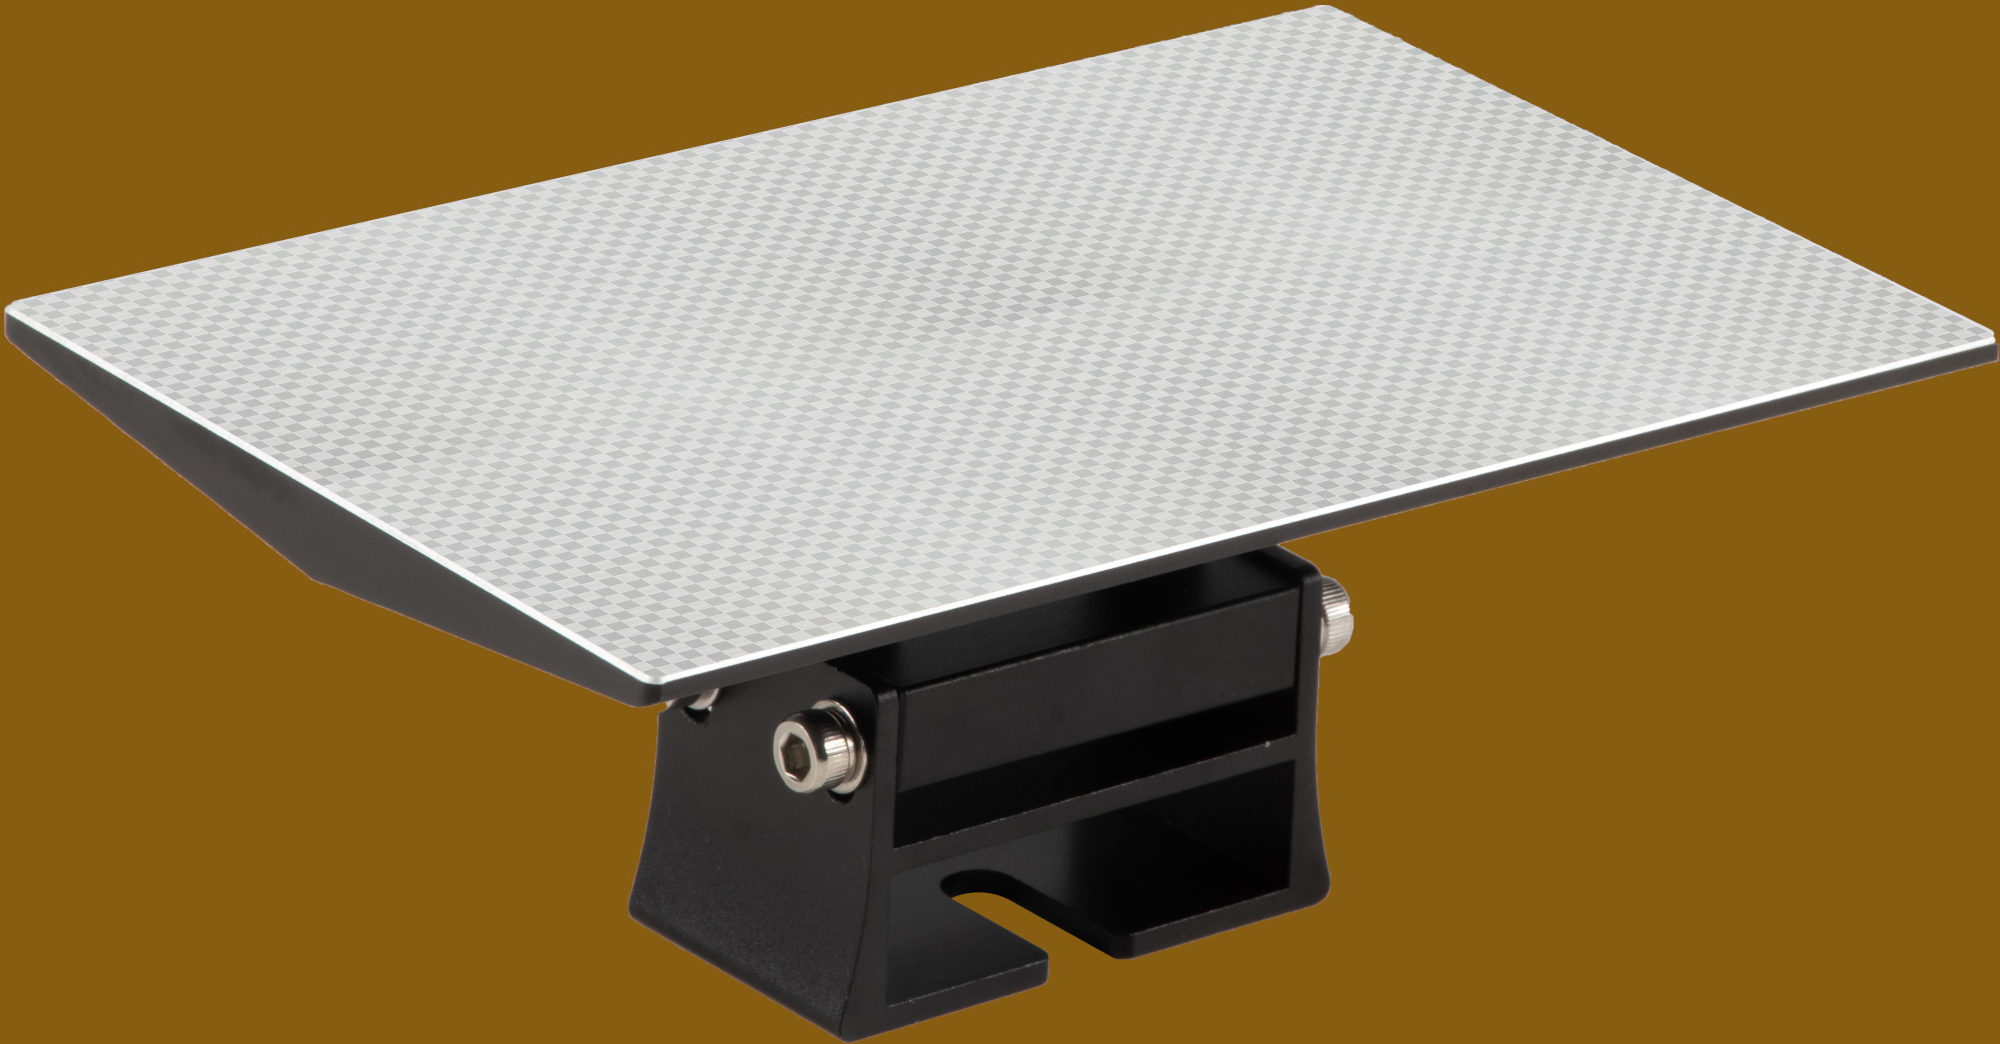
The other printer, the Photon M3, has a special laser-cut build surface that isn’t exactly smooth. Anycubic has used this on several printers and claims that it improves adhesion and also helps get a tool under the part for removal. You can see from the image that it has a sort of diamond pattern lightly engraved in the surface.
The Acid Test
Honestly, the brushed metal beds are painful. I’ve personally cut myself more than once trying to wedge off parts and — more than once — broken pieces of the part in the process. My bed has multiple scratches on it from these attempts.
The Photon M3’s bed is obviously better. I can’t speak for the better adhesion part because I normally don’t have that problem. But it does make it somewhat easier to wedge parts off. Presumably, the pattern gives the tool some gap to work with, but it is much less stressful to remove a part from the textured bed.
However, once you go to the spring steel, it is hard to go back, in my opinion. You can just pull the plate off and pop the whole thing in a washer. Then you can simply flex the plate and pop the part off. No tools, no cuts, no scratches. The plates are pretty cheap, so you can even have multiples and easily print a new part while the last one is washing.
Everybody Has One
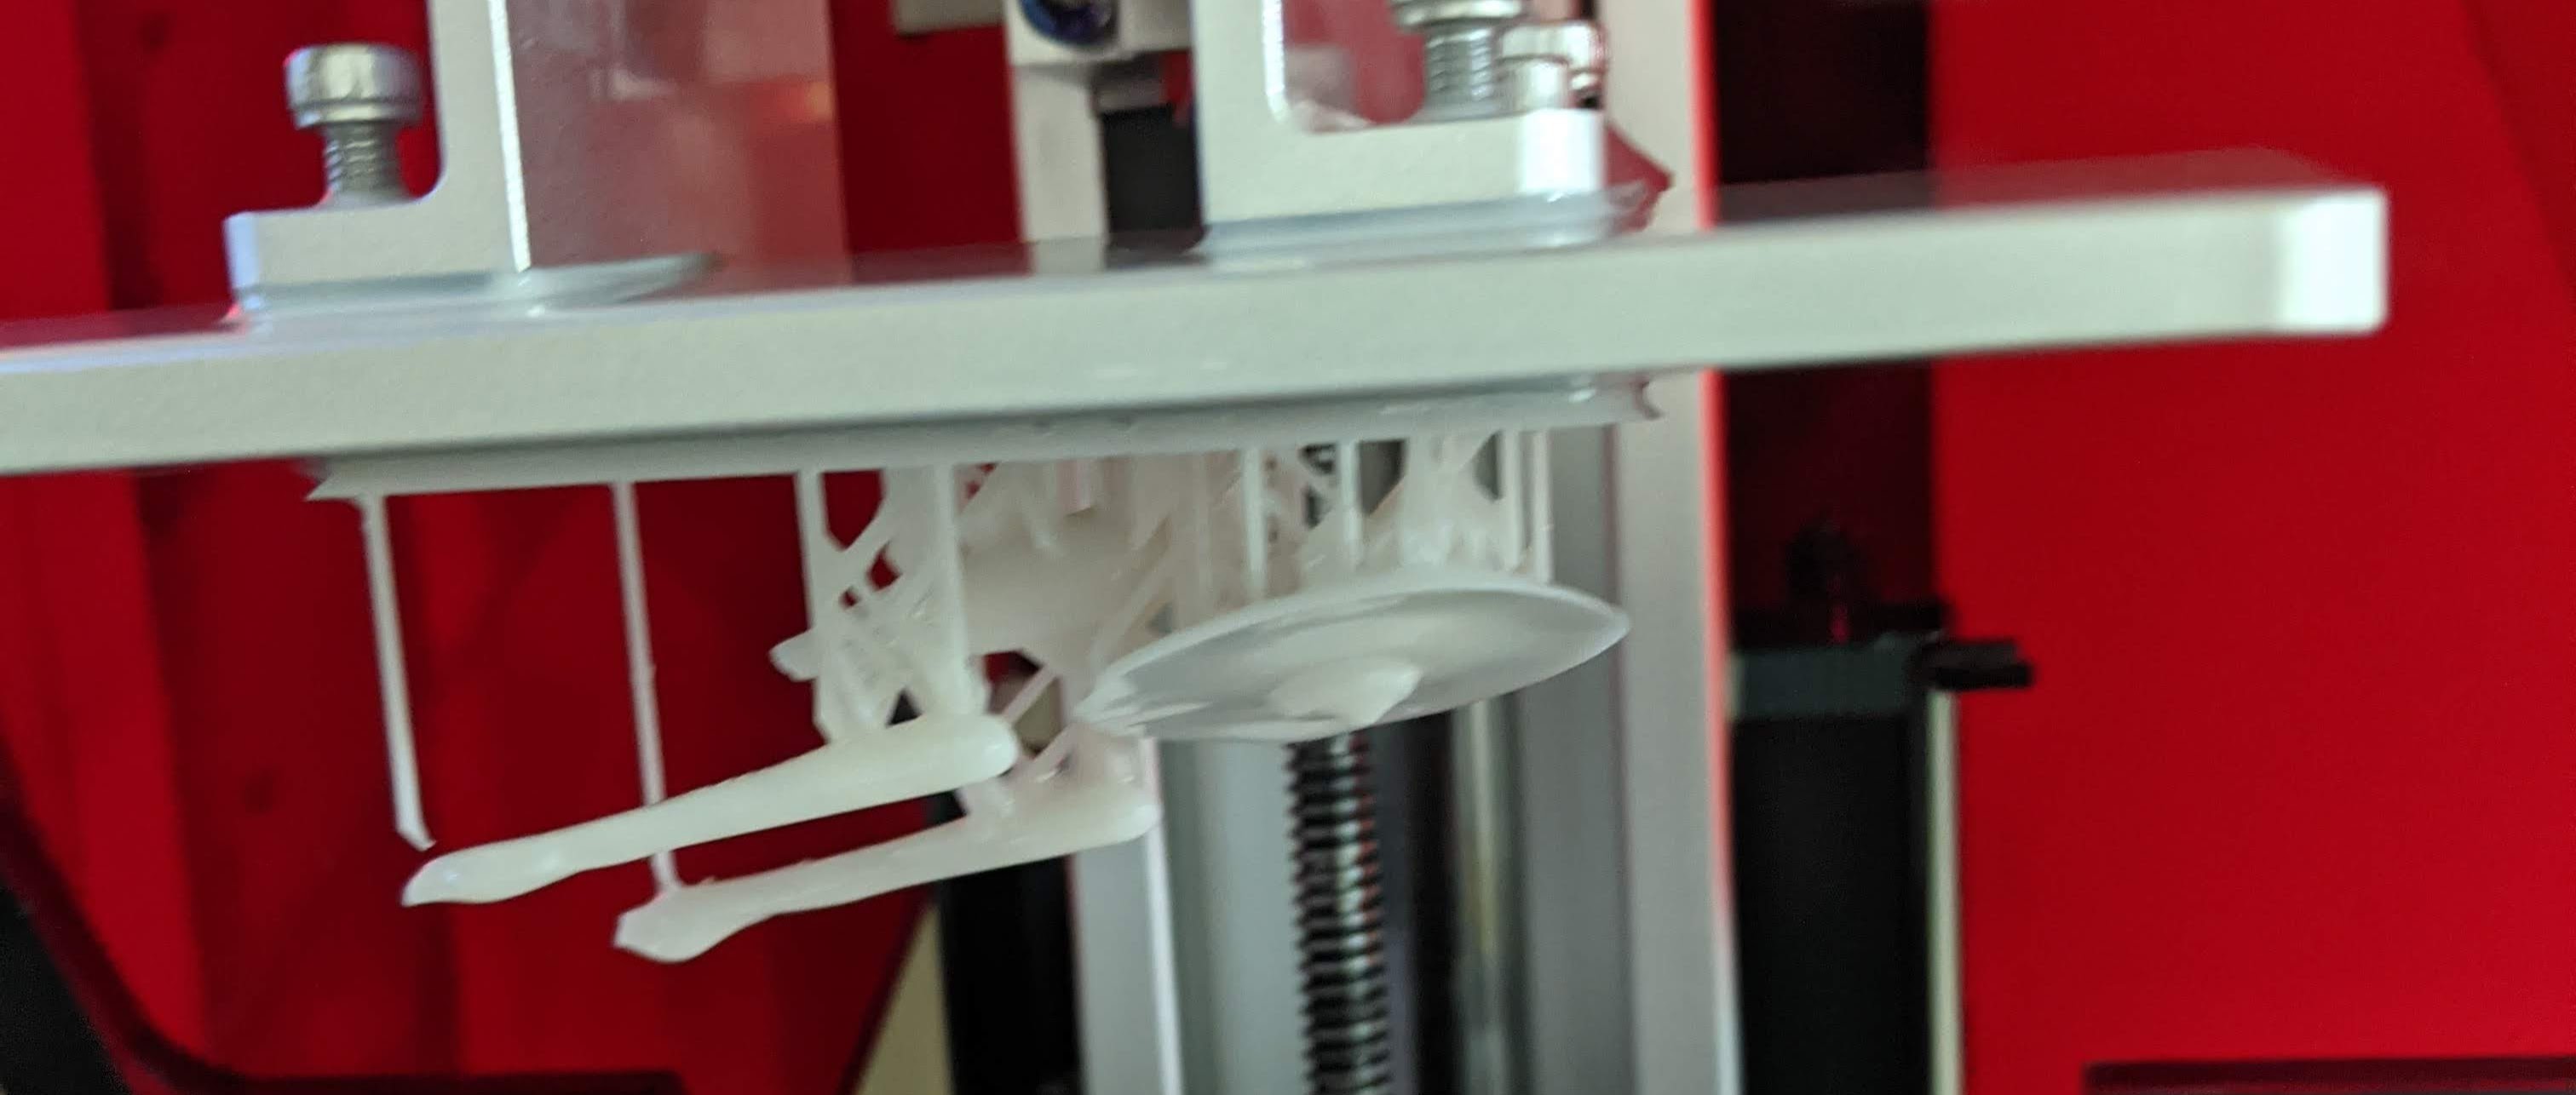
The results, though, are worth the effort. The octopus on the Photon’s textured surface is easier to get off than the smooth metal bed, but it still wasn’t easy. The same octopus on a steel sheet is easy to handle and popped right off.


Of course, that’s my opinion. I’m sold on the flexible plate beds. What do you think? The only real disadvantage I’ve found is that you do have to modify the printer or the firmware to tell the printer not to drive the new thicker print bed down into the LCD. For the Nova3D, that involved printing a little shim that hits the limit switch a little earlier. Not a big deal, but not plug and play, either.
If you browse printer forums, you’ll find people who have gone the flexible build plate system seem happy, overall. There are a few cases of magnets not sticking or poor adhesion. But overwhelmingly, you hear positive stories. It makes me wonder why we haven’t seen any plates like this as a stock item or — at least — as an option with built-in support for offsetting the Z-axis sensor.
I’ll admit, I don’t resin print as often as I thought I would. Sure, the results are great. But the mess is substantial, especially if you are a little clumsy to start with. However, the spring steel bed really does help. The smell is the same, and the resin still drips everywhere, but at least you can easily remove prints. And handling them on a lightweight plate is easier than moving the entire print bed assembly around if you want to, say, throw it in the washer. Of course, if you don’t like it, it isn’t that hard to remove the magnetic sticker, undo your Z-axis mod, and go back to the way things were.
So what do you think? What kind of bed are you using for resin? Do you like it? Are there other options out there? Let us know in the comments and if you’ve done any good projects in this area, leave us a link.
We’ve talked about flexible plate beds before. If you haven’t tried resin printing yet, we can tell you a little about what to expect.


The magnetic bed upgrade I got gave instructions for printing an adaptor for my printer that would adjust for the height difference. You just need to remember to print this part before you adhere the magnetic base…
Or do what I did and print it on an FDM printer!
I cant speak much to resin printers, however i have had poor experiences with pei and spring steel. When you heat a magnet and spring steel the magnet gets weaker and the spring steel warps. Ironically i picked up a coffee table out of the trash that had tempered glass squares on it. These pieces of glass from the trash work way better than any flex plate I have ever touched, and they were free. Literal trash works better than 50 to 100 dollar plates. A bit of stick glue works if i have any issues with adhesion, though it doesnt seem to be an issue for most smaller prints. Plastic putty knife works great for removal barely have to just get under ine edge and the whole thing just pops right off. Tempered glass is also very flat, way more consistent than any spring steel according to my printers own measurements.
Now with resin printers heat is not an issue, so this likely works much better and the smaller area means that replacement plates would be loads cheaper. I would not want to be wrenching on a non-removable build plate on one as it would be very easy to knock it out of alignment. Im sure there is a release agent that would make resin prints pop off more easily after the print is complete.
My first printer used borosilicate glass and it was awful. I ended up buying a 12″ wide roll of kapton tape and covering it. Changing that tape was a pain but the printer didn’t last long before it died.
For my second printer, I bought a 2mil thick piece of PEI, adjusted the z height and never looked back. The only issues I’ve had with adhesion are due to bed leveling and warping.
Aliexpress has a wide range of borosilicate glass in 3d printer sizes for peanuts and amazingly they don’t skimp on the shipping material. I’ve also had the best results with glass and PVA glue.
PEI didn’t work for me either, not enough adhesion, but the spring steel flex plate on the magnetic sticker works great. Just bought it from Ali for less than 30€. I use 3Dlac spray for adhesion, very simple.
Right but the purpose of a flex plate is to allow you to easily remove the print by flexing the plate. So no, your trash glass plate obviously doesn’t work better because it can’t do the one thing the flex plate is designed for.
And of course the build plate on a resin printer is removable so there’s no fear of knocking it out of alignment.
Stupid question… why do they not print at the top of the tank and move the build plate down? No need to touch any film, just focus the UV onto the top of the resin?
So the resin only has to be deep enough to cover the LCD/light source. Otherwise, your liquid would have to remain the final height of the printed object.
And also, you couldn’t control the layer thickness as well. By squishing the build plate against the film, a thin, controlled layer of liquid resin remains.
Three reasons I can think of
1) The top surface of the resin is surely going to move somewhat during the printing process,
2) You’d need to very carefully level the tank in absolute terms to ensure the top of the resin is completely level, and keep it that way during the entire print time (one ripple and your print is wasted), and
3) The depth of the resin would have to be enough to accommodate the entire print.
I think getting the completed print out would also be a fair bit messier as well.
In interesting way of doing it, and one that I’ve wondered about also.
Pro 1: May allow avoidance of Carbon M1 Resin printer patents, at least with respect to use of an oxygen permeable film at the bottom of the build vat.
Pro 2: As you point out, obviates the requirement of a transparent film between the build vat and the UV light source.
Pro 3: Allows for a faster build speed because you don’t have to run the machine cycle for separating the print from the transparent film (see Pro 2, also the reason that the Carbon M1 printer has the oxygen permeable film.)
Con 1: You have to compensate for the fact that oxygen in the air acts as a retarder for the photo catalyzation process that allows the UV light from the laser or that passes through the LCD panel to partially cure the photo reactive resin in the tank.
Con 2: You may end up having ALOT of resin in the resin vat because you need to accommodate the full build volume as well as any accommodation for build plate descending down into the resin vat.
Con 3: you have to engineer your build plate and resin vat so that the build plate can descend down into the resin vat.
Con 4: cleaning the build plate and it’s mechanism will be more complicated because it’s awash in resin the entire time.
Con 5: Resin costs may go up due to spoiled resin increasing because the amount of resin in the resin vat has gone up.
However, sounds like an interesting idea, and maybe this will count as prior art.
That’s more or less how the very first resin printers worked. The part ended up in a tank of resin. They also needed two lasers to harden the resin only in the spot they intersected.
They didn’t move the build plate, they added resin to the work tank.
It wouldn’t work with a LCD version. The light would also harden the resin below the spot. Upside down that spot is air.
This is almost exactly how ‘true’ SLA(original patent, 3d systems) work… They use a laser with galvos above a tank of resin, and the build plate moves into the tank.
Big DLP printers (over 50cm cubed) also tend to work that way – the EnvisionTec (ETEC) ‘extreme’ (or something like that).
It is not necessarily faster (or at least, wasn’t – not sure about the newer DLP’s) – you still have to let liquid settle onto the new printed surface, usually using some sort of spreader. In the laser SLA machines, they also take much longer per layer to expose – the laser needs to travel over every part of the object and support structure – it can take a while.
Not to mention these are not open machines, and resin from 3D Systems or ETEC, while sometimes best in class, can be *really* expensive, and you might need 50L or more to fill a container just to begin printing.
Using Whambam plates on an Elegoo Mars. Setup was not particularly easy and required care but the work flow is soooo much better now…
With the thicker bed. On the Anycubic you just listen the bolts either side of the head and re-level.
With the height variance compensation you then tighten the bolts and you’re off.
Pretty sure that’s what you’re meant to do, or I’ve been winging it all this time.
If you have adhesion issues to your plate, there’s a few simpler fixes. First, start with doing a bed levelling calibration. Then adjust you initial exposure time (more time if parts are lifting, less time if they’re adhered on too much. 0.5 second increments seem to work for me. Your prints should come off relatively easy with a plastic spatula – if you have trouble getting purchase, adding a raft with a lip in a slicer works wonders.
If you feel brave, find a KNOWN level surface and some fine grit sandpaper and give your platform a very light and level sanding. Then go back to step 1. But this should be a last resort.
Overall I’m not sure doing the magnetic thing would help, it introduces a lot a points which could further be misaligned for each print and cause lifting.
The cheapest, easiest and safest way to remove a stubborn part from the build plate is to pop it in your freezer for about five minutes. Never fails to just slide right off.
100% THIS. Especially if you also run hot water over the build plate, too. Metal and plastics expand and contract at different rates, after all.
I used to do the hot water trick too but I stopped because it warped some of my prints.
For any resin printer where build plate leveling is leaving it loose, running it down until it’s in contact with the empty vat bottom, then tightening the fasteners, the additional thickness of the magnet sheet and steel plate is not a problem. Not as long as there’s enough built in oversizing of the Z axis adjustment.
Which there isn’t on my Mars and Mars 2. Both need a simple spacer added to the sensor trigger.
I should also note that if you try to level without the spacer and there isn’t enough play you likely break the LCD. Not worth even attempting, the company that sells the plate almost certainly has an stl of the spacer you’ll need.
Got my flex plate a few days ago. Had a bit of an issue with adhesion to the flex plate. I hit it with some 400 grit then cleaned the absolute crap out of it. Got a couple of prints off it now and I’m liking it so far.
I often print with the part direct on the bed and it has made a big difference for that. Previously I found actually tapping my scraper with a hammer was actually the lowest impact way of getting parts off. Not belting it, just a tap it in. Build plate is still way better and has fewer parts ending up on the floor after popping off lol.
Just to be clear, I meant the flex plate is nicer than the factory plate.
First, flex plates are awesome. I wouldn’t even bother without one anymore.
But second, no one should be struggling to remove thier builds. Your support rafts should have beveled edges which allow your scrapper to get under them. If they don’t then add one that does. You just need to get under it a little bit to get it started and then it should just pop right off.
Has anyone else tried printing on magnetic rubber as seen here?: https://www.youtube.com/watch?v=auuw1Z7MXis
I’ve used and ditched the magnetic build plate on my Anycubic photon mono se due to the following issue that I was unable to resolve.
On larger pieces sometimes the magnetic plate would flex ever so slightly when the plate raised. Some resin would then slip between the magnetic sheet and the plate magnet, both reducing magnetic strength and also stopping the build plate from remaining ‘flat’.
Prints then completed slightly warped because of the resin that sneaked between the metal sheet and the magnetic on the print head. On a couple of occasions the pull on the metal sheet was strong enough to pull the sheet off the magnet – likely because resin had already slipped between the surfaces and weakened the bond. After lots of issues like this I went back to using the original build plate and of course all the issues went away.
Printing can be difficult enough and for me, the added failures due to the convenience of print removal was a no brainer.
M3 owner here….
What plate did you get? I haven’t found a compatible one yet.