Laptop computers may be ubiquitous today, but there was a time when they were the exclusive preserve of rich businesspeople. Back in the early ’90s, the significant added cost of portability was something that few were willing to pay. As a result, not many laptops from those days survive; for those that do, keeping them running can be quite a challenge due to their compact construction and use of non-standard components.
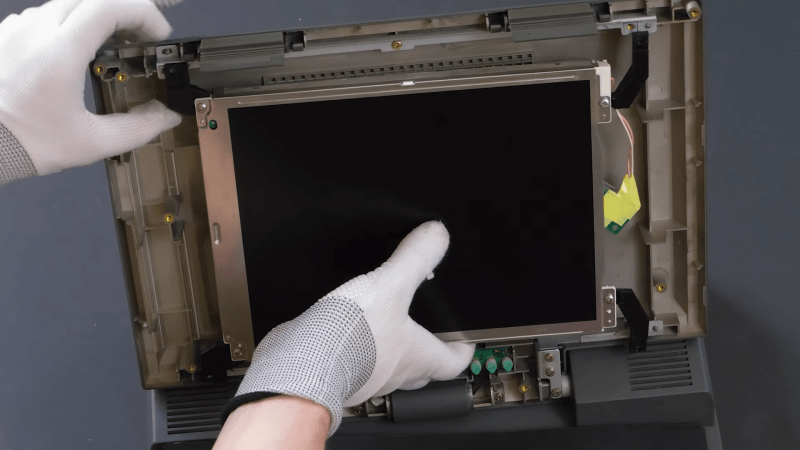
[Adalbert] ran into these problems when he got his hands on a Toshiba T3200SXC from 1991. As the first laptop ever to feature a color TFT display, it’s very much worth preserving as an historical artifact. Sadly, the original display was no longer working: it only displayed a very faint image and went completely blank soon after. Leaky capacitors then destroyed the power supply board, leaving the laptop completely dead. [Adalbert] then began to ponder his options, which ranged from trying to repair the original components to ripping everything out and turning this into a modern-computer-in-an-old-case project.
In the end he went for an option in between, which we as preservationists can only applaud: he replaced the display with a modern one of the correct size and resolution and built a new custom power supply, keeping the rest of the computer intact as far as possible. [Adalbert] describes the overall process in the video embedded below and goes into lots of detail on his hackaday.io page.
Connecting a modern LCD screen was not as difficult as it might seem: where the old display had an RGB TTL interface with three bits per color, the new one had a very similar system with six bits per color. [Adalbert] made an adapter PCB that simply connected the three bits from the laptop to the highest three bits on the screen. A set of 3D-printed brackets ensured a secure fit of the new screen in the classic case.
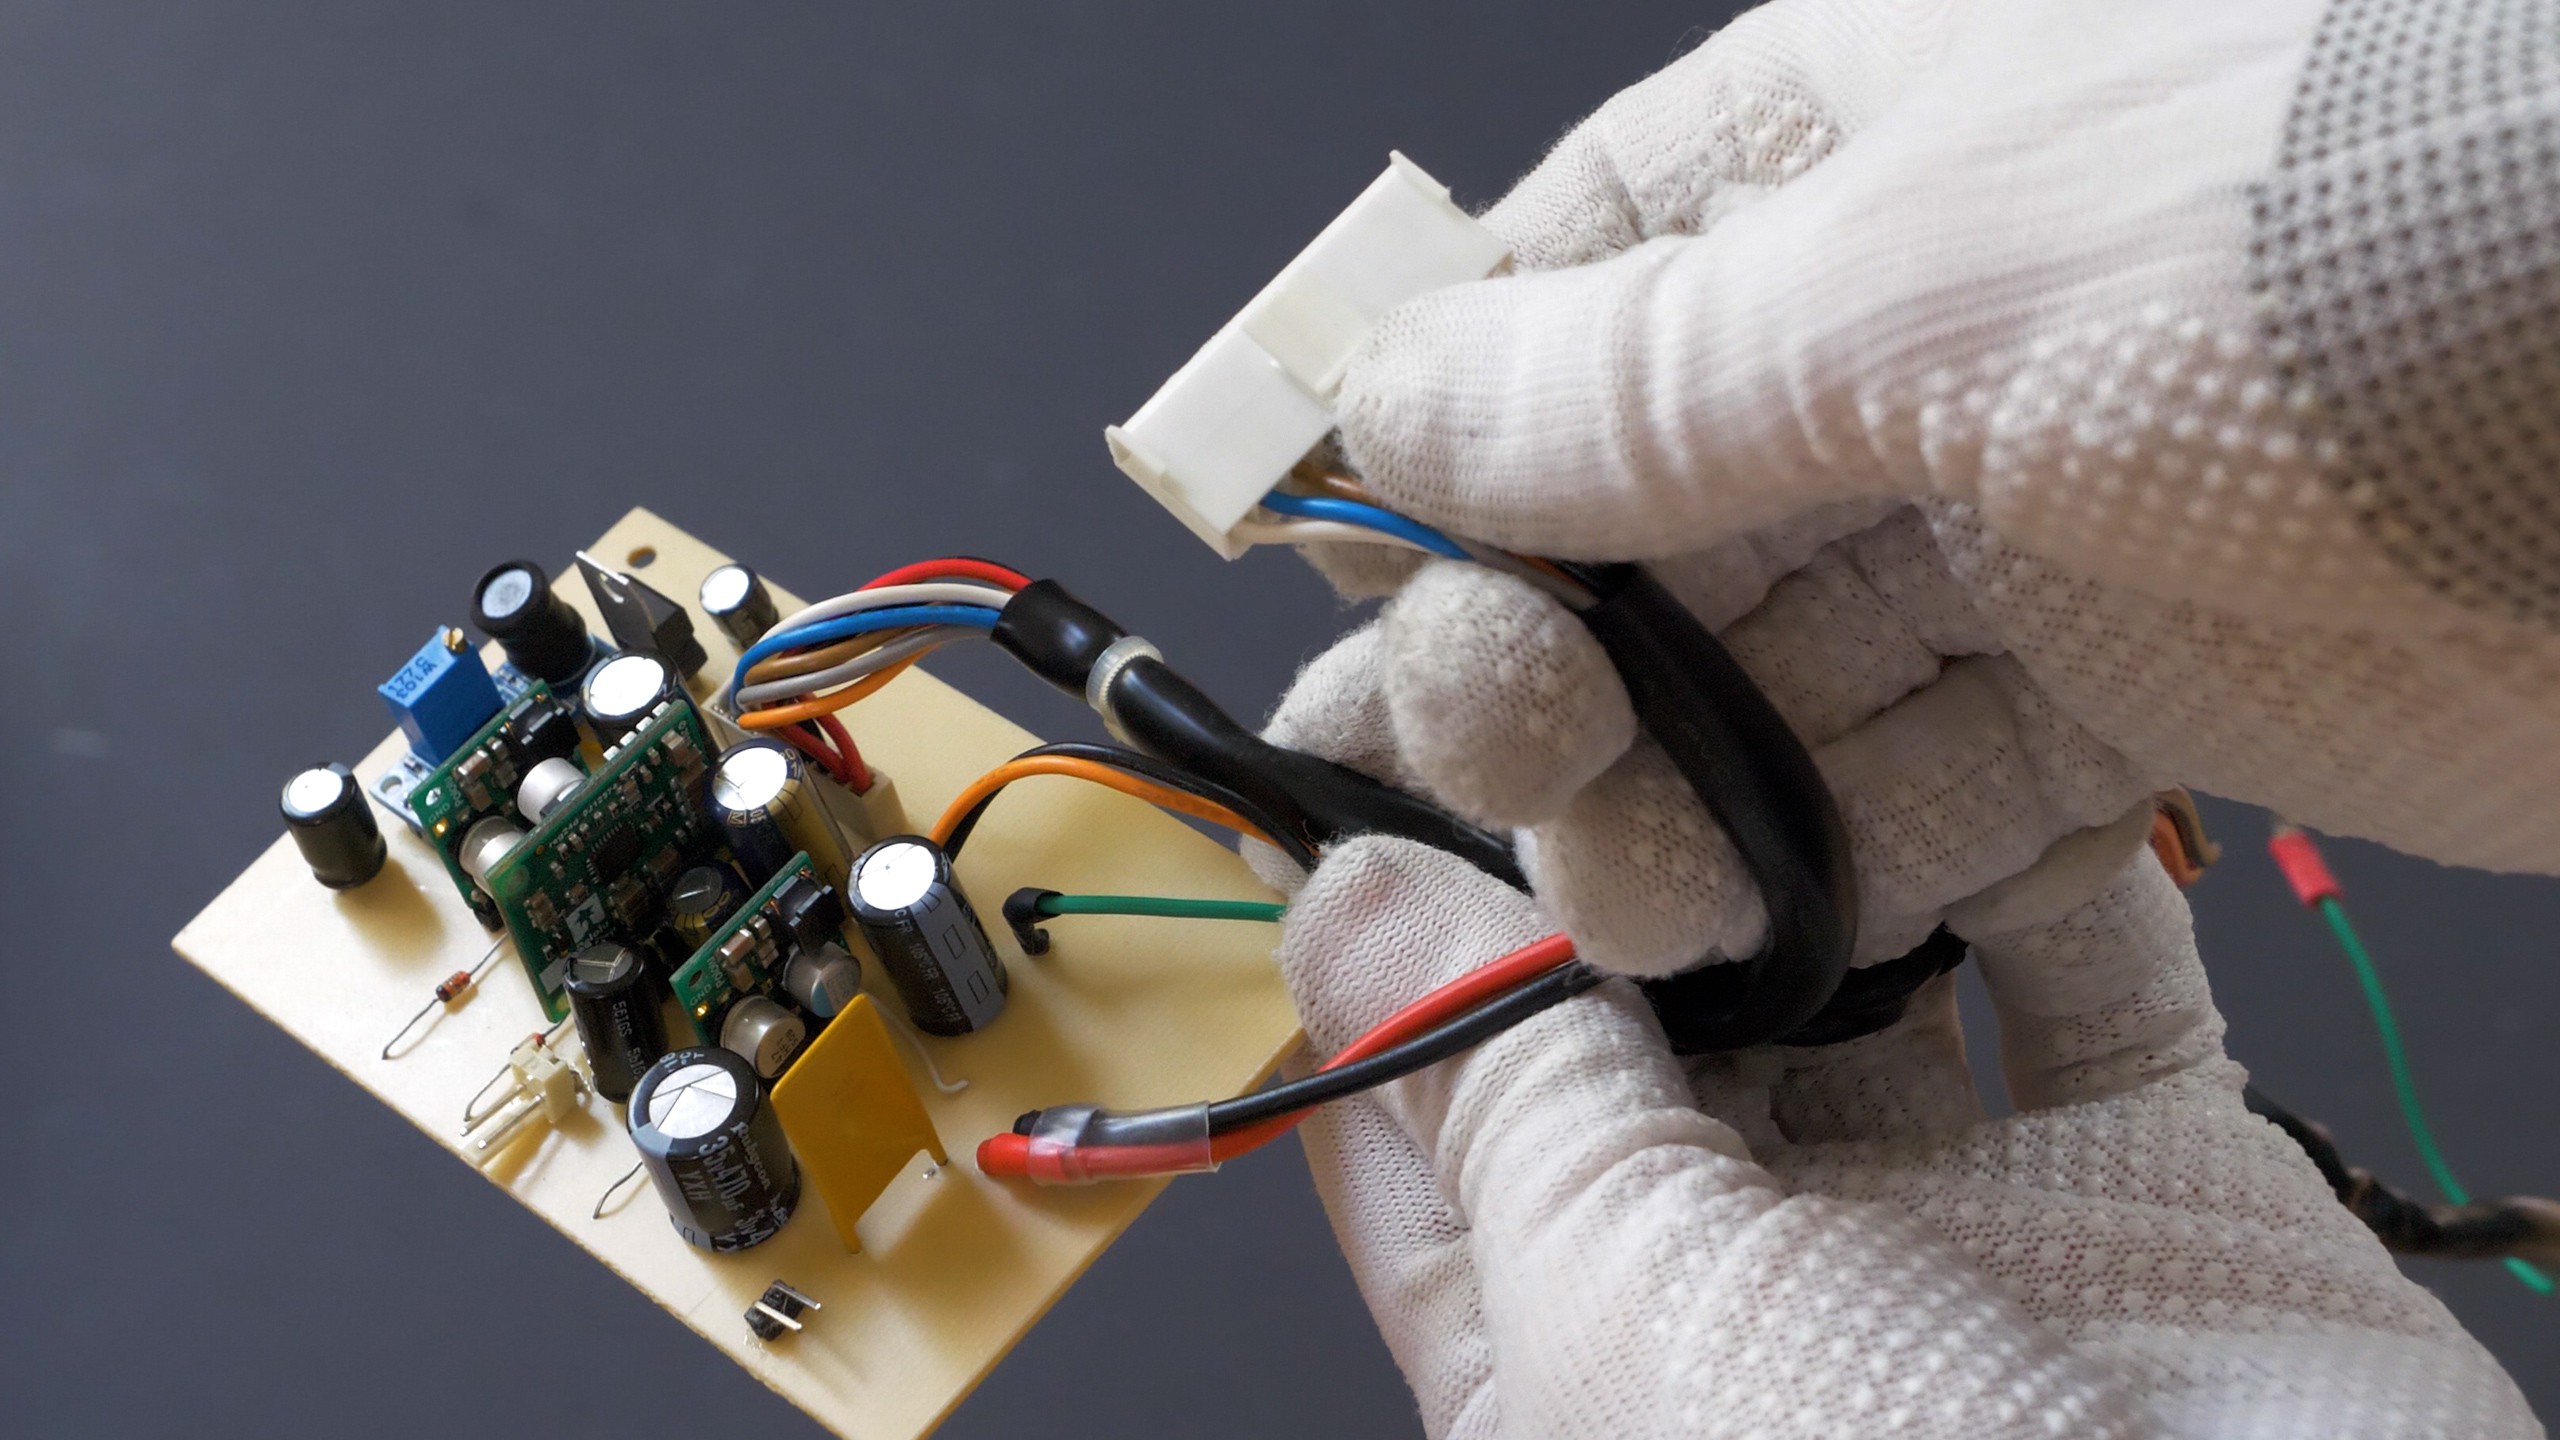 For the power supply [Adalbert] took a similar approach. He designed a PCB with several DC/DC converters that fit easily inside the computer’s case, leaving enough space to add a battery. This made the old Toshiba more portable than it ever was — believe it or not, the original T3200SXC could only be used with a mains connection.
Once the laptop was restored to working order, [Adalbert] added a few finishing touches: a sound card and speakers made it suitable as a gaming platform, and a network card gave it rudimentary online capabilities. The end result is a T3200SXC that looks and feels exactly the way it did when it was new, but with a few added features. That’s a really satisfying result: many classic laptop projects add modern computing hardware, or even completely replace the original contents. You might also want to check out [Adalbert]’s unusual 3D printer based PCB manufacturing technique that he used for the new power supply.


I keep an old laptop from that Era, but the floppy drive is bad, so I’m not able to install Linux, or format a larger hard disk. IIRC, It has a rudimentary USB connector that won’t allow booting.
Format the hard disk in an external IDE adapter and install operating system + network drivers, modem or parallell port communication on it. Then you can reinstall it in the computer and have easy file transfer.
Hmmm, sounds reasonable.
Thanks.
It has been so long since I last messed with it, but I have kept power attached to keep the volatile memory from getting erased by the dead backup battery.
Try the “Plop” bootloader- it has different options for different bootloader configs. (not sure if it would work in your case, but worth checking out:
https://www.plop.at/en/bootmanager/download.html
Was going to mention Plop also,
If it has a CD ROM drive and can boot from it then you can point it to your boot USB.
If no CD then I believe Plop can be installed to the HDD itself ( not sure if that is an option or not as I haven’t used it in a long time)
and maybe kexecloader[1] and/or grub4dos[2] to get booting from USB working (or a combination of those three things)
[1] http://www.solemnwarning.net/kexec-loader/
[2] https://sourceforge.net/projects/grub4dos/
“Just gut it and shove a pi and an LCD in it!”
90% of the problem 70% of the time, that you can fix with at least a 50% success rate… is that all the original lubrication has turned to gum. Clean up and white grease the drive screw on the head stepper.
Until (if) you replace the FDD why don’t you try and see if you can cram a FDD emulator into it, you can boot it from a USB but the computer will think it’s a floppy.
I wonder what laptop model is that? I had multiple laptops with failed floppy drives, and those drives were always Citizen W1D units. They were extremely compact and had a drive mechanism with a rubber belt. The belt becomes loose and needs to be carefully replaced. I don’t remember having problems with other models of floppy drives, as they usually had direct motor drive, with no belt. Unfortunately most of the time the W1D drive can’t be simply replaced with something else, as other models tend to be too large to fit in the floppy drive bay.
It is a Toshiba T4700CT.
The other comments are good options and you also have the option to replace your floppy disk drive with an emulator like a Gotek (cheap).
That’s the laptop made famous by the Microsoft Excel commercial (1992):
https://www.youtube.com/watch?v=kOO31qFmi9A
And somehow excel has only got worse & more bloated from that day forth.
Nice job, but i wonder if he could have replaced the backlight on the original TFT
The description in https://hackaday.io/project/186447-toshiba-t3200sxc-fixupgrade-new-psu-lcd-wifi/log/208833-the-original-state-what-was-broken says that the display was almost completely white. This suggests that the TFT itself has degraded, instead of backlight.
I didn’t take the photo of the degraded screen when it was still working, but here is someone elses thread from 13 years ago: https://www.vintage-radio.net/forum/showthread.php?t=42242
You can see that the screen had pretty bad contrast. In my case it was much worse, the image was illegible.
Nice job considering you kept it as original as possible, and things like this will be necessary in the future as more retro laptop screens go.
Hey, learn something new every day. I didn’t even know those screen themselves degraded.
Still an awesome job you did
I have a similar vintage laptop with a dead CP2064 HDD. Tried to use a contemporary 44-pin Flash IDE module (1 GB, with MBR present), but the BIOS ignores it and goes right to the floppy. That’s no fun.
Old Toshibas tend to be vendor-locked to Conner hard drives. You could try using XT-IDE bios (if your laptop has an ISA expansion port). Or try sourcing a working Conner hard drive. I also wonder, if other hard drives could be somehow hacked to show Conner vendor string.
Great job, How about taking a Thinkpad T60 and upgrading the Platen and electronics to modern standards that will allow running Windows 11 with great graphics. That would be awesome if you could pull it off. Thanks for your time.
Sounds good!!! Repairing a vintage laptop with modern components is really a great idea!!! Keep sharing useful stuff like this!!