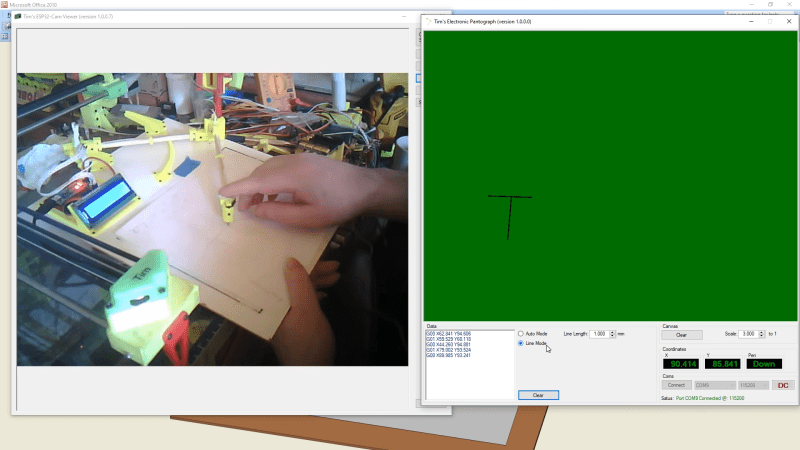
Pantographs were once used as simple mechanical devices for a range of tasks, including duplicating simple line drawings. [Tim] decided to make a modern electronic version that spits out G-Code instead.
The design relies on a 3D-printed pantograph assembly, mounted upon a board as a base. A pair of Hall effect sensors are mounted in the pantograph, which, along with a series of neodymium magnets, can be used to measure the angles of the pantograph’s joints. The Hall sensors are read by an Arduino Nano, which computes the angles into movement of the pantograph head and records it as G-Code. This can simply be displayed on the attached LCD display, or offloaded to a computer for storage.
[Tim] explains the basic theory behind the work in an earlier piece, where he built a set of electronic dividers using the same techniques. He didn’t stop there, either. He also built a more complex version that works in 3D that he calls it the Electronic Point Mapper, which can be used to generate point clouds with a 3D-capable pantograph mechanism.
It’s a neat way to learn about geometry, and could even be useful if you’re doing some work in tracing 2D drawings or measuring 3D objects.
https://youtube.com/watch?v=25-7GnLkfDI%3Ffeature%3Doembed%26autoplay%3D1


Using GIMP’s Path Tool we trace lines and drawings of scanned images. Then export the paths into an SVG File. Then import the SVG file into libreCalc to convert the SVG points into lines and splines. (linuxcnc supports the spline command while GRBL uses arcs and lines). Using libreCalc create a column with the G Code commands which we then copy to text file and run.
After doing this a few times you get good at pasting in the spreadsheet code to create a command for an arc or a line. You can also add preamble and post code. Then just copy and edit that spreadsheet for your next job. Someday we’ll have to write a few macro commands to automatically generate the code from the SVG text.
If you get real good you’ll create the paths using the direction you want the bit to move.
Forgot to mention that we use libreCalc to scale from Pixels to inches or mm too.
Also we could import the svg file into inkscape and have inkscape convert from svg to gcode.
Your youtube video is set to autoplay. It started playing in my rss feed and I couldn’t figure out where the sound was coming from.
At least the video starts calmly and didn’t make me choke on my coffee.
There should be consequences for something like this… I mean enabling auto-play takes effort, it’s not something you do by accident.
In the days of the Apple ][, there was a company that made a similar kind of pantograph for that computer. It just used potentiometers to measure the joints, and it plugged into the joystick (paddle) port of the computer. The default system routines to read potentiometers only gave 8-bit results, which I think was not accurate enough for this device, so they had custom software to read the pots and compute the x/y values from the angle data.
The pointer was actually a small magnifying glass with a dot marked in the center. It was a simple, elegant device, though I think it was also not cheap. I can’t remember the price, but it was most likely over $100.
Back in the very early 80s a school friend and I built our own version of the VersaWriter after seeing the ad in BYTE. We used cheap carbon pots as we could not afford wire wound ones. I did the hardware and my friend wrote the code for a simple paint program. Unfortunately the results of trying to draw straight lines was not that good, unsurprisingly.
Thank you for mentioning the name of the device. I had tried searching for it, but wasn’t able to come up with anything.
Anxiously awaiting Tim’s 4-Dimensional Pantograph.
Add a dial to the 3D pointer to move in/out of the 4th dimension.
I first read that as 3D printer. How awesome would a 4d printer be?
This video auto-plays in my rss feed for some reason. Very annoying.