Anyone who’s anyone on the internet these days occasionally streams content online. Whether that’s the occasional livestream on YouTube or an every day video game session on Twitch, it’s definitely a trend that’s here to stay. If you want to take your streaming session on the go, though, you’ll need some specialized hardware like [Melissa] built into this livestreaming backpack.
[Melissa] isn’t actually much of a streamer but built this project just to see if it could be done. The backpack hosts a GoPro camera with a USB interface, mounted on one of the straps of the pack with some 3D printed parts, allowing it to act as a webcam. It is plugged into a Raspberry Pi which is set up inside the backpack, and includes a large heat sink to prevent it from overheating in its low-ventilation environment. There’s also a 4G modem included along with a USB battery pack to keep everything powered up.
The build doesn’t stop at compiling hardware inside a backpack, though. [Melissa] goes into detail on the project’s page about how to get all of the hardware to talk amongst themselves and where the livestream is setup as well. If you’d like a more permanently-located streaming setup with less expensive hardware, we have seen plenty of builds like this which will get the job done as well.
No matter how often you wash your hands, ABS keycaps will eventually exhibit shine wherever you strike them the most. And that’s the problem right there: the shine might be okay if it were somehow uniform across the surface of the keycaps, but instead it just tends to make one feel seen. And since there’s really nothing you can do except to replace your keycaps (or start with PBT), you might as well embrace the shine, right?
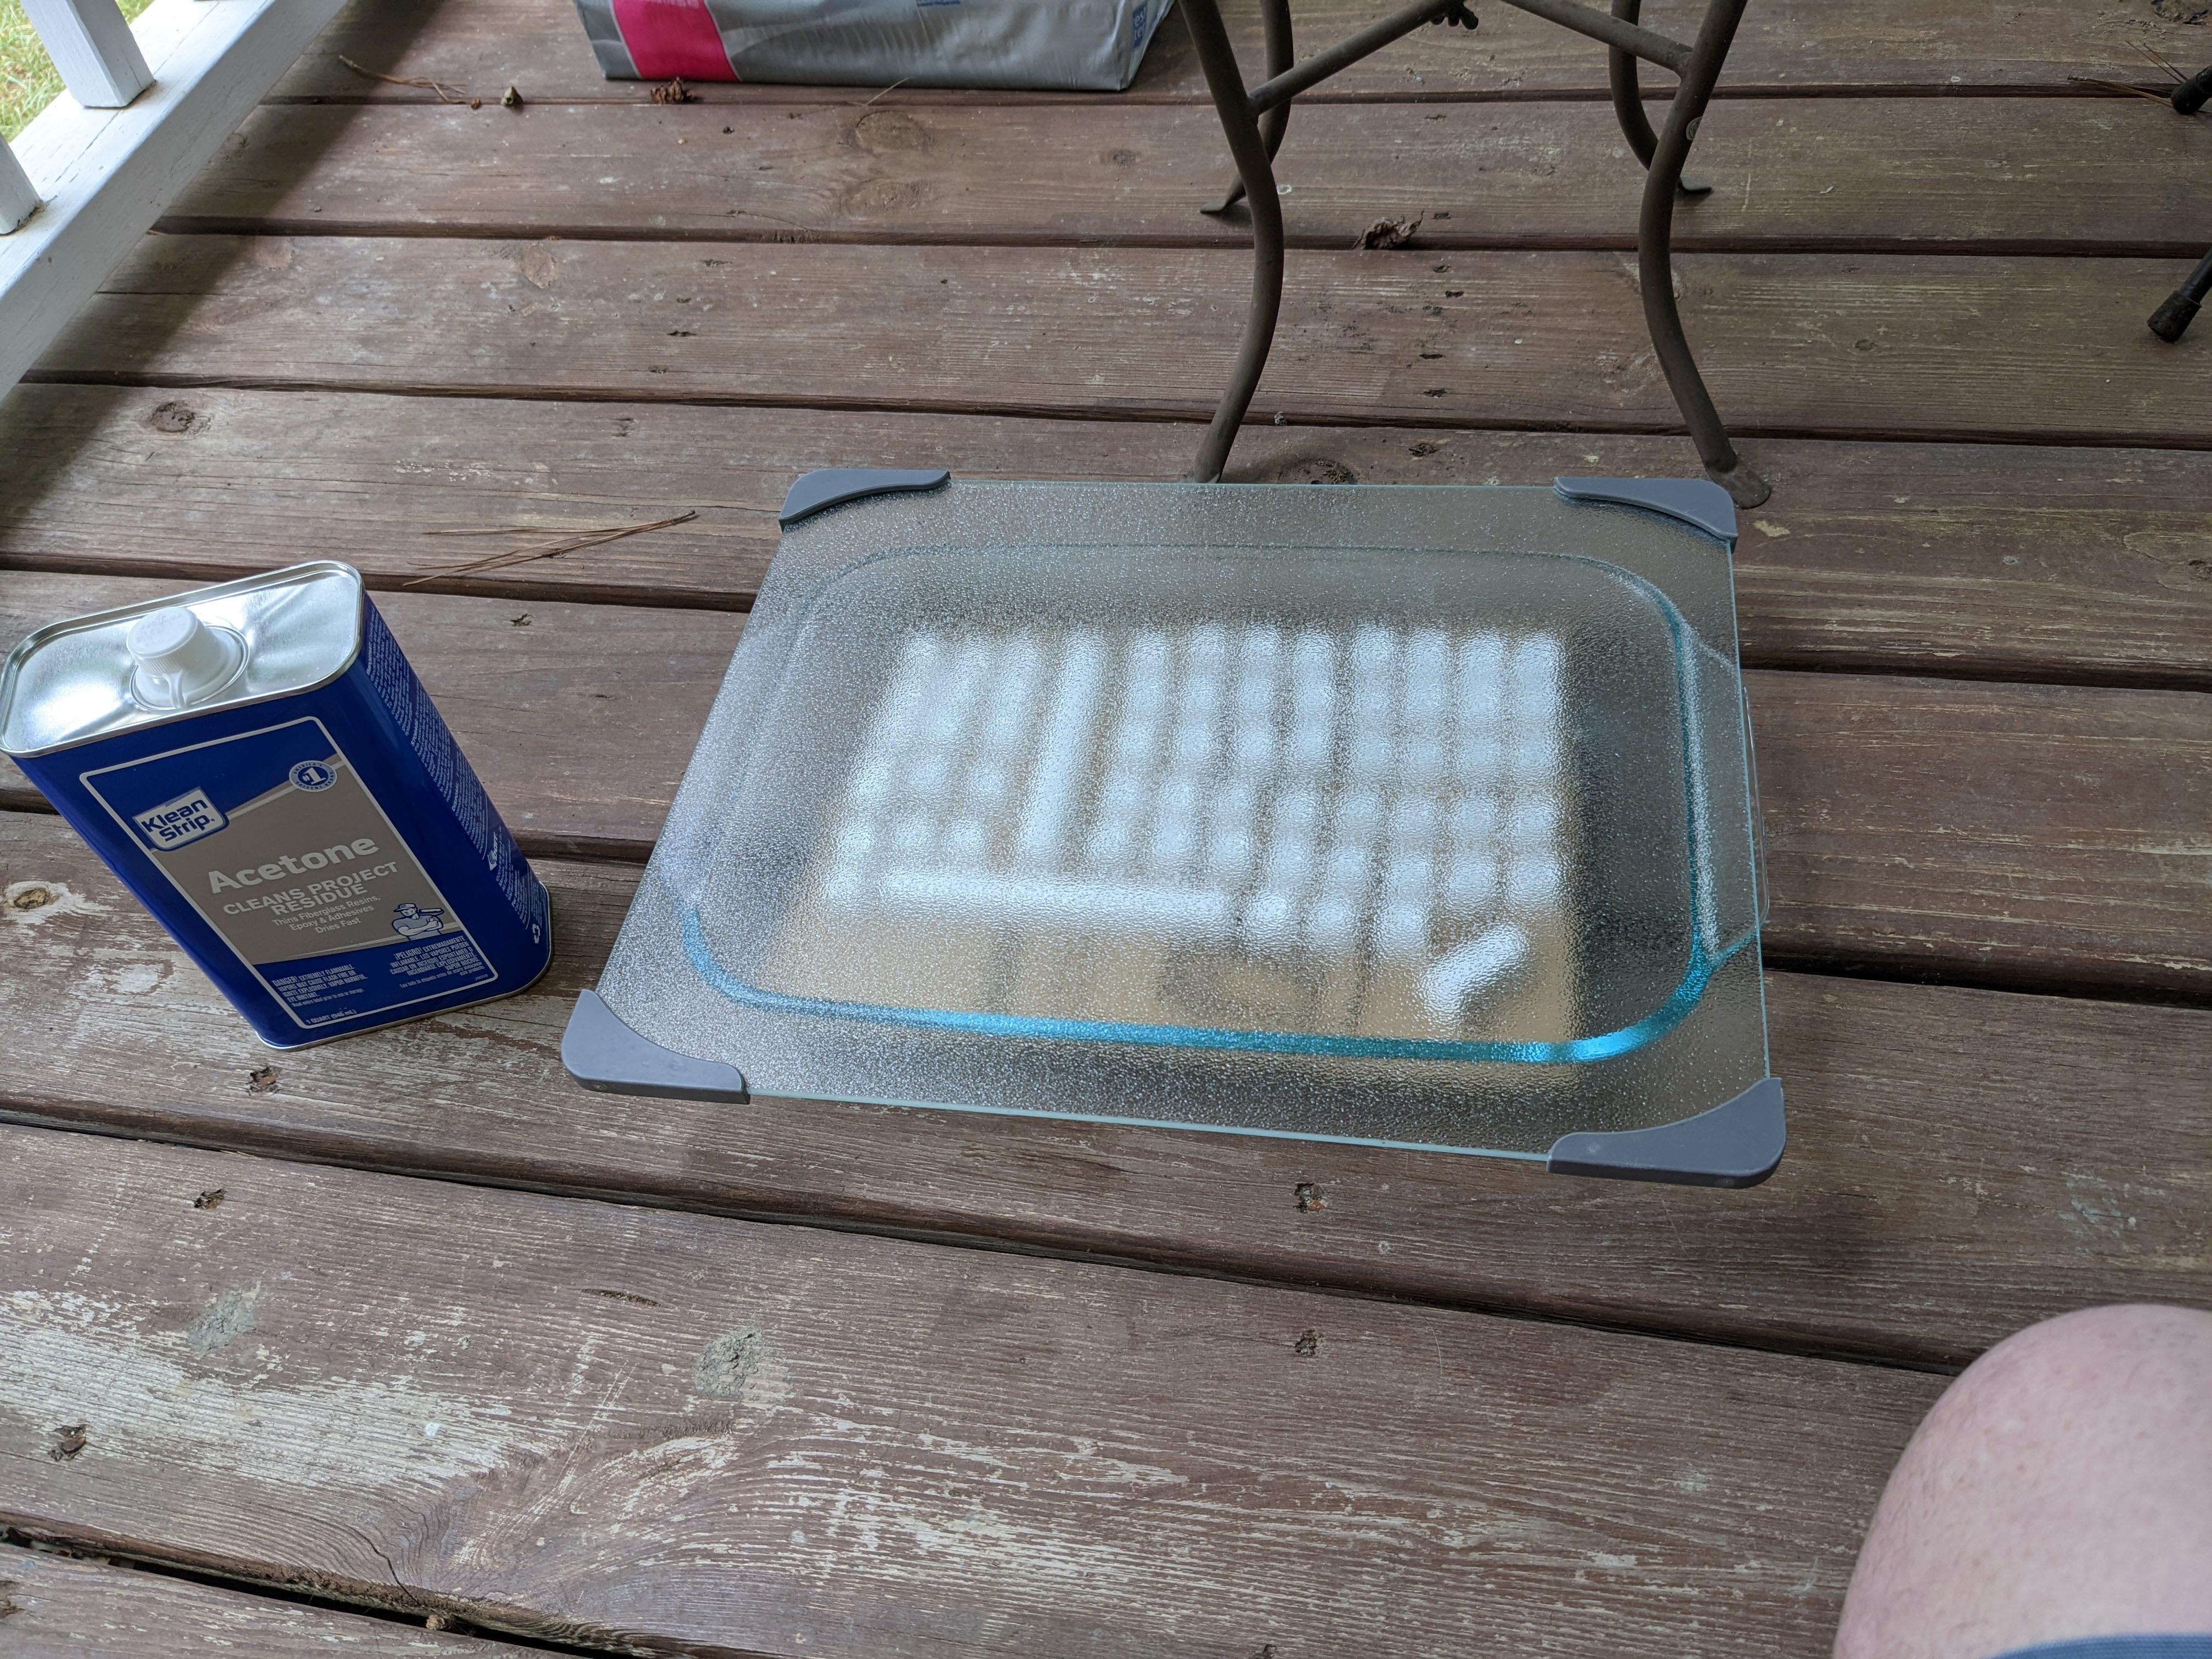
Well, that’s how [mmalluck] feels, anyway. He recently experimented with using acetone vapors to refinish a set of keycaps from Drop, making them super-duper shiny in the process. Now, the operative word here is vapors, because straight acetone would acid-wash those ‘caps faster than you can say ‘bad idea jeans’.
So to that end, [mmalluck] poured acetone in a glass cake pan, used a piece of cardboard to separate the keycaps from the acetone, and covered it all with a glass cutting board. It doesn’t take very long to achieve a good result, and [mmalluck] says it’s better to err on the side of too-short instead of risking reaching the point of too-melted.
We wouldn’t have thought we’d react this way, but we think they’re pretty cool looking. That particular set seems just right for this process, which makes them look like new old-stock typewriter keys or something. Looks way better than the ultra-personalized shine of usage. What do you think? Let us know in the comments.
Rǒta counts things. That’s it, really — what a cheap little mechanical counter does with a thumb press, or what you can do by counting on your fingers and toes, that’s pretty much all that Rǒta does. But it does it with style.
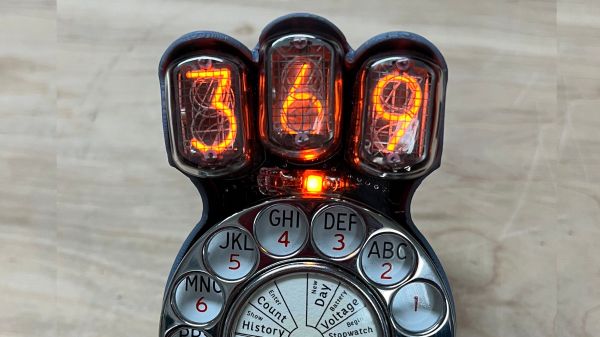
OK, that’s being a bit unfair to [Kevin Santo Cappuccio] — Rǒta has a few more tricks up its sleeve than simple counting. But really, those functions are just icing on the cake of how this little gadget looks. Rǒta was built around the unbeatable combination of a rotary telephone dial mechanism and a trio of Nixie tubes. The dial looks like it might have come from an old pay phone, all shiny and chrome and super robust looking. The Nixies sit atop the dial on a custom PCB, and everything, including the high-voltage supply for the tubes, is enclosed in a 3D printed case with a little bit of a Fallout vibe.
But what does this thing do? Actually, quite a lot. It’ll count up and down, using whatever number you dial into it. You can either increment from zero, or enter any three-digit number as the starting count. It keeps track of the score of your golf game, if that’s your thing, and it’s also got a stopwatch function. You can even dial up a display of the current battery voltage. It takes some ingenuity to use just the dial for all these functions, but that’s as easy as dialing the operator used to be — dialing 0 puts it in menu mode, allowing you to access any of the functions printed on the card in the center of the dial. It’s pretty clever — check out the video below.
Is it particularly useful? Perhaps not. But when has that ever been a measure of the worth of a project? Something like this rotary cellphone might be more useful, but sometimes looking great is good enough.
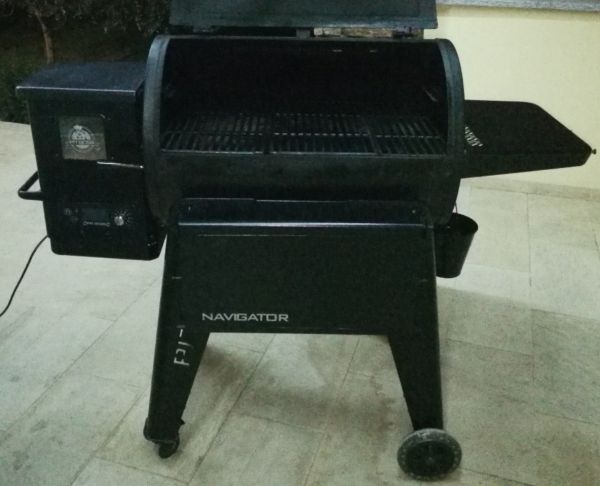
In certain parts of the world, cooking meat in a regionally-specific way is a critical part of the local culture. From barbeque in the American south to boerewors and braaivleis in South Africa to Montréal smoked meat in French Canada, almost every location has its cookout specialty. So much so that various manufacturers of the tools used for these foods include all kinds of gadgets to monitor the sometimes days-long process of cooking various cuts of meat. [megamarco833]’s smoker, though, includes some tools of his own design.
The smoker is made by a company called Pitboss and includes a rotary switch and control board for maintaining a precise temperature in the smoker. The switch works by changing the voltage value sent to a small microcontroller. By interfacing an ESP32 to this switch, [megamarco833] can remotely change the smoke level and temperature of the smoker. On the software side, it uses a combination of Node-RED and Domoticz to handle the automation and control.
For a cookout that can last hours (if not days) a remotely accessible smoker like this is an invaluable tool if you want to do something other than manually monitor the temperature of your meat for that much time. And, if your barbeque grill or smoker of choice doesn’t already have an embedded control board of some type, we’ve seen analog cooking tools adapted to much the same purpose as this one.
Thanks to [Peter] who sent in the tip and also helped [megamarco833] with the reverse-engineering of the control board!
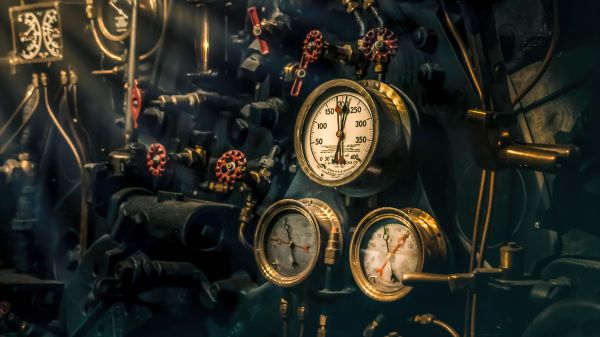
Ask the average person about steam power and they’ll probably imagine a bygone era, a time when the sky was thick with smoke belched out by coal-burning locomotives and paddle-wheel ships. Steam is ancient technology they’ll say, and has as much to do with modern living as the penny-farthing.
Naturally, the real story is a bit more complex than that. Sure the reciprocating steam engine has fallen out of favor as a means of propulsion, but the concept of running machinery with steam is alive and well. In fact, unless you’re running on wind or solar power, there’s an excellent chance that a steam turbine is responsible for keeping the lights on in your house.
In honor of all things steam, we invited Quinn Dunki to host this week’s Hack Chat. Those who follow her exploits on YouTube will know that over the last several years she’s built a number of steam engines, from miniature scratch-built models to commercial kits that can do useful work. Who better to answer your burning steaming questions?
The first questions in the Chat were logical enough, with several users wanting to know just how hard it is to build a functional steam engine if you don’t have access to a mill or other means of high precision machining. According to Quinn, while better equipment will certainly allow you to build a more powerful and efficient engine, the basic premise is so simple that it doesn’t take much to get one going. If you’ve got a mini lathe and some bar stock, you’re half way there. In fact, they are so forgiving that she opines you’d struggle to build a steam engine that didn’t at least turn over — though that doesn’t mean it will necessarily run well.
Naturally some comparisons were drawn between the complexity of building a steam engine and putting together a small internal combustion engine (ICE). But while they might seem conceptually similar, Quinn cautions that building a working ICE from scratch is far more difficult and dangerous. She explains that steam engines have a tendency to fail gracefully, that is, mistakes in the design or poor tolerances generally result in little worse than wasted steam and extra noise. Comparatively, a faulty ICE design could easily turn into a bomb on your workbench.
Of course, that’s not to say working with steam is without danger. You certainly don’t want to underestimate high pressure steam, which is why boilers that are over 6 in (15 cm) in diameter or that produce more than 100 PSI will often require the operator to be licensed. They may also need to be inspected, though Quinn notes that your local government official probably won’t be able to make heads or tails of your homebrew build — so if you need an official stamp of approval, your best bet is to find a local model engineering club or society that would have the appropriate connections. All that being said, most hobbyists make it a point to try and get their engine running at the lowest pressure possible, so unless you’ve got something really massive in mind, you’ll probably never need to build up more than 60 PSI or so.
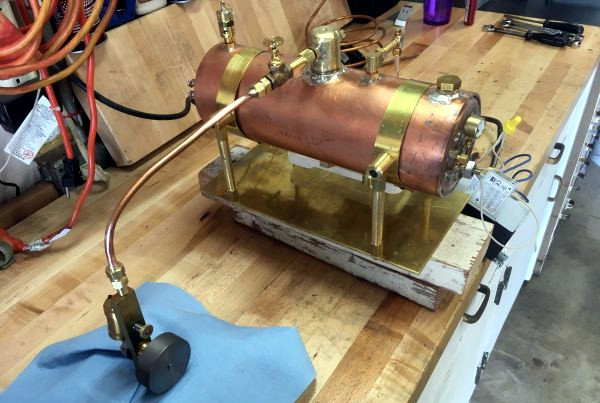
A DIY electric boiler and small steam engine.
Another topic of discussion was how to fuel the boiler itself. An electrically powered boiler is perhaps the easiest option, but is somewhat counterproductive if you hope to put your steam engine to useful work. Coal and wood fires are an option, and indeed were commonly used in the old days, but the soot and ash they produce can be a problem.
Quinn also notes that if you’re using such fuels, you need a way to quickly remove the firebox from the boiler in an emergency; something she likens to the starship Enterprise having to eject its warp core before it explodes. For her own projects, Quinn says she uses either an electric element or a camping gas burner.
While most of the questions during this Hack Chat had to do with the work Quinn has already featured on her blog and YouTube channel, naturally there were questions about where things go from here. After she completes the steam engine kit she’s working on currently, she says she’ll likely to back to another scratch-built engine. She also plans on coupling some of her engines to generators, as she’s gotten many requests about seeing these machines put to useful work. Looking further ahead Quinn says she’s interested in casting her own bronze and aluminum components, and specifically wants to work with “lost PLA” casting, which is a variant of lost wax casting that uses a mold based on a 3D printed part.
We’d like to thank Quinn Dunki for stopping by the Hack Chat and sharing some insights into this unique hobby. While a handcrafted boiler or a desktop steam reciprocating engine might not be on the average Hackaday reader’s list of future projects, it’s still fascinating to see how they work. We owe much of our modern life to steam power, so the least we can do is show it some respect.
The Hack Chat is a weekly online chat session hosted by leading experts from all corners of the hardware hacking universe. It’s a great way for hackers connect in a fun and informal way, but if you can’t make it live, these overview posts as well as the transcripts posted to Hackaday.io make sure you don’t miss out.
Editor-in-Chief Elliot Williams and Managing Editor Tom Nardi are here to bring you the best stories and hacks from the previous week (and maybe a little older). Things kick off with news that the Early Bird tickets for the 2022 Hackaday Supercon tickets sold out in only two hours — a good sign that the community is just as excited as we are about the November event. But don’t worry, regular admission tickets are now available for those who couldn’t grab one out of the first batch.
This week there’s plenty of vehicular hacks to talk about, from John Deere tractors running DOOM to a particularly troublesome vulnerability found in many key fobs. We’ll also lament about the state of 3D CAD file formats, marvel at some retro-futuristic photography equipment, and look at the latest in home PCB production techniques. Wrapping things up there’s a whole lot of cyberdeck talk, and a trip down silicon memory lane courtesy of Al Williams.
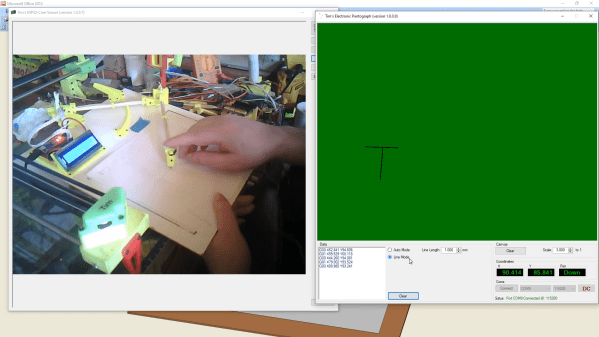
Pantographs were once used as simple mechanical devices for a range of tasks, including duplicating simple line drawings. [Tim] decided to make a modern electronic version that spits out G-Code instead.
The design relies on a 3D-printed pantograph assembly, mounted upon a board as a base. A pair of Hall effect sensors are mounted in the pantograph, which, along with a series of neodymium magnets, can be used to measure the angles of the pantograph’s joints. The Hall sensors are read by an Arduino Nano, which computes the angles into movement of the pantograph head and records it as G-Code. This can simply be displayed on the attached LCD display, or offloaded to a computer for storage.
[Tim] explains the basic theory behind the work in an earlier piece, where he built a set of electronic dividers using the same techniques. He didn’t stop there, either. He also built a more complex version that works in 3D that he calls it the Electronic Point Mapper, which can be used to generate point clouds with a 3D-capable pantograph mechanism.
It’s a neat way to learn about geometry, and could even be useful if you’re doing some work in tracing 2D drawings or measuring 3D objects.