Heat-set inserts are a great way to embed mechanically-strong, threaded parts into a 3D print. For installation, all that is required is an economical soldering iron; something most of us already have.
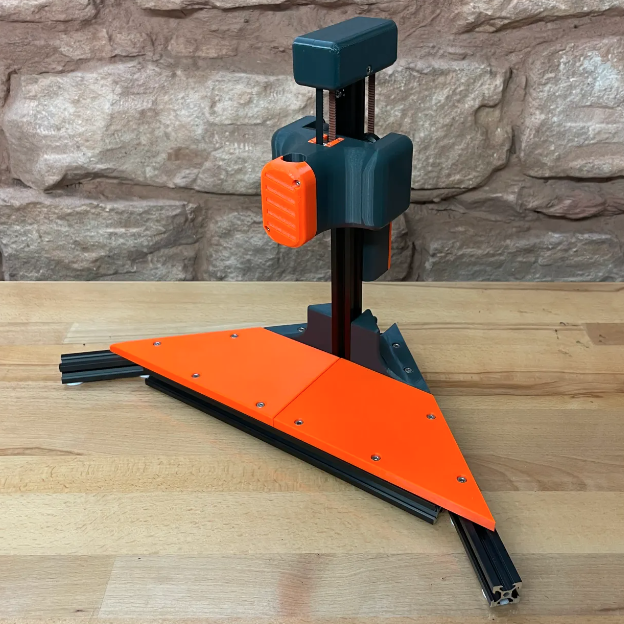
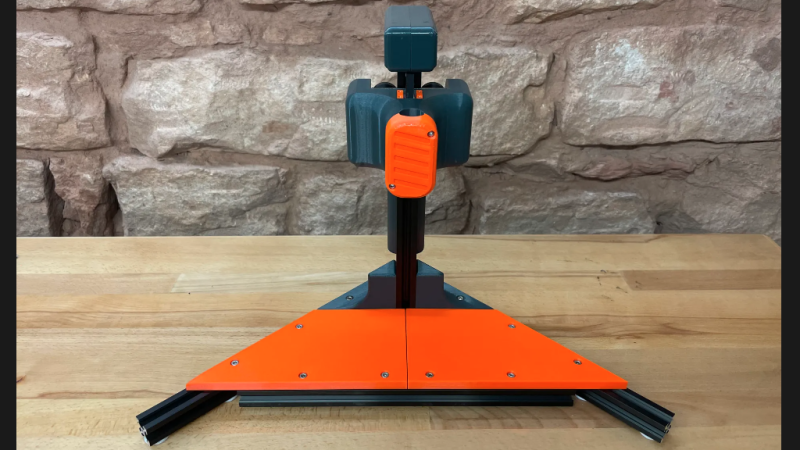
That’s fine for a handful of occasional inserts, but when a large number need to be inserted reliably and cleanly, something a little more refined is called for. That’s where [virchow]’s threaded insert press design comes in. It adds 3D-printed parts to an aluminum extrusion frame to create a press that smoothly lowers a soldering iron directly up and down, with minimal effort by the user.
The holder for the soldering iron is mounted to a small v-wheel gantry that rides along the vertical extrusion. The gantry features a counterweight to take care of resetting the position of the iron. [Virchow] admits that the design could be considered unnecessarily complicated (hence the “UC” in the name) but on the other hand, there’s nothing like doing a hundred or so inserts to make one appreciate every bit of comfort and stability.
Heat-set inserts aren’t difficult to use, but a little technique goes a long way. Spend a few minutes reading Joshua Vasquez’s guide on the optimal way to use them in 3D-printed parts to make sure yours not only go in straight but end up looking great as well.


A Juicero moment. A simple arbor press could be recycled when it reaches its end-of-life (unlikely) or is not needed anymore. This just generated quite a bit of plastic waste.
That’s a bit harsh. The Juicero is an underwhelming piece of work that also requires superfluous consumables. This is merely an over-engineered DIY-contraption that makes light(er) work of something that not everyone needs. And this isn’t a for-profit construction either. You can argue necessity, but let’s leave the Juicero where it belongs, in its own realm of bullshit existence.
“Generated quite a bit of plastic waste” by converting part of a roll of plastic filament into a device which will see active use for an extended amount of time, isn’t likely to obsolete ever or break during normal use, isn’t exposed to the elements or anything else which would cause premature end of life? That’s one hell of a stretch.
I gather that you’re deeply jaded about 3D printing, and I can understand why you would have such strong bias, but it would be way more constructive railing against the thousands of printed fidget spinners and cute little bookmarks and printer tests and figurines and keychains and wall art than actual usable, useful, fairly minimal projects which also happen to use plastic.
While he COULD have made an attachment for an arbor press, there’s nothing wrong with building your own tool for a job. It looks nicely done. And he made it himself. Sometimes the making is as important as the having and kore desirable than buying.
Yesss! Now you’re talking my language. I’ve been trying to find a simple 3D printed clamp that will allow a drill press chuck to hold a soldering iron. I have a small, bench-top drill press. This would require the fabrication of the fewest parts, while ensuring the threaded insert is seated perpendicularly to the part and not at an angle. Unfortunately, so far I haven’t been able to find such a clamp.
‘Cause everyone has an unused arbor press just lying around?
The cheapest one I see on Craigslist today is $75. Fleabay has a few that are cheaper than that but they are so small. I’m not sure you could press into much more than sheet material once you lose some depth for the heating element.
Ok, not entirely out of reach but still maybe enough to be worth printing instead.
Also not sure exactly how you suggest mounting the heating element.
Or my favorite method—put an old tip on my soldering iron and just stick it through the heated insert and push it in.
An alternative to the Aluminium extrusion and 3D printed route, is one of those drill presses made for ordinary hand drills. I believe variants for Dremel’s exist as well.
A bonus is that it can be used for other tasks which require precision applications of vertical pressure, such as grommets, snap fasterners, hole punches etc. And it can deliver more vertical pressure.
You still need to manufacture some pieces yourself (3D or otherwise), but it is an alternative, especially for those who prefer multi-use tools. Depending on the task at hand, 3D prints may do, but you may have to do some hardwood or metal work.
Good point. And I have one of those….
Hadn’t thought about heat-set inserts, though I’ve used threaded inserts in wood. Definitely a solution worth adding to the toolbox.
An arbor press would be cheaper. You don’t need a good one. If you make a jig to hold the hot end, it can be removable, and you can still have an arbor press as well.
Its literally named Unnecessarily complicated.
Which it is. I’m struggling to see why all the plastic exists on it. The linear rollers are in a metal enclosure, I’m not sure why the pulleys on the top can’t just be exposed. The work surface is a large flat piece probably better served by some kind of stock and a drilling guide. Or better yet screw the “gantry” to a good piece of plywood or something pre-existing.
I like the idea of a press guide, but I also like not wasting a bunch of stuff when re-purposed materials are available.
If it’s only reason for existence is virchow wanted the challenge of creating it, then it it’s existence is to be applauded.
Your struggle to see why it wasn’t done this way or that way is a subset of a greater personal struggles to accept that your knowledge of virchowms resources and skill set is imperfect, and your posting is useless gatekeeping.
As a scientist once said, “The proof of a system’s value is its existence.”
(http://www.cs.yale.edu/homes/perlis-alan/quotes.html, nr. 104)
Is there some slicer trick to allow one to make the walls of the hole for the threaded insert thicker than the default wall thickness?
Maybe some very thin spokes (cuts) radiating from the hole could add material. Similar in spirit to the techniques people (e.g. Tom Stanton) are using to trick vase mode into making solid areas or multiple holes.
To complete the look, you could make some of these in the orange filament:
https://www.printables.com/model/79562-3030-extrusion-cap
(Or, start with those and make some that also act as feet.)
Something just feels off for an article to state “(hence the “UC” in the name)” without ever actually having the whole name in the article.