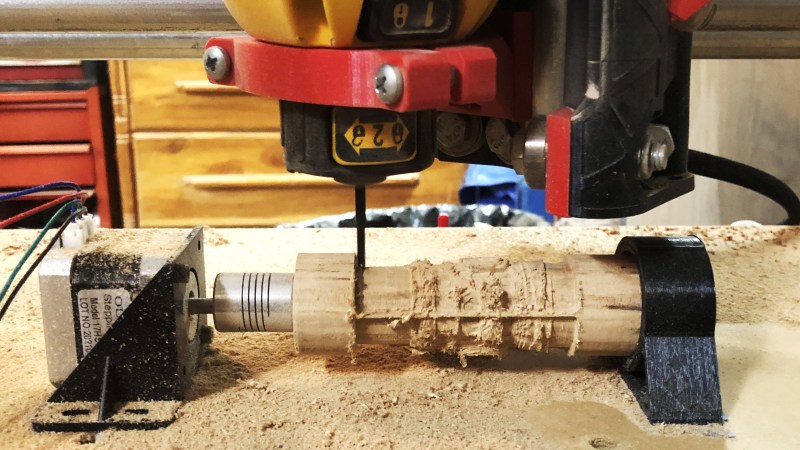
[legolor] brings us a great, cheap rotary axis to add to your small 3 axis CNC mills. How are you going to generate G-Code for this 4th axis? That’s the great part, and the hack, that [legolor] really just swapped the Y axis for the rotation. To finish the workflow and keep things cheap accessible to all there’s a great trick to “unwrap” your 3D model so your CAM software of choice thinks it’s still using a linear Y axis and keeps your existing workflow largely intact. While this requires an extra step in Blender to do the unwrapping, we love the way this hack changes as little of the rest of your process as possible. The Blender script might be useful for many other purposes too.

The results speak for themselves too! We thought the 3D printed parts were suspect in a CNC setup, but for the small scale of game pieces and milling wood, the setup is stable enough to produce a surprisingly accurate and detailed finish. If you want to try the same approach with something larger or a tougher material, [legolor] has a suggestion of a tailstock setup that’s still under $100 USD.


I struggle to get mine to work well on just 3 axis – these look great
Can it machine frozen meat?
Username checks out.
Reminds me of the time my dad decided to make steaks using the 12″ radial arm saw.
(Didn’t think to cut the cow into thinner slabs *before* stuffing it in the freezer.)
The sawdust stank up the shop for weeks.
That’s why old the butcher shops that used sawdust on the floor replaced it every single day.
My grandmother would use granddad’s tablesaw to cut up chuck and ribs when he was off at work, and he was all “I dunno why it always smells bad in the woodshop: I clean it up regularly.” When I inherited that saw I spent a LOT of time cleaning it out.
This looks interesting… I tried something similar on mine but found it was incredibly difficult to align everything, and impossible to get sufficient holding force with just a stepper.
Call me cynical, but you’d expect at least some footage of actual carving in the video…
I got a massive nema42 stepper for mine, with a 4:1 reduction belt. (As in, I bought something like this with a nema23 and it was grossly inadequate, so I rebuilt the front end to fit a 42.) What I found is that if you’re right on axis it does pretty well, especially if it’s not a very large piece — ie, low moment of inertia. But if you’re trying to do work where you’re loading against the stepper rather than on the centerline, you have to take very small cuts. In this setup, where he’s remapping Y, cutting on centerline is inherent so this is the best-case scenario. I’m writing my gcode by hand and going off-axis, so I have to deal with the stepper’s holding torque being adequate to fight the spindle. This is really an ideal situation for either a servo or a stepper that has a closed loop control at the stepper itself, like those clearpath jobbies, or in my case (in progress, definitely not yet working) using a Mesa card and an encoder on the stepper to close the positioning loop in linuxcnc.
That is fantastic!
Fusion 360 is not free software ;-) Yes I know, you don’t have to pay for personal use, but this does not make it free software, because free is not only about the price.
Agreed, that section of the video needs to be redone using FreeCAD.
What we all want to see if one which can work for machinign metals.
So where is evidence of it actually working? I see setup, I see end product, but I don’t see any actual machining.
There is no real machining in this long video. There is only a demonstration of a not very nice intermediate result, and then beautiful resulting products. It doesn’t seem too trustworthy.
Do you think they are just doing it for the clicks?
I don’t know. But it is strange that there is no machining in the machining video. On the other hand, there are near unrealistic beautiful results.
No mention of how he compensated for the eccentricity (axis wobble) stemming from having a coupler not the right size for the motor shaft? The motor shaft looks to be around 2mm too small in diameter for the coupler.
He eventually gets a 3 jaw chuck and tail stock instead of the weak and wobbly 3D printed design shown. I would not be surprised if that is what made the parts shown. I too noticed the wobble in the little bit of video showing the wooden dowel rotating.
Thanks ,a very good idea