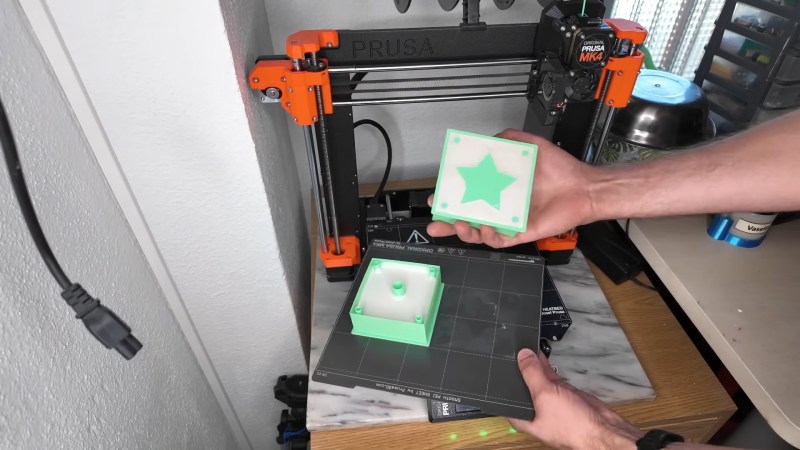
Direct 3D printing of metal remains out of reach for the hobbyist at the moment, so casting is often the next best thing, particularly given the limitations of 3D printed metals. [Denny] from Shake the Future shows us how to simplify the process with “print wave metal casting.”
The first step of printing a PLA object will seem familiar to any 3D print to metal process, but the main differentiator here is pouring the investment casting on the printer build plate itself. We like how he used some G-code to shake the build plate to help remove bubbles. Once the plaster solidifies, the plastic and mold are placed in the microwave to soften the plastic for removal.
The plaster is dried in an oven (or air fryer) and then [Denny] bolts the mold together for the casting process. Adding a vacuum helps with the surface finish, but you can always polish the metal with a generous helping of elbow grease.
If [Denny] seems familiar, you might remember his very detailed breakdown of microwave casting. We’ve seen plenty of different approaches to metal casting over the years here. Need a part in another material? How about casting concrete or resin?
Thanks to [marble] on the Hackaday Discord for the tip!


Great process and great video, this really invites to try it yourself,
Great video, makes it seem so simple when it has its own intricacies that we won’t know until we actually do it.
The process is great, I wonder if using microwave would decrease the heat up time and energy used, compared to a ohmic heating or gas powered heating?
I loved how well the crucible insulation was done, it was cold enough to be picked up by hand while the crucible inside contained molten metal!
No guarantee of anything, but it takes my setup (copied directly from Denny’s) 5 minutes on high to melt 250 grams of copper, which my propane furnace can’t do at all. However, for 2 kilos of aluminum, I can’t even fit that into a carbide crucible that fits into the microwave, and that’s 14 minutes in the propane furnace. My use case for the microwave melting setup is small amounts of high temperature metal.
I’ve followed this creator’s YT series on metal casting with a microwave. He is very inventive and has a way to find solutions and ever simplifying the molding and casting process. For each negative aspect, he finds a solution to improve the design, from building a crucible and heating mantel to now reducing the effort of burning the wax/pla from the molds. While I expect there will be limitations in this design, I currently believe this is one of the easier and safer methods around. Much safer than the galvanized bucket with plaster, at least.
It comes to the point where I have to try it now, as I’d be very useful for making lock parts and other mechanical systems. As an improvement to this design, I’d add half circles to each side of the print, and use a ball bearing to act as locating points for the mold halves.