
It is a common problem: I have a USB device on a computer out in the shop, and I want to use it from the comfort of my office. What to do? Well, you could remote desktop into the distant machine. But, honestly, I always find any remote desktop more than ssh clunky and somewhat undesirable. Fortunately, Linux can do virtually anything if you only know how to do it. So, this time, I’ll show you how to transport a USB device over your network. Of course, I have a network that reaches out to the shop. It should be a simple matter to tell my desktop machine that one of its USB devices lives across the network. Well, it wasn’t that simple, but it is doable.
The Tools
The whole thing involves a program called usbip. That should be the end of it, but of course, it isn’t. In order for this to work, both machines on the network will need some kernel modules and a daemon on the server: the machine with the USB devices to share.
You may be able to install usbip from your package manager. On Ubuntu, it is in the linux-tools-common package, so a simple apt-get might give you everything you need. I wasn’t so lucky.
I use a custom kernel (xanmod), so I had a problem. While I had the kernel modules, I didn’t have the client tools and the ones in the standard repository are tied to your kernel version. Running the stock versions gave me an error message. So I had to find a way to make things myself.
Here’s what you need in the way of kernel modules on the server: usbip_core, usbip_host. You also need usbipd (the daemon). On both machines, you need the control program, usbip. On the client machine, you need the vhci_hcd module. If you can get all this working and with compatible versions, you are pretty much home-free.
In my case, I had to download my kernel source and find the tools/usb/usbip directory. Normally, you can build everything with the Makefile in tools/, but this seems to be a special case. You run the autogen.sh file to create the build setup. Then do a ./configure and a make. A make install will finish things up. Just be sure that where it installs for you is where you run the tools in the next steps.
The Pi Connection
Many people use a Raspberry Pi as a sort of USB server. In that case, the setup is pretty easy:
sudo apt install usbip hwdata usbutils
That should get you everything you need. For that matter, if you run a pretty stock version of Ubuntu, you might try:
sudo apt install linux-tools-generic linux-cloud-tools-generic
For anything else, you’ll need to do some homework.
Setup
Assuming you have everything ready, you need to do several things. First, you must load the modules on both the server and the client. Then, you need to run the daemon on the server. You can bind one or more USB devices to the server using the command line tool. Notice that the USB device has to be free; once you bind it to the server, you can’t use it directly anymore.
You’ll then connect with the client. Again, one client acquires the device, and that’s it. It can’t be shared. Sure, you can release it, and someone else can get it. Or the server can drop it, returning the device for local use. However, while the server has the device, only one client can use that device at any given time.
Loading the modules is easy with modprobe, although over the long term, you probably want to add them to /etc/modules-load.d so they will load at boot time. For now, on the server, try:
sudo modprobe -a usbip_core usbip_host
On the client:
sudo modprobe -a vhci_hcd
You’ll also have to run usbipd on the server. You can do that in any way you usually run a daemon, including systemd, rc.local, or whatever. For now, just run it as root from the command line.
You need to find at least one device to share, so from the server try:
sudo usbip list -l # -l for local
This will give you a list of devices. What you want is the “bus id.” Suppose it is 4-3.1. You’ll bind that device to the server:
sudo usbpip bind -b 4-3.1
Now, from the client, you should be able to see the device:
sudo usbip list -r myserver.local # use your server name or IP
You can then attach to it:
usbip attach -r myserver.local -b 4-3.1
Commands
A good first test is to share a USB drive over the network. There are other ways to do this, but it is easy to see that it works with standard software. Here’s a transcript, assuming root prompts on both server and client, along with all the preliminary setup:
server # usbip list -l

...

- busid 5-2.1.2.3 (0781:5575)
SanDisk Corp. : Cruzer Glide (0781:5575)
...

server # usbip bind -b 5-2.1.2.3

client # usbip list -r 192.168.1.2   # or whatever IP/address

Exportable USB devices
======================
- 192.168.1.2
5-2.1.2.3: SanDisk Corp. : Cruzer Glide (0781:5575)
: /sys/devices/pci0000:00/0000:00:01.2/0000:01:00.0/0000:02:08.0/0000:08:00.3/usb5/5-2/5-2.1/5-2.1.2/5-2.1.2.3
: (Defined at Interface level) (00/00/00)

client # ls /dev/sd*    # see what hard drives are available before sharing

/dev/sda  /dev/sda1  /dev/sda2  /dev/sda3

client # usbip attach -r 192.168.1.2 -b 5-2.1.2.3
client # ls /dev/sd*
/dev/sda  /dev/sda1  /dev/sda2  /dev/sda3  /dev/sdb  /dev/sdb1  /dev/sdb2  /dev/sdb3
client # mount /dev/sdb3 /mnt
client # ls /mnt

... output of ls ...

client # umount /mnt
client # usbip port

Imported USB devices
====================
Port 00: <Port in Use> at High Speed(480Mbps)
SanDisk Corp. : Cruzer Glide (0781:5575)
3-1 -> usbip://192.168.1.2:3240/5-2.1.2.3
-> remote bus/dev 005/028

client # usbip detach -p 00  # 00 is port number from above

server # usbip unbind -b 5-2.1.2.3    # release from server, too
Note that you have to detach by port number, even though everything else takes a bus ID, which is somewhat dynamic across reboots. Also, if the system suspends, you may have to reshare the device.
To summarize, you can use variations of the list command to show local or remote devices. If you ask the server to show you remote devices on 127.0.0.1, you can easily see what devices are exported. On the client, the port command shows you what’s connected.
On the server, you bind or unbind devices. On the client, you attach and detach.
Once the device attaches, it looks like any other USB port on your system. Pretty cool!
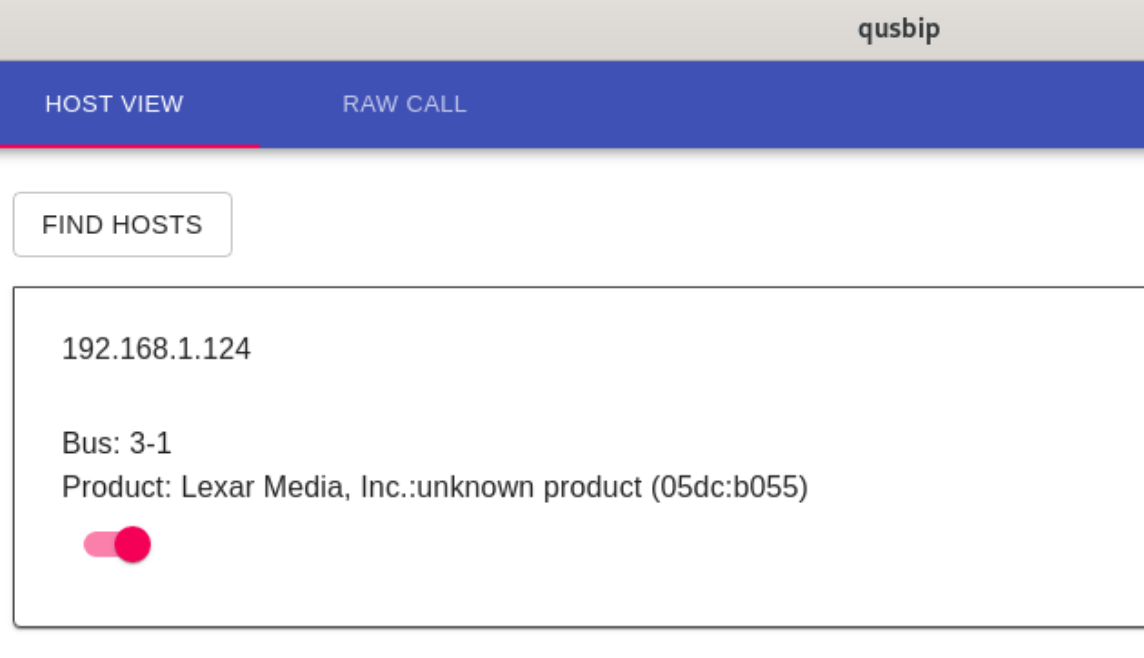
If the command line isn’t your thing, we noticed a Hackaday.io project aimed at creating a Qt GUI for the client work. It doesn’t seem to be active, but it might be something to try or someplace to start.
The Windows Connection
There are two clients for using USB devices on Windows. The newer one requires you to be in test signing mode and has several other warnings. It originally forked from an older version that some people prefer and may support the server part, too. I haven’t tried it, so if you want to explore using Windows, you are on your own but do report what you find in the comments.
Usually, we want our USB cables shorter, not longer. We wonder if a USB keyboard and monitor with a Pi server could make a good remote terminal.


Thanks for the tip as I’ve never heard of this. May have to explore it a bit.
I just use standard NFS. Mount an external USB drive (my drives are formatted ext4) to a folder, say /mnt/usbdrive and export the folder so every one on the network can access it (they have to mount it of course to use). I don’t have any Windoze machines in my home network however.
Keep in mind I only use the USB drive because it was something easy to visualize. But really the value is using it for things like serial ports and specialized devices. So I use it to carry audio over the network for example.
Thanks. Now it makes a bit more sense on the how this can be used… Not just for File I/O.
Yeah, I’ve mentioned USB-over-IP before in this series of articles and everyone’s response is always like “what are you talking about.” I’m amazed more people don’t know about it.
Digi actually makes networked USB hubs you just buy (using the same protocol) although there are some limitations on Linux.
I would think that you could just use old school RS-232 as a transport layer to have fairly distance USB connections as long as any given connection only needs to be between a single host and peripheral at a time.
If you utilized the full spec, a compliant DB-25 cable could carry two independent serial channels.
The trick would be in wiring and converting to and from USB signalling so as to keep things transparent to both ends without significant overhead.
I use usbip along with udev rules to automount devices across my lan. One thing about usbip is that the data is not encrypted, so to secure the connection I use an ssh tunnel. I create the tunnel from the host with the usb device to the remoteHost like this:
/usr/bin/ssh -i -C -N -R localhost:3240:localhost:3240 @
Then on the remoteHost, you can
usbip list -r localhost
sudo /usr/bin/usbip attach -r localhost -b
Hopefully this is useful for others.
My replacement args seem to have been sanitized out of the comment… Let me try using arg instead…
/usr/bin/ssh -i ident -C -N -R localhost:3240:localhost:3240 user@remoteHost
sudo /usr/bin/usbip attach -r localhost -b addr
I use a pi zero w as a hub and have a keyboard, mouse, spacemouse and streamdeck connected. The streamdeck runs scripts to switch between USB/IP hosts using https://github.com/timothycrosley/streamdeck-ui
I used usbip it to flash an usb barcode reader via a wan connection :D
I regularly use usbip on Windows 11 to interact with serial devices from WSL. It’s a very quick setup, all you need is a PowerShell (admin) one-liner to install the program and you’re set, assuming you already have a WSL2 distro installed. Install with
winget install --interactive --exact dorssel.usbipd-winand then bind and attach devices as in Al’s examples. The only differences are that you callusbipdrather thanusbipand that you specify--wsl [distro]rather than an IP address when attaching (I assume it works with remote hosts but haven’t tried myself). Also, you don’t need to attach on the client side in this case–the devices just show up.There’s not much more to it than this but the page to reference for more info is https://learn.microsoft.com/en-us/windows/wsl/connect-usb
Yeah. but the IDs of USB changes randomly, so there’s more scripting to be done. Also one has to run chmod on /dev/bus/usb//.
Unless there’s some easier way.
I have used it to access a oscilloscope mounted at the top of a mast.
Just because the editor mentioned that they have found all tested remote tools to be clunky for them. I recommend moonlight and sunshine. I’ve tried many tools as well and this one is just a far better experience than any of the ones I tried!
I wonder how usable USBIP is on latency sensitive devices that are also relatively high bandwidth, like webcams, capture devices, multi-channel audio interfaces.
I briefly tried to use it a while back with a printer, more as fun experoment than anything else. While i did get it to work, something kept breaking, making unreliable for me (do not remember what).
Anyway, setting up a print server in a VM (PCI passthrough of a USB host controller for the printer connection) seemed like (and has proven to be) a more practical and more reliable option.
You can also run USBIP on a DD-WRT (and probably OpenWRT) powered gateway router. Again, that worked for me at the time, when I tested it, but had reliability issues in my setup.
Bad. It really depends on the driver implementation. Even some devices that shouldn’t be latency sensitive do not work with this method. I have tried and failed with a Brother printer/scanner, printer works but scanner fails mid-page, even over ethernet wire.
It might be easier to use dedicated software that handles interacting with the USB devices and merely transmits the received data over the network.
That won’t help an application designed specifically to interact with USB devices, but it seems more practical than what the article seems to b describing.
I used to have an X-terminal on my garage workbench. Logging into it was visually the same as logging into my main desktop in the house.
Remote USB was on my list of goals. First I wanted to get audio working though and I never did. So I never even got to the part of trying to get USB going.
Anyway, I thought a perfect setup would be if I could permanently set a device to always be exported back to my main machine even after reboot without having to go in and set it back up.
And I wanted that device to be a USB hub.
This way everything I plug into the hub would be seen at the X-client, not the local x-server. I would still have things like keyboard and mouse plugged into other ports on the X-server and seen locally by it instead of exported.
This was my electronics bench so it would be things like Arduinos, USB chip programmers and stuff like that which I would be likely to want to plug in. Or maybe a USB stick or other storage device, that is something one might want to use anywhere.
I don’t think the software actually supports doing what I wanted. Wouldn’t it be an awesome setup though if it could be made to do that?
Last week I tried a lot to achieve this, but I always made a similar mistake:
“usbip: error: vhci driver is not loaded”
My environment: server – debian bookworm, client – windows 10 22H2
I only managed to get the share on the client with this version:
https://github.com/cezanne/usbip-win/releases/tag/v0.3.6-dev (Thanks cezanne)
Tested: Zebra bar code reader, 3 types of mouse, USB sticks: Sandisk, Adata
I was wondering why you’d go to all that trouble to access a remote flash drive instead of just using sshfs.
Being able to access remote devices like scopes or SDRs, for instance, makes a lot more sense.
USB over ip is still an out-of-tree kernel module?
I’ve got a need to pass a USB Zigbee hub into a VM on a platform that doesn’t support USB passthrough. The official solution is to add a USB controller on PCI and do PCI passthrough but maybe USB over IP would fit the bill. Thanks for the writeup.