
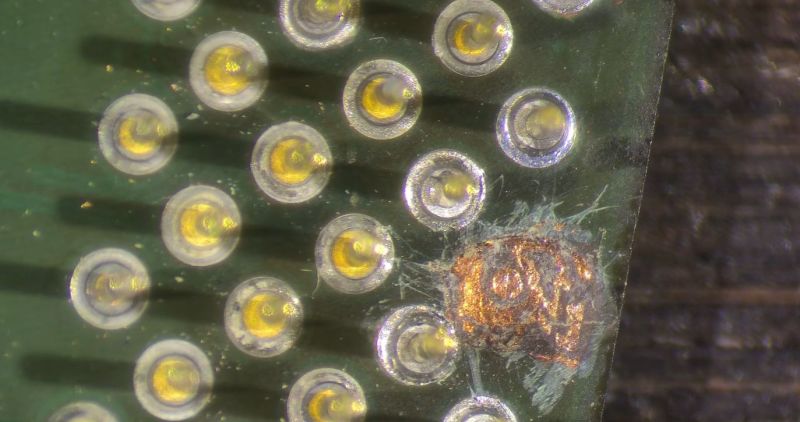
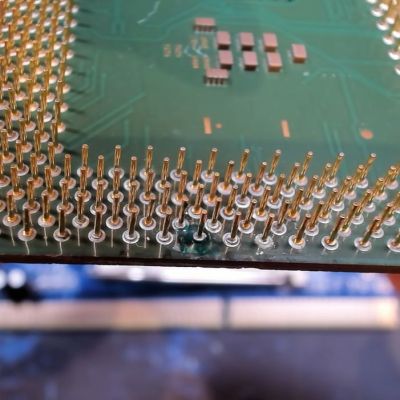
 Before moving to land grid array (LGA) packaging whereby each pin on the substrate is just a copper pad, processors commonly used pin grid array (PGA) packaging, including the still highly relevant AMD AM4 socket. With PGA you get a pin soldered onto the copper pad which inserts into the ZIF socket, rather than a fragile pin on the mainboard side. Repairing a damaged PGA pin can be easy if just the pin broke off at the solder joint, or rough if the pad was destroyed, as in the case of this Pentium III CPU that [Bits und Bolts] recently tried to fix.
In the case of something like a ground pin or similarly unimportant pin you can ignore the damage, but in this case it concerned an important pin for this 1.2 GHz Tualatin PIII core, with the damage consisting of a well and truly destroyed pad. The first step to repair the damage is thus to try and rebuild the pad, which was done using solder mask and solder.
Although a PIII-era Celeron CPU is definitely not a high-value CPU, since they have so few and such large pins they do make for useful test subjects when it comes to PGA repair practicing. In this case the affected data pad and pin appears to have been repaired successfully, with it running overclocked to 1.6 GHz and crushing similarly or higher clocked Pentium 4 and AMD Athlon CPUs of the era.












I had a Celeron with a bent pin, spent at least an hour trying to fix with a dental scraper, right as I got it perfectly straight, it snapped off. As far as I can tell, it was a NOOP because the thing still runs 20yrs later with no issue I’m aware of.
In my experience if the pin is bent more than about 30 degrees, you get one chance to bend it back and if you bend it more than that it’ll work harden and break off. I use a pair of smooth jaw mini pliers to pinch the whole length of the pin to try to get it as straight as possible in one go.
my tool of choice is a 0.7mm mechanical pencil with the lead removed
Smart!
I had a bent pin on I think an AMD K6-2 and what fit perfect was the little metal tube at the end of higher quality mechanical pencils, not the plastic bits. Slid it over and slowly bent it back till realigned. I remember it working till upgraded to one of those slot A Athlons.
Some of the newer processors may have a different size.
Mechanical pencil without the lead. Slide on pin and bend back. Stable and never failed me.
I’d do it like this: fix damaged planes (around pin) if necessary. silkscreen + clear plastic on top + UV. Scrap off just in pad. Solder to broken pad. Add a thick (or possibly folded/stacked?) copper sheet and solder. Put 1 pin into socket (could be stolen from e.g. another pin that has double ground, just solder between pins and cover with soldermask). The idea is that the pin + added thicker copper pad makes contant – the whole CPU will be pushed against it in its holder.
Way back in the day I snapped a pin off of a 486 chip.
I cut a staple to length stuck in the socket and placed the cpu carefully in place and locked it down.
It kept working for as long as I was there.
Did the same! Used the needle off of a syringe though instead. I’ve also did something similar to a vga cable. Rather than trying to straighten a handful of bent pins I simply broke them off and shoved some metal in the socket side. Syringe needles are great because the sharp end is tiny enough to bend whichever way it wants too and make a good contact without touching something else and causing a short.
I also twisted and scotch tapped all 21 (I think it’s 21) wires together when the other end failed completely and I replaced it with one from a busted monitor. And to top it off the salvaged end had a completely different labeling thing going on with the wires so I used a 9v battery and my tongue to check for continuity for every wire. I really should invest in an iron and a meter one of these days.
I also did something along the same line with a snapped pin of a socketed DIP; stuck a staple into the socket and got it to make contact with the barely-exposed leadframe
I had once Tualatin Celeron 1-1.4Ghz (can’t remember exactly – it was 25 years ago, sorry) which are delidded (doesn’t give me any overclock advantage, it was already close to the edge of that generation) and had one pin broken off completely with a pad.
Unfortunately, it was functional pin, however, can’t remember which one.
So, I traced down that pad (thankfully it doesn’t go somewhere underneath but was trace on surface), scratch down that trace, solder in thin wire and solder that poor pin to that wire. Apply a little super glue over afterwards because pull off that super thin trace or soldering was very easy.
All that was possible then because it was one of the inner pins, closest to the center, so wire doesn’t need to run around other pins. :-)
So, afterwards CPU installation procedure was as follows:
Put down that single wired pin into the socket, carefully, in right hole (marker helps :-) )
Carefully put CPU next over it, carefully not to pull that poor pin.
It works at least year or two while in my possession and God knows how much more when I sell it for router server usage back then (complete motherboard/CPU combo, not CPU alone obviously, quite cheaply, and customer doesn’t care about all that pins ordeal – it will be install and forget Linux machine).
Unfortunately, no pictures – I don’t own a camera at the moment and phones can only call back then. :-)
That sounds like the kind of hack one’d have seen pop up on one of the various computer forums back then. Glad you got it working, shame there are no pictures :)
why is everyone talking about this like its something new and none can mention the fact he made a new slocket adapter to run them