[Dino] Builds A Simple Non-contact Voltage Detector

homemade_voltage_detector

[Dino] is back with another installment of his Hack a Week series, and in this episode he is taking on what he promises will be the last transistor-based project – at least for a little while.

In the video embedded below, he shows off a homemade voltage detector circuit that he constructed using a trio of BC547 NPN transistors. The circuit is pretty simple though very useful all the same. At one end, the device has a small copper strip, which is connected to the base of the first transistor. The emitter of that transistor is daisy chained to the base of the second transistor and so on, until reaching the indicator LED.

As noted by one of [Dino’s] viewers, the circuit functions as follows:

“The front end copper strip forms one side of a capacitor, and then when you bring it near a voltage potential a super tiny current flows between air dielectric of the “cap”. This is mega amplified with the high gain BC547′s and viola, the LED lights up.”

Since the small bit of current is amplified many times over, the LED lights up even when very small voltages are present. While we might not necessarily trust our lives to [Dino’s] voltage detector, we’re sure it would come in handy now and again.

Continue reading “[Dino] Builds A Simple Non-contact Voltage Detector”

Adding An External Audio Input To The Sansa Clip+

adding_external_mic_input_sansa_clip

Workshop 88 member [Jim] got his hands on a couple of SanDisk Sansa Clip+ MP3 recorder/players from Woot, and was anxious to see what he could do with them.

The first order of business was to install RockBox, an open source hardware package built for a wide range of MP3 players. He was impressed with how robust the firmware was, though he thought the Sansa’s built-in microphone could use a bit of upgrading. Acting on a tip from a fellow square dance enthusiast, he disassembled one to see how he might add an external audio input.

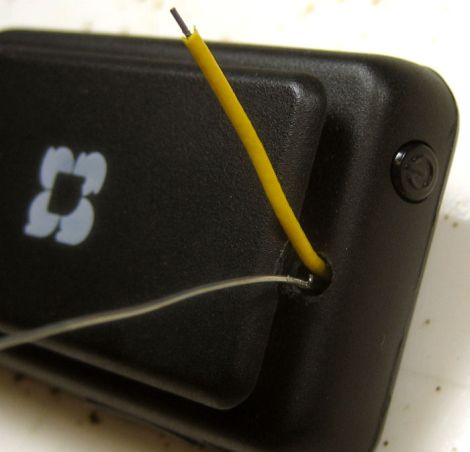
He pried the existing mic apart, and desoldered it from the motherboard, installing a small capacitor and resistor in its place. He extended some wires through the case, then powered up the unit to make sure it was still alive and well. Since things still looked good, [Jim] put some audio on the Sansa’s new inputs and sure enough it recorded the audio without a hitch.

He says that his initial guesses for the capacitor and resistor values were pretty decent, though with a bit of tweaking he should be able to get exactly the recording levels he was looking for. Not bad for a $20 audio recorder!

18650_things_to_do_with_dead_laptop_batteries

Things To Do With Your Laptop Batteries When They’re Dead

[Roy] over at GeekDad had a dead laptop battery on his hands, and decided he would disassemble it to see what useful things he could do with the cells inside. He mentions in his article that even though your laptop might be convinced that its battery is toast, more often than not just one or two cells are damaged. This may not be news to all of our readers, but is worth pointing out to those who might not be aware.

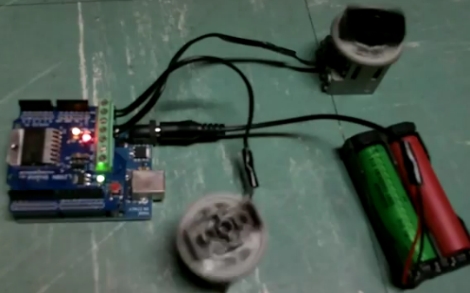
With the bad cells separated from the good, [Roy] thought up a couple of different uses for his newly acquired batteries. His initial idea was to power an LED flashlight that was made to run on the 18650 cells he recovered from his laptop – not a stretch of the imagination, but definitely useful. The second use he came up with was to pair two of the cells together in order to simultaneously power an Arduino and some small Lego motors.

[Roy] lays out all of the standard caveats you would expect regarding the care and feeding of the lithium cells, and even suggests rebuilding the laptop battery as an option for the more skilled members of his audience.

Now we understand that dismantling and re-using old laptop cells is not necessarily groundbreaking, but it’s definitely something that’s worth a bit of discussion. [Roy] admits that his two ideas fall far short of the “18650 Things” his article title suggests, so how about adding a few of your own?

If you have stripped down some laptop batteries to salvage the cells, let us know what you did with them in the comments – we would be interested in hearing about it.

Motorized Blinds Put Control At Your Fingertips

remote_controlled_motorized_blinds

While [Bremster] likes the view from his office window, he often needs to get up and adjust the blinds several times throughout the day in order to keep the glare from killing his eyes. Like any other enterprising hacker, he decided that constantly adjusting them was too repetitive, and that he could automate the process with electronics.

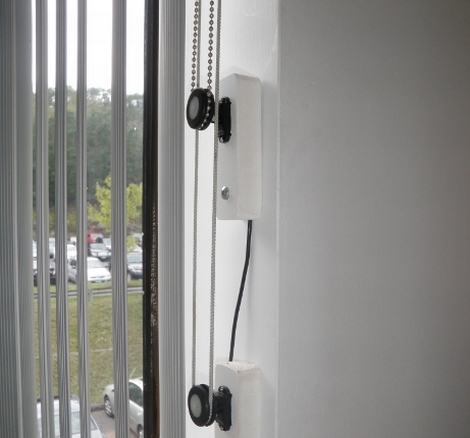
He thought that RC car servos would be a great choice to control the blinds, since they are cheap and the geared drive system offers a lot of torque at low speeds. After modifying the servos to enable continuous rotation, he set off to the hardware store in search of a way to mount them to the blinds’ looped cords.

After mounting some nylon spacers with rubber grommets on the servo arms, he installed them into a set of brackets he built and gave the blinds a spin. Now, he can easily control his blinds from the comfort of his desk with the simple flick of a switch – that’s the kind of laziness ingenuity we can respect!

Continue reading to see a quick video of his motorized blinds in action.

Continue reading “Motorized Blinds Put Control At Your Fingertips”

rfid_door_lock_tutorial

Easily Movable RFID Door Lock Is Great For Dorm Rooms

One of the first things that [Eric] hacked together when he got to college was an RFID door locking system. He found that he was often in a rush to get in and out of his dorm room, and that using a simple wireless key was a great way to streamline his days.

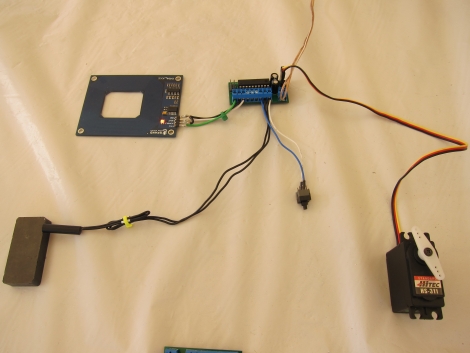
Over the years, he has refined his design, and while his original prototype was functional, it was a bit rough around the edges. In the video posted on his site, he thoroughly explains how his system was built, and shows off the revisions he has made over time. One key consideration when building this system was the fact that the installation had to be non-permanent. Since schools typically frown on physically altering your rooms, he found a non-intrusive means to mount his system in the way of zip ties and foam board.

His RFID door lock looks to work quite nicely, and we especially like the inclusion of the reed switch to ensure that the system knows if the door has been opened or not. If you have about half an hour to spare and are interested in building an RFID entry system of your own, be sure to check out [Eric’s] video below for all the details.

Continue reading “Easily Movable RFID Door Lock Is Great For Dorm Rooms”

Broken Xbox 360 Converted Into An Arcade Controller

xbox_360_arcade_controller

Like many Xbox 360s out there, [Aaron’s] console succumbed to the dreaded three red lights of death. Since it seemed to be unrepairable, there wasn’t a lot that could be done with it other than throw it out. Rather than be wasteful however, [Aaron] thought of a great way to reuse the console’s outer shell.

He’s a big fan of fighting games, and as everyone knows, this genre is best played with an arcade-style controller. The 360’s shell seemed to be just about the right size, so he gutted it and got busy constructing his own arcade controller. With the console cleared out, he installed all of his arcade bits, wiring them to a stripped third-party Xbox controller.

He installed a four port USB hub to the front of the console, enabling use of the 360’s USB ports, and rewired the power button to trigger the Xbox Guide button. A shiny coat of paint later, and he was ready to play.

Keep reading to see a short video of [Aaron’s] arcade stick in action, and check out the picture gallery he put together of the controller’s construction.

Continue reading “Broken Xbox 360 Converted Into An Arcade Controller”

Stoplight Indicator System Signals When Your Servers Are In Distress

stoplight_server_monitoring_system

At [mkanoap’s] office, they have a software package that monitors their various servers’ health, but they wanted a separate indicator to display the status of their most critical systems. They put together a simple list of criteria for their display, including the ability to view the status without a computer, and that it share the same red/yellow/green indicators that their monitoring software utilizes. With those needs in mind (and a few hundred dollars to spare), [mkanoap] and crew rushed out to buy a stoplight, then got to building.

Their status system is self-contained, utilizing an Arduino and Ethernet shield to control the stoplight. The Arduino was programmed to act as a web server, and responds to GET requests by toggling any of the three mains-powered lamps using relays. [mkanoap] then created a handful of scripts that check the status of the critical servers every 5 minutes, updating the stoplight accordingly. The whole setup was tucked neatly inside the light’s housing, before being mounted on the wall in their office.

[mkanoap] says that the reaction to the stoplight as been great, though they had to install dimmer bulbs so those people sitting near it were not blinded. His writeup is incredibly detailed should anyone want to construct one of their own, and who wouldn’t?