Want To Play Pong On Your Oscilloscope?

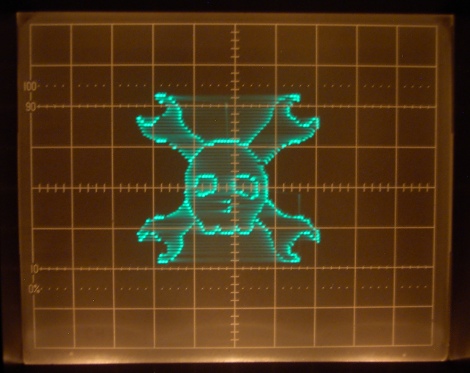
I always have! I don’t know why, but I like the idea of using an oscilloscope screen as a general use video display. Why not? In my case it sits on my desk full time, has a large screen area, can do multiple modes of display, and is very easy control.
Making an oscilloscope screen do your bidding is an old trick. There are numerous examples out there. Its not a finished project yet, so be nice. It is actually rather crude, using a couple parts I had on hand just on a whim. The code is a nice mixture of ArduincoreGCCish (I am sorry, still learning), and includes the following demos:

  1. Simple low resolution dot drawing
  2. A font example
  3. A very quickly and badly written demo of pong

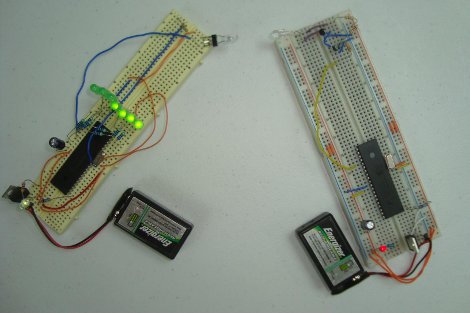
The software runs on an Attiny84 micro controller clocked at 16Mhz, paired up with a Microchip MCP42100 dual 100k 8 bit digital potentiometer though the Attiny’s USI (Universal Serial Interface) pins. This is a fast, stable and accurate arrangement, but it requires sending 16 bits every time you want to change the value of one of the potentiometers so its also very piggy. I was just out to have some fun and did not have a proper 8 bit DAC. This was the closest thing outside of building one.
Join us after the break for pictures a (very) brief video and more.

Continue reading “Want To Play Pong On Your Oscilloscope?”

Light LED’s With FIRE!

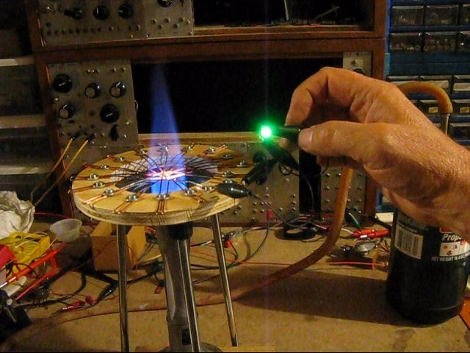
Reader [Andre] sent in a link which tells us all about this “cool” Copper Oxide Thermoelectric Generator. All you need is a bit of solid copper wire and a gas torch. Burn the wire so it gets a nice coating of oxide. From there, it is a matter of making the 2 sections of burned wire cross at a point and heat up only one of the wires. Whichever is hotter forms a cathode and whichever one is cooler is the anode.

Just one of these junctions is enough to produce a few hundred millivolts, but the author takes it a step further, well 16 steps further. He made a ring of these junctions in series, which is enough to light a bright blue LED. While the author notes that this thing is producing a considerable amount of voltage, its not producing much amperage. This could come in very handy in the future, like if you need some additional LED lighting for your camp stove.

IR Communications Tutorial

After seeing our communications via light post , reader [Chris] dropped this handy little link in our inbox. A very good tutorial about using infrared to enable communications between 2 pic micro controllers.

The tutorial covers all the parts you will need, physical wiring and schematics with notes detailing each section of the circuit. It then goes on into basic IR theory, and a simplified push button circuit you can make to see that it is, in fact, working. Once you get the exercise built on some breadboards, he does some software and get some results from it all.

Now in the end this little device was hitting in the neighborhood of 9600 baud, but had to be pretty darn close to each other with a direct line of sight. These  are often accepted as a couple of drawbacks to IR technologies. IR, which has never really vanished, is in use on a lot of devices though. The more you know the better off you are.

Join us after the break for a quick video!

Continue reading “IR Communications Tutorial”

Security Bot 2

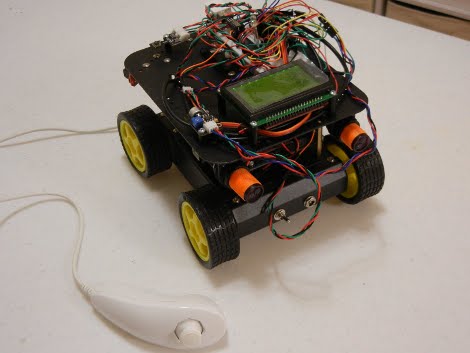
[William] Had originally built a little Security Bot to roam the halls of his house while he was not at home. He wanted a little bit more and started Security Bot 2 to include a good pile of sensors and add pan and tilt control to the onboard camera. Thanks to ordering pieces from a “who’s who” list of robotic and electronic hobby shops, the bits and pieces quickly arrived making assembly less tedious.

Packed on board of the 4WD platform are IR switches, IR distanace sensors, line sensors, Ultrasonic sensor, an Xbee (soon to be replaced with a WiFi Shield), pan/tilt brackets/servo, SpeakJet/TTS/Speakers, LCD, battery, serial motor controller, ICSP pocket programmer, Arduino Mega 2560, DSS Circuits Fuel Gauges, plus motors, batteries, camera, leds and a wiimote connection. (whew, that’s a mouth full)

All put together with some perfboards, breakout boards and a lot of jumper wire Security Bot2 is ready to patrol your premises!

SMD Soldering With Gas

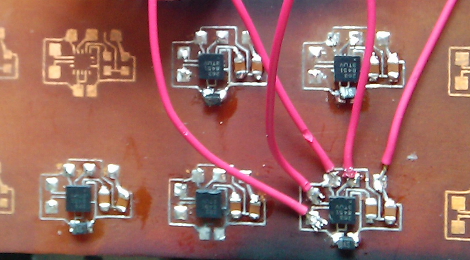
[desimon] had a wanted to use some accelerometer chips, but their 3x3mm 16-VFQFN packages made it pretty darn hard to solder by hand. While there are endless ways to approach this, we found this one peculiarity interesting from his use of a gas torch, though it is pretty much hot air reflow.

A PCB for the tiny devices is etched and tinned, the pads have a healthy but not overdone amount of solder applied to them. A liberal coat of flux, rough alignment of the chip and a few gentle passes from the torch and the hobby grade solder melts while the surface tension pulls everything into final alignment.

Having personally used a hot air gun a number of times (and also burning my hand about the same number of times) the localized heat of the torch does make more sense, and there is virtually no heat up time for it either, though it appears just as easy to scorch the board. It is a live flame so be careful!

Unlocking Wireless PC Locks

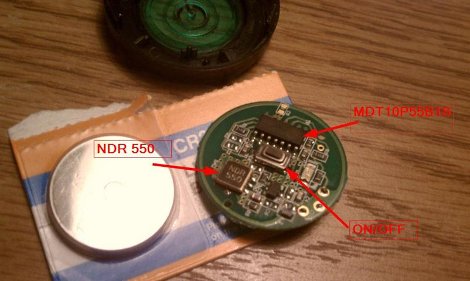
[Mr.Pantz] pointed us to a web page  we thought you would find interesting. It deals with hacking PC lock using a Universal Software Radio Peripheral (USRP) . Following the good practice of logging off or locking your workstation while your not at it, it is darn hard to get users to actually do it. These little gadgets are a 2 piece setup one being a usb dongle, and the other being a badge like device. If the badge is turned off or is a distance greater than ~30 feet, the signal is lost and the pc is locked.

From there all you really need to do is figure out what frequency the 2 are running at and what codes are flying around the air. Some careful eyeballing suggests that this operates in the 434MHz region much like remote lock dongles for your car, and once the device is apart some research of 2 of the IC’s on board confirms it. Using the GNU Radio spectrum analyzer a signal is quickly captured, dumped, and a script is created to send the signal back out, provided you have the correct hardware to do so.

Is That A Rom In Your Locket?

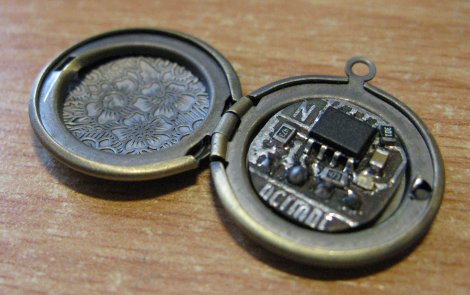
[Andrew] recently ordered some lockets to bejewel them with some LEDs but got a bonus small locket for free with the order. Not really having a plan for the small locket it kind of sat around until finally some inspiration hit. Meet the ee-locket which contains a tiny circular pcb with a 64k eeprom, a few passive support components and a male pin header on the back so you can quickly plug it into the micro of your choice.

While the uses of such a thing may not be obvious at first, just sitting down writing this I thought of a few applications, such as some form of key and lock system, mission impossible dreams, or just going full out geek at your next job interview. Its a pretty spiffy idea no matter what its used for, and we just love it when people shove electronics where no one expect them.