LED Dog Collar

LEDs make everything better, right? What about your dog? [Ken] tries it out on one of his frisky dogs who loves to run whenever she gets out with a LED dog collar. It’s an off the shelf dog collar sporting 5 blue LEDs, and is powered by an attiny2313 micro controller, which makes adding / changing light sequences quick, easy, and also allows for future upgrades. Small PCB’s are made and to help keep minor amounts of the wild from frying. the electronics parts are encased in hot glue, and the whole thing is powered by 3 AAA batteries.

While it’s an early test of the device, and there is more to come, like an automatic trigger as [Sunshine] bolts for the door, but it seems like a great help while chasing after a runaway dog in the dark.

Join us after the break for a quick video.

Continue reading “LED Dog Collar”

Backlit Buttons And Panels

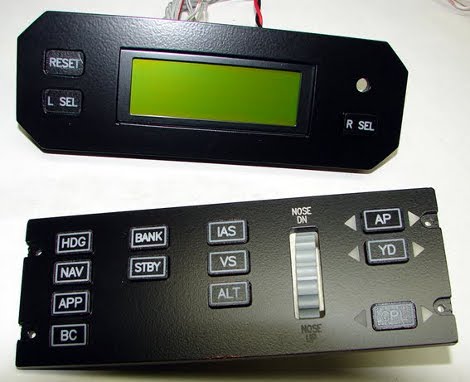
“Kick the tyres & light the fires” is a blog by [Ruscool Electronics] that is focused on building a cockpit simulator from scratch, and while the blog is loaded with all sorts of nifty information, reader [Brian] pointed out one entry which explains how to make back-lit control panels out of acrylic sheet, and a CNC machine.

The parts start off as clear acrylic, and cut to shape and size. Next up is a thick, but uniform coat of paint so the panels are opaque , then its back off into the CNC machine for engraving. What is engraved is now a frosty white, ready for leds behind.

The end result looks fantastic and professional, though, we are left thinking of how to pull off the same look, sans CNC.

Ideas?

Driving A Salvaged LCD

[bill2009] wanted to reuse some common seven segment LCDs, but the question was how to drive them. Armed with a couple application notes from [Microchip] and [Atmel], an oscilloscope and an Arduino, he has made a proof of concept which shows its not super hard to drive those little reflective LCDs that so many devices have.

First finding out that these things are indeed multiplexed, he went on to what is needed to drive them, which is about +-2 volts difference from the backplane, next up was to find a donor, which he found readily at Staples, in the form of a “clocky” style run away alarm clock.

After poking around watching what signals do to the different segments on the LCD he whipped up a little circuit to control the display from the Arduino. The positive and negative voltages the segments require are made possible by the use of a set of pull down resistors, and switching pin modes on the micro controller.

These small type segmented LCDs are everywhere, and being able to use them is a big bonus.

Sumo Style Robot

[Jeremy] really wants to compete in some sumo bot wrestling, and in order to have robotic sumo wrestling one needs to make some robots, which is what [Jeremy’s] build log is all about.

The framework is made out of 6mm thick Sintra (which is a type of closed cell pvc foam sheet) with the use of a CNC machine, using a “sliced” design style framework. Two geared motors fit snug inside of the internal frame and some wheels from solarbotics are attached to the ends. The arrangement of the drive wheels in the rear, and the large front end, seems like good design for the end application where robots doing turtle flips would be no fun.

Keeping in mind this is not a fully finished project and therefore does not have code or schematics posted, the brains of this beast are in a similar state, and should be pretty easy to figure out. The thinking is handled by an atmega328, and fed by IR sensor pair’s to detect light / dark patterns on the floor or table, and an array of proximity sensors along the front and sides to detect its opponent.

And while this project may not be completed, it at one point was dead and set aside, after some months [Jeremy] went back for a second look and found out that the only thing dead about it was the power regulator and h-bridge and quickly got it back up and working, which is a good reminder to not give up, even when it does go poof.

Update To Stairmonster

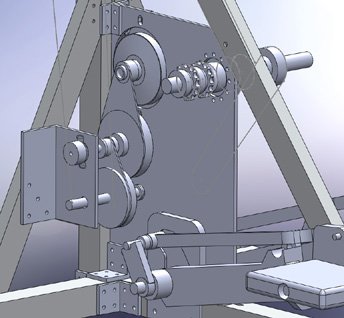
The “Stairmonster 2” is an updated verison of the hyper speed, home brew stairmaster we covered back in November. It still features most of its original version’s features including a very sturdy construction, heart rate monitor, and 320×240 touchscreen interface. What is new about the Stairmonster 2 is its handlebars. V1 used stationary bike handlebars, which would be good for pull-ups or other similar exercises, but did not do much good while on the machine.

Version 2 on the other hand uses moving handles, when paired with the resistance of the machine allows the user to simulate a climbing action. The handles are also attached to rotary slip clutches so there is only resistance on the pulling cycle and not while retracting, which could be very bad at the speed this thing can run at.

Overall a good improvement to an already impressive machine, though don’t expect to see us climbing on it anytime soon.

Arduino Asteroids

[nootropic] has a new game out for hackvision, “Asteroids”! We covered the hackvision back when it first started appearing in October of 2010, and hardware wise it has not changed. It is still an Arduino (software) compatible system sporting a atmega328, video and audio out connections (uses the TV-out library), all on a nice printed circuit board that, with the buttons, resembles a game controller.

While its impressive enough to run arcade inspired games like space invaders, pong, and tetris while using Arduino and a library, Asteroids takes the game up a notch.

Features that make Asteroids well, Asteroids include a mod of the TV-out library so that bitmaps can fly over each other without erasing the pixels under them to give that old time vector arcade feel, and “point in polygon” style collision detection, which is a fantastic / efficient way of collision detection against irregular shapes, limited platform or not.

Last but not least, [nootropic] used the set_vbi_hook() function of the tv out library in sound design, going from simple “beeps” and “boops”, to “beeps” and “boops” on a constant 60Hz refresh (in the case of NTSC) that allows him to build more complex sound effects that give a nice arcade sound of explosions and laser blasts.

Join us after the break for a quick video, and remember, this is Arduino based so if you already have an Arduino, you can add the supporting hardware (buttons, resistors, and RCA jacks) and run any of the games currently offered, or make your own.

Continue reading “Arduino Asteroids”

DIY Clapper

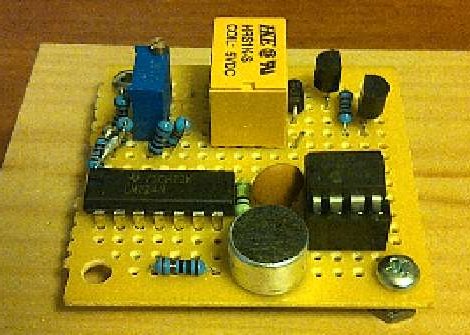
[Patrick’s] latest Instructable walks us though making a clap clap on / clap clap off type of switching circuit, similar in use to that sometimes popular commercial product seen on TV. He does this by using a standard electret microphone, half of an LM324 op amp, a voltage comparator and a PIC micro controller.

The operation of the device is as simple as its wiring, the microphone picks up sound and produces a signal, that signal is stripped of its DC component and fed into the op amp, after 2 stages of amplification the signal passes though a voltage comparator, and if the sound was loud enough a timer is triggered on the pic. Two claps within the specified amount of time, the micro then switches on a relay which can toggle your outside appliance (keeping the load in mind).

On the last page [Patrick] also gives a rough outline of how to make a single clap on / off variant using a 555 timer and some flip flops. Join us for a quick video after the break, and be sure to check this one out.

Continue reading “DIY Clapper”