$400 DIY CNC Machine Is Surprisingly Simple!

Once you go CNC you never go back — they’re just too darn convenient! [Drez20001] shows us how he made one for around $400. Who needs expensive roller bearings when you can use drawer slides?

That’s right — the majority of the cost of this CNC machine are the things you can’t really get any cheaper — the servos (or steppers), the belts (or leadscrews), and of course the motor controller plus computer interface. Everything else? Plywood, drawer slides, and a bunch of fasteners can be had for next to nothing!

He had wanted to build a CNC for years but was mostly hesitant in doing so due to the cost and apparent complexity of the build, but when he started to look into it seriously, he found it really wasn’t the case! It’s built on the basic gantry system design where the X-axis drives a bridge containing both the Y and Z-axis. It’s not a heavy duty machine by any means (he just has a small dremel-like tool in it right now), but for his purposes it’s more than enough.

One rather creative way he saved a few dollars is with his motor couplers — he’s actually taken rubber gas line and cinched it onto both shafts, which he says works quite well!

Continue reading “$400 DIY CNC Machine Is Surprisingly Simple!”

Pi-Powered Anti-Cat Trap Soaks Felines And Other Animals

[Joshua] has a problem with cats. They like pooping in his garden. He decided to take action with this awesome automated and humane cat trap.

Now just to clarify, he did attempt a few other alternatives before going all out in cat defense – the easiest solution would be to get a cat of his own, but alas, he’s not a cat person.

The system uses a Raspberry Pi in a waterproofed housing with a PiCam. He’s written some rudimentary code to make use of the PiCam Python Library which also allows him to record pre-cat-trapping footage, much for our enjoyment. When motion is sensed, the Pi trips a 24VAC solenoid water valve, which turns on the sprinkler and quickly soaks the intruder.

Stick around after the break for quite a few videos catching the furry little buggers in the act!

Continue reading “Pi-Powered Anti-Cat Trap Soaks Felines And Other Animals”

Upgraded Nerf Gun Keeps Track Of Your Ammo

[Paul] and his buddy [Jonathan] recently had a zombie themed Larp event to go to, so in the spirit of making the experience more realistic, they decided to upgrade their Nerf N-Strike Stryfe gun.

They started by cracking open the gun and making note of the available space for a few bells and whistles. Luckily, thanks to traditional plastic injection molding practices — there’s lots of room!

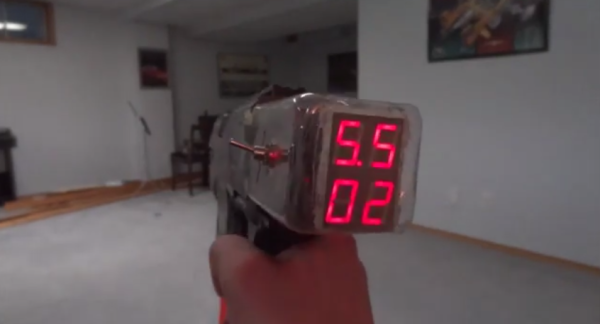
Upgrades include a magazine sensor, a jam sensor, a trigger sensor and a voltmeter to make the gun a little bit smarter. A knockoff Arduino Pro Mini takes in all these inputs and outputs it to a 7-segment LED display for easy visibility. Our favorite part is the ammo sensor, which keeps a tally of how many shots you’ve used. It’s simply an IR photo-diode and IR transistor in a Darlington configuration, connected to the GPIO interrupt pin on the fake Arduino.

Continue reading “Upgraded Nerf Gun Keeps Track Of Your Ammo”

Break Your Frames? Print Some New Ones!

3D Printed Glasses

When [Aaron Porterfield] accidentally broke his glasses frame, he saw it as an opportunity, rather than an unfortunate event. He decided he was going to design and print new ones to fit his prescription lenses!

The trickiest part of taking on a project like this is designing the glasses around the pre-existing lenses, because typically, lenses are cut to fit the frame — not vice versa. This is why we’re particularly impressed with the project. [Aaron] was able to 3D scan the lenses using his camera phone and Autodesk’s 123D Catch software (free) to create the lens model! Once he had the lens outline, he scaled it properly by measuring its maximum dimensions with calipers.

Now this is where it gets a bit tricky – designing the frames. [Aaron] is using Rhino to do the design work, and he’s actually laid out the steps quite nicely for anyone who wants to attempt something like this. He describes in detail matching the curvature of the lenses, designing the frame around it, and of course actually fitting the lenses in place.

There is a small caveat to this entire project — The frames were printed on a nice Stratasys polyjet 3D printer — due to the geometry, it might be a bit tricky (or impossible) to print on a traditional hobby FDM machine. Regardless — making your own glasses is some serious geek cred. Nice work [Aaron]!

Basic IKEA Wall Light Turned Smart And Colorful!

WallLight-DSO

[Daniel Grießhaber] just finished his latest electronics project and we love it. He’s taken a cheap IKEA wall/ceiling light and completely revamped it with RGB LEDs and intelligent control!

The light he used is called the LOCK, and is a mere 1.79€ or about $4 USD. It has lots of room inside and a nice frosted glass dish which results in some excellent color diffusion. He’s designed a nice big circular PCB to mount inside off of the original mounting points. To do this, he used Eagle software to create the circuit and his trusty desktop CNC to mill out the pattern.

To control the lights he used an old ATMega8 board he had lying around, with the Arduino IDE and WS2812 Library. He’s outlined all the parts, diagrams and program sketches you’ll need to make your own over on GitHub.

Unfortunately the LEDs aren’t quite as bright as he hoped so it can’t be used to replace a regular room light — instead he plans on turning this project into sunrise timing light in one of the bedrooms — still pretty cool!

VU Meter Record Player Lights It Up

vu_intro-image

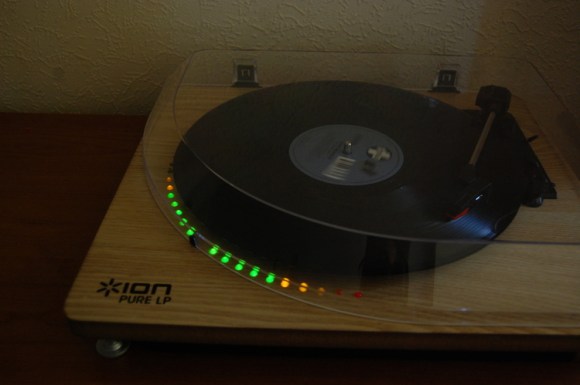
[Michaël Duerinckx] was given a turntable for his last birthday from his fiancée — since then he’s started collecting records like nobodies business. But about a month ago he started itching to do an electronics project — he decided to upgrade his record player to include a VU Meter!

As he began designing he soon realized he didn’t have all the tools he needed to do this project right — a perfect excuse to go check out his local makerspace, SoMakeIt!

He started prototyping the VU Meter on a breadboard, and opened up the record player – it was like this thing was made to be hacked. Two free connections off the power supply to power his circuit, bingo! Continue reading “VU Meter Record Player Lights It Up”

Connect 4 Robot Taunts You Before Kicking Your Butt

Connect 4 Robot

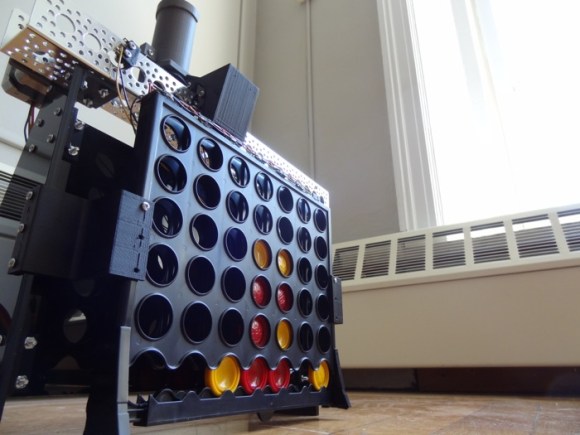
[Patrick McCabe] is a student at MIT and for his final project in his Microcomputer Project Laboratory course he decided to build a clever Connect 4 Robot.

The only criteria for the project was that you have to use the Cypress PSOC 5LP kit along with a 8051 micro-controller or equivalent (programmed in the same assembly language as the PSOC). All in all, [Patrick] had 5 weeks to work on the project.

He’s using a regular old Connect 4 game along with an assortment of custom parts. A stepper motor drives the token carriage back and forth across a 15″ aluminum channel using a timing belt. A servo releases the tokens, and all the other components, brackets, and other pieces were either made with his very own UP Mini 3D printer, or out of acrylic using the school’s laser cutter. It’s an extremely clean and well thought out build, and he’s actually uploaded all the custom part files (in SolidWorks format) online, for others to build their own.

Continue reading “Connect 4 Robot Taunts You Before Kicking Your Butt”