New HackadayU Classes: Antenna Basics, Raspberry Pi Pico, And Designing Complex Geometry

Get ’em while they’re hot: a new session of HackadayU just opened with classes from three fantastic instructors and seats are filling up fast.

Introduction to Antenna Basics — Instructor Karen Rucker teaches the fundamentals of antenna design as if it were your first year on-the-job. She’ll cover the common types of antenna designs and the fundamentals of radio frequency engineering that go into them. Begins Thursday, May 6th.

Raspberry Pi Pico and RP2040 – The Deep Dive — Instructor Uri Shaked guides the class through the internals of the RP2040 microcontroller, covering system architecture, hardware peripherals, and dipping into some ARM assembly language examples. Begins Wednesday, May 5th.

Designing with Complex Geometry — Instructor James McBennett helps you up your 3D modelling game with a course on using complex geometries in Grasshopper3D (part of Rhino3D). Dive into Non-uniform rational B-spline (NURBS) and go from simple shapes to incredibly complex objects with a bit of code. Begins Tuesday, May 4th.

Each course includes five weekly classes beginning in May. Being part of the live class via Zoom offers interactivity with the instructor and other attendees. All tickets are “pay-as-you-wish” with a $20 suggested donation; all proceeds go to socially conscious charities.

For the benefit of all, each class will be edited and published on Hackaday’s YouTube channel once this session has wrapped up. Check out our playlists for past HackadayU courses, or watch them all in one giant playlist.

You might also consider becoming an Engineering Liaison for HackadayU. These volunteers help keep the class humming along for the best experience for students and instructors alike. Liaison applications are now open.

Continue reading “New HackadayU Classes: Antenna Basics, Raspberry Pi Pico, And Designing Complex Geometry”

HackadayU Announces Rhino, Mech Eng, And AVR Classes During Winter Session

The winter lineup of HackadayU courses has just been announced, get your tickets now!

Spend those indoor hours leveling up your skills — on offer are classes to learn how to prototype like a mechanical engineer, how to create precision 3D models in Rhino, or how to dive through abstraction for total control of AVR microcontrollers. Each course is led by an expert instructor over five classes held live via weekly video chats, plus a set of office hours for further interaction.

  • Introduction to 3D using Rhino
    • Instructor: James McBennett
    • Course overview: Introduces students to Rhino3D, a NURBS based 3D software that contains a little of everything, making it James’ favorite software to introduce students to 3D. Classes are on Tuesdays at 6pm EST beginning January 26th
  • Prototyping in Mechanical Engineering
    • Instructor: Will Fischer
    • Course overview: The tips and tricks from years of prototyping and mechanical system design will help you learn to think about the world as a mechanical engineer does. Classes are on Tuesdays at 1pm EST beginning January 26th
  • AVR: Architecture, Assembly, & Reverse Engineering
    • Instructor: Uri Shaked
    • Course overview: Explore the internals of AVR architecture; reverse engineer the code generated by the compiler, learn the AVR assembly language, and look at the different peripherals and the registers that control their behavior. Classes are on Wednesdays at 2pm EST beginning January 27th

Consider becoming an Engineering Liaison for HackadayU. These volunteers help keep the class humming along for the best experience for students and instructors alike. Liaison applications are now open.

HackadayU courses are “pay-as-you-wish” with a $10 suggested donation; all proceeds go to charity with 2019 contributions topping $10,100 going to STEAM:CODERS. There is a $1 minimum to help ensure the live seats don’t go to waste. Intro videos for each course from the instructors themselves are found below, and don’t forget to check out the excellent HackadayU courses from 2020.

Continue reading “HackadayU Announces Rhino, Mech Eng, And AVR Classes During Winter Session”

Use Nodes To Code Loads Of G-code For 3D CNC Carving

Most CNC workflows start with a 3D model, which is then passed to CAM software to be converted into the G-code language that CNC machines love and understand. G-code, however, is simple enough that rudimentary coding skills are all you need to start writing your very own programmatic CNC tool paths. Any language that can output plain text is fully capable of enabling you to directly control powerful motors and rapidly spinning blades.

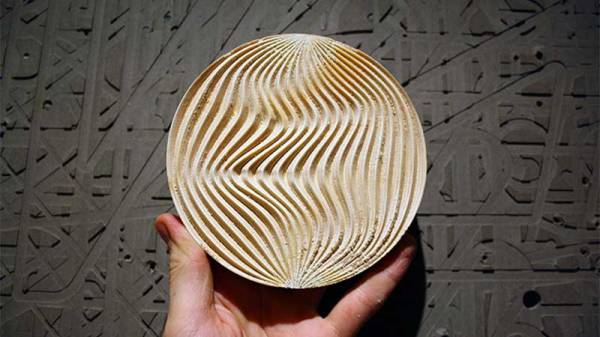
[siemenc] shows us how to use Grasshopper – a visual node-based programming system for Rhino 3D – to output G-code that makes some interesting patterns and shapes in wood when fed to a ShopBot. Though the Rhino software is a bit expensive and thus is not too widely available, [siemenc] walks through some background, theory, and procedures that could be useful and inspirational no matter what software or programming language you’re using to create your bespoke G-code.

For links to code and related blog posts, plus more lovely pictures of intricately carved plywood, check out [siemenc]’s personal site as well.

[via Bantam Tools]

Disco Flashlight Binary Analog Clock?

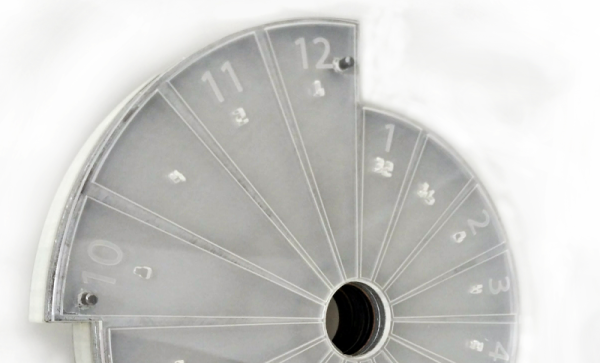
As multitools have lots of different functions in one case, so [Shadwan’s] clock design incorporates a multitude of features. He started the design as a binary clock using a Fibonacci spiral for the shape. However, the finished clock has four modes. The original binary clock, an analog clock, a flashlight (all lights on), and a disco mode that strobes multiple lights.

[Shadwan] used Rhino to model the case and then produced it using a laser cutter. The brains are — small wonder — an Arduino. A 3D-printed bracket holds everything together. You can see the result in the video below.

Continue reading “Disco Flashlight Binary Analog Clock?”

Break Your Frames? Print Some New Ones!

3D Printed Glasses

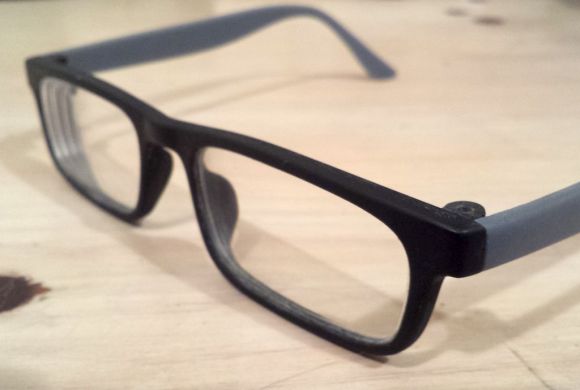
When [Aaron Porterfield] accidentally broke his glasses frame, he saw it as an opportunity, rather than an unfortunate event. He decided he was going to design and print new ones to fit his prescription lenses!

The trickiest part of taking on a project like this is designing the glasses around the pre-existing lenses, because typically, lenses are cut to fit the frame — not vice versa. This is why we’re particularly impressed with the project. [Aaron] was able to 3D scan the lenses using his camera phone and Autodesk’s 123D Catch software (free) to create the lens model! Once he had the lens outline, he scaled it properly by measuring its maximum dimensions with calipers.

Now this is where it gets a bit tricky – designing the frames. [Aaron] is using Rhino to do the design work, and he’s actually laid out the steps quite nicely for anyone who wants to attempt something like this. He describes in detail matching the curvature of the lenses, designing the frame around it, and of course actually fitting the lenses in place.

There is a small caveat to this entire project — The frames were printed on a nice Stratasys polyjet 3D printer — due to the geometry, it might be a bit tricky (or impossible) to print on a traditional hobby FDM machine. Regardless — making your own glasses is some serious geek cred. Nice work [Aaron]!