RA 3D Printer Controller Board Does Everything, Has Disco Lights

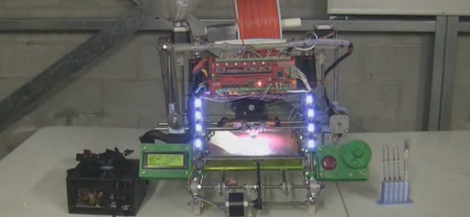
3D printers are getting far, far more complicated than a 4-axis, plastic-squirting CNC machine. These days, you really haven’t earned your geek cred unless you’ve hacked an LCD and SD card interface into your 3D printer, or at least experimented with multiple extruders. There’s a problem with the controller boards everyone is using, though: most boards simply don’t have enough output pins, greatly reducing the number of cool things a 3D printer can do.

Enter RA. It’s a new 3D printer controller board with IO for any imaginable setup. Going down the feature list of RA, we’re wondering why we haven’t seen some of these features before. A 24-pin ATX power header is soldered directly to the board, giving RA users a stupidly easy way to power their printer. Of course there are outputs for LEDs, camera triggers (printer time-lapse movies are really cool), light rings, buzzers, an LCD/rotary encoder/SD card control panel, and support for two heated beds for gigantic printers. If printing in one color isn’t good enough for you, RA has support for three extruders

Compared to other 3D printer boards such as RAMPS or the Sanguinololu, the number of outputs on this board is simply amazing. If you’re planning to build a huge, feature-laden 3D printer, you probably couldn’t do much better than what RA is offering.

Printing Organs With A 3D Printer

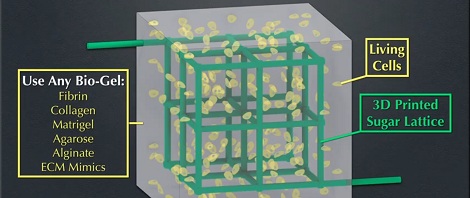
[Jordan Miller], [Christopher Chen], and a whole bunch of other researchers at the department of bioengineering at U Penn have figured out a way to print 3D tissues using a 3D printer. In this case, a RepRap modified to print sugar.

Traditional means of constructing living 3D tissues face a problem – in a living body, there’s a whole bunch of vasculature sending Oxygen and nutrients to the interior cells. In vitro, these nutrients can’t get to the cells in the core of a mass of tissue. [Jordan], [Chris], et al. solved this problem by printing a three-dimensional sugar lattice. After encasing this lattice in a gel embedded with living cells, the sugar can be dissolved and the nutrients pumped through the now hollow capillaries in the gel.

If you have access to Nature, the full text article is available here. There’s also a great video showing off this technique after the break.

Continue reading “Printing Organs With A 3D Printer”

Don’t Bring Your 3d Printer To MakerFaire

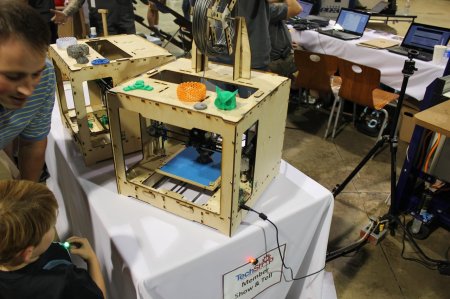
This could easily be called “the year of the 3d printer”. They are in the news, in every hackerspace, and at every event. This last one is the one I’m going to focus on here. All the coverage we’ve seen as well as our personal experience shows that MakerFaires are filled with 3d printers. At MakerFaire K. C., there were so many that I lost count. I didn’t even bother taking pictures or stopping to look after a while. Many were makerbots, though a few repraps were present too.

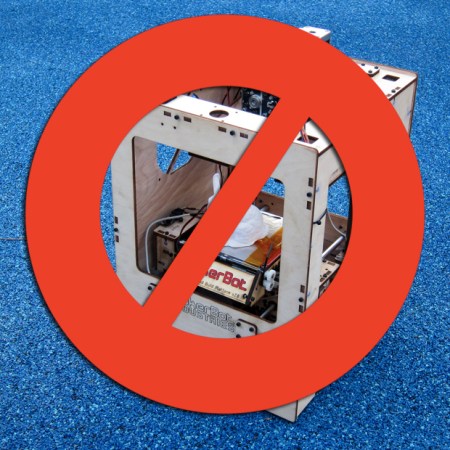
If you want to be noticed at MakerFaire, DON’T BRING A 3D PRINTER AS YOUR SOLE DISPLAY.

Continue reading “Don’t Bring Your 3d Printer To MakerFaire”

NC Maker Faire 2012: Machine Tools And 3D Printers

NC Maker Faire 2012 3D printer

There were quite a few 3D printers at the NC Maker Faire this year (like the [Fablicator], several [RepRap]s, and [MakerBot]s) as well as a few subtractive machining devices including a wood lathe, a [ShopBot] display (one of the sponsors), and my little CNC router. There was even a little [Eggbot] on display, which combines several CNC concepts into a really unique device for printing a picture on an egg.

Check out the video below for lots of examples of what was at the Faire. There’s always room for one more 3D printing or CNC machining enthusiast, so hopefully it inspired some makers to expand their capabilities! Continue reading “NC Maker Faire 2012: Machine Tools And 3D Printers”

Tearing Apart A Hot Glue Gun For A 3D Printer

If you’re building a 3D printer, the most complicated part is the extruder. This part uses a series of gears to pull plastic filament off of a spool, heats it up, and squirts it out in a manner precise enough to build objects one layer at a time. [Chris] made his own extruder out of a hot glue gun and made it so simple we’re surprised we haven’t seen this build before.

The basic operations of a plastic extruder – pushing a rod of plastic through a heated nozzle – already exists in a hot glue gun available for $3 at WalMart. To build his printer, [Chris] tor apart the hot glue gun and mounted the nozzle on a piece of plywood. The hot glue sticks are fed into the nozzle with the help of a 3D printed gear and a stepper motor driver.

After the break, you can see [Chris]’s hot glue gun RepRap printing a 10cm cube. It’s not fast, but the quality is exceptional, especially considering he made it out of a hot glue gun.

Continue reading “Tearing Apart A Hot Glue Gun For A 3D Printer”

3D Printed Circuit Boards Using Conductive Ink

The thought of using a 3D printer to fabricate PCBs is tantalizing and the good news is that it’s a reality. This project shows that it’s possible to use a special printer head to apply traces to an extruded substrate.

This is similar to the point-to-point 3D printer circuits with one big upgrade. Now the traces can be printed directly onto the ABS using conductive ink. The process starts with the design files, which are used to model a substrate that has a trench for each trace. A Makerbot then prints out this model. Once complete, the ABS extruder head is swapped for a special ink head. Each trace is then filled with the conductive fluid, which is kept in place by the trench walls until it can dry. We think this improves on the trace printing techniques we’ve seen before because it doesn’t require your printer heat to use molten metals.

The circuit above uses printed traces for the high and low side of an LED circuit. It’s a bit rough at the edges, but it shows a lot of promise. Don’t miss the demo video embedded after the jump.

Continue reading “3D Printed Circuit Boards Using Conductive Ink”

3D Printing With Nylon For A More Useful Objects

[taulman] over on Instructables has been working on his own version of a 3D printer. Unlike the usual PLA or ABS filament all the RepRaps and Makerbots use, this printer uses nylon to make parts with very interesting properties.

Most extrusion printers are designed to print with ABS (a very hard plastic that melts around 220-230° C) or PLA (a somewhat softer plastic that melts at about 180° C). [taulman] is using Nylon 6, a very slippery and bendable plastic that melts around 320° C (about 600 degrees Fahrenheit). He’s doing this with a hot end of his own design and a ‘spiky’ extruder bolt that allows high-temperature thermoplastics to be extruded into any shape imaginable.

For the longest time, the 3D printer community has been using low-temperature thermoplastics such as PLA and ABS. There are obvious benefits to these materials: it’s pretty easy to source a spool of filament, and the low melting point of these plastics makes building a printer easier and safer. Now that [taulman] has the high-temperature plastic nut cracked, he’s moving on to easily-machiniable Delrin and transparent Polycarbonate. Very cool, and hopefully in a year’s time we’ll have a choice of what material to run in our printers.

After the break, there are a few videos [taulman] put up showing his printer at work and the properties of his 3D printed objects. It looks like [taulman] can print objects that are impossible on any other 3D printer we’ve seen; the flexible iPhone case probably couldn’t be made on any other DIY machine.

Continue reading “3D Printing With Nylon For A More Useful Objects”