Hundred Dollar Capacitive Discharge Welder

[Robert] needed to weld metal tabs on a few batteries. In a proper manufacturing situation, this is usually done with outrageously expensive welders. Not wanting to spend thousands of dollars to attach bits of metal together, [Robert] built his own capacitive discharge welder for only $100.

Instead of the giant transformers you’d find in a spot welder, a capacitive discharge welder uses a huge bank of capacitors – greater than 1 Farad – to weld pieces of metal together. Huge caps like these are commonly used for ridiculous car stereo setups, so with the addition of a car battery charger purchased from Walmart, [Robert] had most of a welder on his workbench.

To control the mass of power coming from his huge cap, [Robert] used a 13o amp Silicon controlled rectifier to improve the control of his welder. With the battery charger, cap, and SCR, [Robert] only needed a few bits of heavy gauge wire to tie the entire build together.

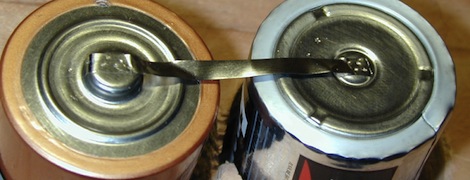
[Robert]’s build welds metal tabs on battery terminals beautifully, but the possibilities don’t end there. This welder could easily be repurposed to build the skeleton of outrageously intricate dead bug circuits, or maybe even keeping that thing you made with your Erector set in one piece permanently.

Turning An IBM Selectric Into A Printer.

In the days when computers took up an entire room, a CRT monitor was a luxury. Most of the time, input and output was handled with a teletype – a typewriter connected directly to the computer. [Josh] wanted his own typewriter terminal, so he took apart an IBM Selectric II and got to work.

Instead of an electronic keyboard, the IBM Selectric II uses and electromechanical keyboard to tilt and rotate the Selectric’s typeball. In normal operation, a series of shafts underneath the keyboard are engaged. [Josh] added parts of an erector set to those levers and tied each one to one of 16 solenoids.

With a set of solenoids able to print any key with the help of an Arduino, [Josh] had a fully automated typewriter from the early 1970s. [Josh has been printing out a lot of ASCII art lately in preparation for the Kansas City Maker Faire later this month. You can check out the build videos after the break.

Continue reading “Turning An IBM Selectric Into A Printer.”

Remote-controlled Tank Tread Robot Will Walk The Dog For You

remote_controlled_robot

Instructables user [IAMTHEBOT] recently finished building his robot which can be controlled by a human using an R/C transmitter, via a PC, or through its built-in object avoidance system. The robot doesn’t seem to have a name, though Johnny Five might be appropriate.

The robot was built using plenty of erector set parts, as well as a Lynx motion tank tread kit. The robot is crammed full of controllers, including a Propeller USB servo controller which operates the arms, and a pair of Parallax motor controllers to manage the tread movement. A pair of Parallax Stamp controllers are used to drive these controllers as well as to manage the remainder of the robot’s functions.

The robot’s head consists of a custom pan and tilt wireless camera system, which allows him to drive it around from the comfort of his home, while watching the video stream on his PC. The robot also has the ability to roam around autonomously, avoiding objects using a ping sensor that can be mounted where the camera is currently located. It seems all that’s missing is Steve Guttenberg.

As you can see in the videos below, the robot manages pretty well on all sorts of surfaces, and even walks this guy’s dogs.

Continue reading “Remote-controlled Tank Tread Robot Will Walk The Dog For You”

Solar-powered Junkbot

solar_powered_junkbot

Instructables user [martzsam] recently built a simple robot using miscellaneous junk he found around his house. The first parts he scrounged up were a pair of 1.5v electric motors and some wire scraps, after which, he went to work on an old garden light. He detailed how to carefully remove the light’s solar panel as well as the charging circuit, which he used to power his robot. The pieces were mounted on some old erector set parts after a bit of rewiring, then the bot was set in motion. [martzsam] also mentions that he tweaked the solar panel’s charging circuit and battery to run the motors at half speed until light is shone on the panel, at which point the robot runs at full speed.

This project would be great to do with kids as it teaches the concepts of re-purposing common household items as well as allows them to use their imagination in designing a fun, yet simple robot. Gather up some old junk and your kids/nieces/nephews and get going!

Continue reading to see a quick video of the robot in action.

Continue reading “Solar-powered Junkbot”

A Modular Halloween With Grid Beam

gridbeam

The fantastic Creatrope blog has a great article on quickly assembling animatronic Halloween gags using salvaged electric motors, pvc pipe, and “grid beam” construction.

Grid beam is a prototyping and building medium that’s like a giant hippie Erector set. You can’t buy grid beam, but with a drill press, a jig, and some square stock you can create your own unlimited supply. It’s ideal for “sketching” and temporary constructions like these Halloween props. After use, everything can be dismantled, stored flat, and later reused for the next [Herbie Hancock] music video creative project. Looks like fun!

The article wraps up with some valuable pointers on getting started with grid beam and where to acquire parts.