Arduino-Fart-O-Meter

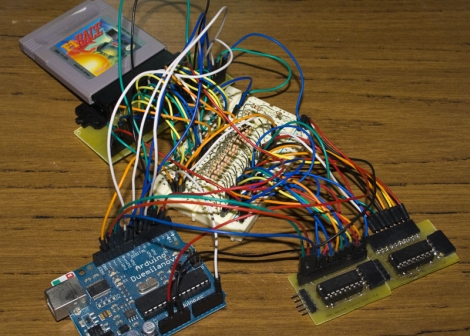
[robomaniac] shows us some serious application of modern technology with his recent Instructable, (the) Arduino-Fart-O-Meter. The wireless device uses a “perfboard Arduino” to read a remote wired methane sensor, and send data over a nRF2401A radio transceiver.

“The data” is picked up by another Arduino / transceiver combo, which then drives a servo motor connected to the pointer. The meter itself consists of 6 ranges from “Fresh Air” to “Liquid” so there is no doubt in your standing.

The wireless and remote sensor setup makes this an easy device to include into your loved ones chairs while having the meter far enough away (just in case you have to make a run for it). If you want some more accuracy check out the Fart intensity detector we posted about, which adds in temperature and sound to the equation, or how about a chair that twitters your toots?

Join us after the break for a quick video, its a real gas.

Continue reading “Arduino-Fart-O-Meter”

DOTKLOK

[Andrew] is showing off his latest creation, an LED matrix clock, which he is calling “DOTKLOK”. The clock is powered by an atmega328 micro controller with a real time clock module keeping the time. The display is made out of a grid of 8×8 LED matrices giving it a resolution of 24×16, and is all housed in an attractive acrylic housing.

The clock animations are inspired by classic video games such as Pong, Tetris, Pacman, and Space Invaders. Since the software is open, it is easy to jump into the Arduino source and add or modify animations to suit your taste, or even use the clock as a custom display for non clock related applications.

Available as a kit or fully assembled if youre needing a gift for that special nerdy someone. If you would like to go it alone, source, schematics, pcb, and enclosure files are available along with a bill of materials.

Join us after the break to see a short video of this fun clock in action

Continue reading “DOTKLOK”

Nimbus, The Wall-following Robot

nimbus_wall_following_robot

[Johannes] sent in the latest iteration of an ongoing project – Nimbus, the wall-follwing robot. Originally operating on a cardboard frame, the robot has undergone several revisions as you can see by reading through his blog. Nimbus started out as a simple, Arduino-powered robot, but the project has progressed nicely over time. The last revision simply avoided walls, using a Sharp IR proximity sensor to detect, then avoid obstacles. The most recent model sports a nice polycarbonate frame as well as two additional IR proximity sensors, allowing Nimbus to navigate quite well, following walls and avoiding obstacles with ease. It does get caught up from time to time on carpets and wires, but overall Nimbus is a great little robot. [Johannes] even added a small RGB status LED for the bottom of the bot, communicating its navigation status to the operator at all times. This is done by flashing various colors when objects have been discovered or have moved out of sight – it’s a really novel addition.

Keep reading for a video of Nimbus navigating his way around, and don’t forget to check out the Nimbus photo stream.

Continue reading “Nimbus, The Wall-following Robot”

WWII’s Top Cryptography Comes To A Child’s Toy

This toy has some upgraded internals that turn it into an Enigma machine. We absolutely love the idea, as it takes a toy that your child may have grown out of, and uses it to provide teachable moments dealing with both history and mathematics. But who are we kidding? We want to make one just because it’s a fun project.

[Sketch] grabbed this toy from a thrift store because it has a full keyboard that he can use to make his own machine. It’s powered by an Arduino, with a four-line character LCD display taking the place of the original. His post covers the methods he used to figure out the keyboard wiring, and also contains a cursory overview of how the Enigma Machine functions. See a video of the finished project after the break.

If this wet your appetite, also check out the paper Enigma Machine we covered during Hackaday’s first year.

Continue reading “WWII’s Top Cryptography Comes To A Child’s Toy”

Shockingly Fun Quiz Game

Gather your friends round the living room for a head-to-head quiz game. This one’s not quite as nice as you might think. Get an answer wrong and you’re going to get the Venkman treatment thanks to the stored electricity in a disposable camera flash circuit. [Israel] runs the game questions from a Windows machine, and uses a set of four USB joystick buzzers that let each contestant ring in. They all wear a cuff that houses electrodes for negative-reinforcement upon an incorrect answer. Since every contestant answers each question it won’t be long before you hear the uncomfortable yelp of failure from your guests. This seems a little bit more fair than shocking people for not calming their minds, but the video from that hack is still one of our all-time favorites.

Valentine’s Day Love Song Machine

tellart_bell_ensemble

Just in time for Valentine’s day, [Adam Meyer] and the folks over at tellart.com have put together a little project they call the “Love Song Machine“. Using a web-based form, anyone can submit a song, which will then be played on a system of bells that they have set up in their office. You can choose from several pre-defined love songs, or you can create your own unique arrangement with which to serenade them. Once you are ready to go, your song will be queued up, and you can watch a video of your creation as it is being played.

The system is comprised of 8 solenoid-actuated bells which are all controlled by the Arduino they have hooked up to their web server. It’s a pretty fun idea, and there are sure to be plenty of people submitting songs, so get yours in before things get too busy!

Keep reading to see a video preview of their system in action.

Continue reading “Valentine’s Day Love Song Machine”

Radio-controlled LED Light Show

HL1606_radio_controlled_light_show

[Alan] was commissioned to make some wearable, radio-controlled LED strips for the Travelling Light Circus. It has taken some time, but he has recently finished some prototypes, and thought it was a good time to do a writeup on the project. The system is managed by a single controller unit, which communicates with any number of LED driver units, each controlling 4 HL1606 LED strips. The light displays are synchronized across all of the LED driver units via a 2.4 GHz radio, with each driver falling into synch almost immediately after being powered on. While some might be turned off to the fact that he uses Arduino Pro Minis to control the LEDs, this is far from a simple project.

[Alan’s] blog contains several posts about this project, with everything documented in detail. He spends quite a bit of time talking about the project’s software, as well as hardware issues he ran into along the way.

His blog is a must read, but even more so, it is a must see. The lighting effects are mesmerizing, as there are a ton of different light patterns these units can generate, so be sure to check out the following video of the lights in action.

Continue reading “Radio-controlled LED Light Show”