Bellows Camera To DSLR

[Jonas Kroyer] is a digital  photographer, with a fascination with old cameras and pairing the two together sounded like a fun idea. Searching around on the net he fell in love with the design of the Zeiss Ikon Ikonette (1929-31), and found one with a chipped lens.

After dismantling the camera completely, it was found out that he needed the lens/shutter mechanism, the bellows, and the rails that allow the lens to slide back and forth. The bellows were glued to the body of the camera, but some careful prying and they were quickly removed unharmed. Next was to make an adapter so he could attach the lens to a digital DSLR camera, a steel plate and a Nikon Bayonet swiped off of a no name lens holds everything together. Rails were reattached using rivets, and the bellows were glued onto the plate. Other mods include adding small brass knobs to aid in adjustments, and a spring from a ballpoint pen to hold the original shutter open.

The new old lens is said to be easy to operate, and produces some beautiful images. Though since the lens does not have any modern day coatings it does have its drawbacks, like a diamond shaped flare in the middle of the image, which can be good when you want it, or partially removed in photoshop if you don’t.

Canon T1i/500d External Microphone Hack

canon_t1i_external_mic

Like most other DSLR cameras that feature video recording, the Canon T1i has a small built-in microphone with limited sound reproduction capabilities. [Robb] wanted better audio performance while taking video, but found the camera’s inability to use an external microphone to be a frustrating limitation. He decided to take matters into his own hands, and disassembled his camera in order to add an external microphone jack. The process is not overly complicated, as it requires little more than the installation of a switching microphone jack. You will however need to get your hands a bit dirty since it involves opening the camera, a bit of drilling, and some epoxy. Doing such things to your camera clearly voids the warranty, and with a $600 camera at stake, this hack is definitely not for the faint of heart. That said, if you desperately want to get better quality audio from your Canon T1i or 500d DSLR, be sure to check out his tutorial.

Four-axis Camera Mount Rides On A Wire

Here’s [Badwolf’s] team posing with their college project. It’s a 4-axis gimbal mount for a camera that they designed in CAD, cut parts using a laser, then milled them down to specifications. In the picture above there is a tiny point-and-shoot camera mounted inside the suspended ring but the rig’s strong enough to support cameras of any size.

That mounting ring can rotate like the hands of a clock, but it also pivots on a horizontal axis. The bracket that holds the ring can rotate on a vertical axis, and the entire assembly moves along the wire supporting it. After the break you can see some test footage that shows the rig being operated via a handheld radio controller.

This setup let’s the camera travel as far as the cable can reach. But if you want something that lets you take photographs of very tall objects you’ll need to use a different setup. Continue reading “Four-axis Camera Mount Rides On A Wire”

Remote Camera Trigger Built From Air Freshener Parts

Remote camera trigger assembled front view

[jcopro] took a look at a Glade automatic air freshener he had sitting around and couldn’t help but open it up to determine how the mechanism worked.  After taking it apart, he found that the automated system was comprised of a 3v motor, a series of gears, and a mechanical arm.  When actuated, this arm simply pressed the spray nozzle of the air freshener canister contained within the device.  After some consideration, he decided that the components would make a great remote trigger for his Casio point and shoot camera.  He fabricated a small plywood rig including both the camera and air freshener components, which was able to be mounted on a tripod.  [jcporo] also mentions that the air freshener has the ability to be triggered by a built-in timer.  Although the presets are locked at 9, 18, and 36 minutes, he suggests that a 555 timer could easily be used to add some custom timing intervals when wired to the manual trigger.  Be sure to check out his video of the remote trigger in action.

Triggering A DSLR Shutter With An Audio Clip

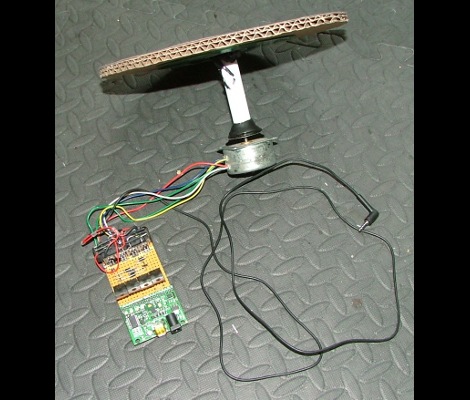
Apparently Pentax DSLR cameras have a remote shutter option that used infrared signals. [Pies for you] gathered up several different hacks and built a method of triggering the camera using custom audio. He put together the dongle above, just a headphone extension cord and two IR LEDs, which plugs into the headphone jack of any audio device like an iPod or an Android phone. When you play back a file the audio signals drive the IR LEDs. This is completely worthless unless you craft your own audio file using the correct frequency, duty cycle, and bit encoding. [Pies for you] did just that and got things up and running. Looks like the system doesn’t do so well with MP3 compression, but take a look at the waveform analysis that he posted and then make sure you’re using a lossless format.

Bringing An LCD Viewfinder Back To Life

[Foobarbob] posted a pretty simple job of bringing an LCD viewfinder back to life. He doesn’t specify what was wrong, but since he replaced the backlight, we’re guessing that was the main issue.  It was pulled off of a JVC camcorder. The camcorders with LCD viewfinders are getting more and more common at garage sales, so we’re surprised we don’t see more of these used. [Foobarbob] cracked it open, traced out the power lines and replaced the backlight with an LED and a makeshift diffuser made from a bottle cap. His results look great, we could see this being perfect for an HMD, or possibly a home made VR helmet.

No More Blurry Pictures

Say goodbye to ruined images thanks to this add-on hardware. It measures the movement of the camera when a picture is taken and corrects the image to get rid of motion blur. Above you see a high-speed camera which is just there for testing and fine-tuning the algorithm that fixes the photos. Once they got it right, the setup that the camera is attached to only includes an Arduino board, Bluetooth modem, 3-axis accelerometer, gyroscope, and a trigger for the camera. You use the new hardware to snap each image and it takes care of triggering the SLR’s shutter in order to ensure that the inertial data and the image are synchronized correctly.

[Thanks Rob]