Counting Down To The New Year

[Rod] is in a position to provide a community service on New Year’s Eve. He spends the evening at a relative’s house next to the beach. There are fireworks at midnight, but the crowd has no communal way to count down to the deadline. This year, he build his own count-down display so that everyone can join in during the last few seconds.

This is a temporary build so each digit is housed in a cardboard box. [Rod] first drew the outline of the seven segment digit on the front, then added holes for three LEDs in each segment. He’s feeding the segments with 12V and therefore is able to run the LEDs in series, along with a resistor, switching each segment with one transistor. He chose an Arduino to drive the display, and since he had two sitting around, used both instead of grabbing a shift register as port expander.

If you’re looking for a more permanent solution, we really like the digit displays designed for this scoreboard. But you’re going to have to etch the boards yourself if you want them done in time for the festivities.


Animated LED Buckyball

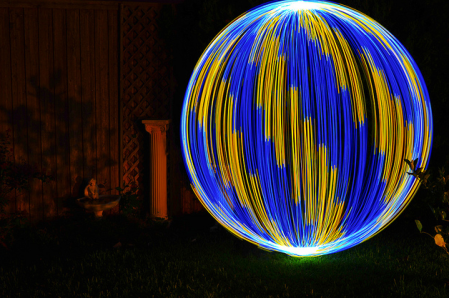
This animated LED buckyball has little to do with modeling a carbon molecule but a lot to do with adding some excitement to your party decor. [Tim] felt that the LED cube hacks had run their course, so took on the challenge of a sphere made out of pentagonal and hexagonal components instead.

As with many LED projects, finding a good diffuser is paramount. [Tim] decided to go with hot glue sticks, which do a great job of both diffusing, and piping the light from RGB LEDs. The unintended consequence of this choice is that the shape sags under the weight of 90 glue cylinders.

At the end of each glue segment you’ll find a tiny surface-mount RGB LED and controller combo. This is [Tim’s] own design and in bulk it gets the cost of each node down to about one dollar. With the help of a soccer ball as an assembly jig he finished off the construction and wrote some code to produce the eye-pleasing animations seen after the break.

Continue reading “Animated LED Buckyball”

How To Grow Your Own EL Wire DNA Helix Lamp

el-wire-helix-lamp

[LucidMovement] was looking for some crystal-based artwork and just couldn’t seem to find anything that fit the bill, so he decided to build something himself.

The inspiration for his desk lamp came from something we’re all familiar with, a DNA double-helix. To grow the crystals he built a helix-shaped growing substrate out of nichrome and EL wires, submerging them in a warm alum solution. Once he had a nice set of crystals, he mounted it in an acrylic tube, filling the air space with clear silicone to seal off the display. He then mounted the silicone-filled tube on top of a rotating acrylic stand that he had cut for the project. The stand is made from several sheets of acrylic and contains both the gearing for movement as well as RGB LEDs to light the display from the bottom.

The lamp looks great when sitting idle, but when he powers it on it really shines (no pun intended). [LucidMovement] put a ton of work into the lamp, and offers up all sorts of tips, tricks, and considerations for anyone looking to build their own. Be sure to check out his writeup for plenty more details, and stick around to see a short video of the lamp in action.

Continue reading “How To Grow Your Own EL Wire DNA Helix Lamp”

Flowerboard LED Cube

Here’s a neat 4x4x4 LED cube made with an ElecFreaks Flower Protoboard.

A few days ago, we posted a neat new prototyping board made specifically for SMD work. Instead of the usual ‘holes-with-circles’ protoboard layout, the ElecFreaks team decided to go with a flower-shaped pad. This makes it especially easy to deal with SMD components when building whatever. To demonstrate their new protoboard, ElecFreaks built an awesome-looking 4^3 LED cube. Just look at those solder traces.

The LED cube itself is nothing we haven’t seen before, but the construction of this thing is amazing. The entire build is on the Arduino Mega Flower shield, meaning there are no wires at all. Everything, from the resistors to the transistors, is an SMD component. The only problem now is bending and soldering all those LED leads.

This Flower Protoboard is starting to look more and more interesting; check it out in action after the break.

Continue reading “Flowerboard LED Cube”

led-contacts

[Ben Krasnow] Sticks LEDs In His Contacts Just For Kicks

[Ben Krasnow] wrote in, saying that every so often a news story appears covering a project in which researchers embed a single pixel LED display inside a contact lens. The most recent article he saw featured a contact-wearing rabbit, and not being one to shy away from damaging his own body in the name of science, he decided to try the experiment on himself.

He started out by soldering a tiny 0402 SMD LED to a hand wound coil, laminating the display between a pair of regular contact lenses. After trying to adhere the lenses to one another using water, he opted to tack the edges together with a pair of hot tweezers, making for a more secure but uncomfortable piece of eyewear. The LED is powered by a simple inductive coil he put together, which uses a spark gap transmitter to flash the LED on and off.

If you’re not freaked out by people sticking things in their eyes, be sure to check out the video below to see [Ben’s] augmented contact lens in action. While it might not give him Terminator-like vision, it’s pretty awesome considering he pieced it together in his workshop in his spare time.

Continue reading “[Ben Krasnow] Sticks LEDs In His Contacts Just For Kicks”

This CheerLights Display Has A Mind Of Its Own

cheeriobot

[Axel] wanted to participate in the CheerLights project this holiday season, but not one to always follow the rules he decided to make his display a bit different than most others out there. While the lights at his house are synchronized with the CheerLights project, he programmed his Cheeriobot with a little added personality.

Normally, Cheeriobot is happy to follow the rest of the world, changing its colors whenever the Twitter feed dictates. If things are a bit slow however, Cheeriobot gets impatient and will send a tweet to @CheerLights on its own to ensure that it doesn’t display a single color for too long.

[Axel] also created a mode that turns Cheeriobot into a bit of a contrarian. The display’s “Rebel Mode” causes it to change colors when someone tweets, but it selects a random color instead of following the rest of the pack.

It’s definitely an interesting twist on the CheerLights project, and we really like the fact that it keeps things moving if the stream of tweets ever slows down.

Head-mounted Light Display Takes Holiday Cheer On The Go

hat-mounted-light-display

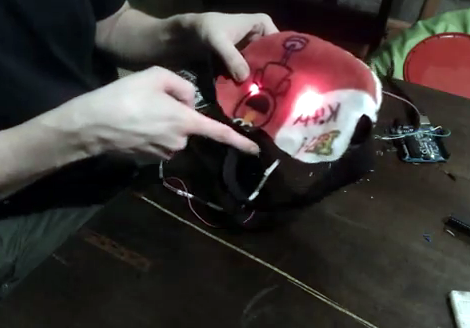
Most holiday light displays we see this time of year are stationary, or at least confined to somebody’s home. [Marco Guardigli] wanted to take his lights on the go, and thought that a light up winter hat would be perfect for showing off his holiday spirit.

In the winter he sports a sturdy wool felt hat, which was ideal for mounting LEDs. He picked up a basic LilyPad Arduino that uses a small LiPo battery as its power source, mounting it inside the hat with a bit of glue. He wired up a series of SMD LEDs around the perimeter of the hat which blend in quite well in the felt, leaving them nearly invisible to the naked eye when powered off. When he flips the LilyPad on however, there’s no missing the bright blue LEDs nor the music emanating from the tiny speaker he also mounted in the hat.

We think that [Marco’s] display is great, and if we were to build one, we would likely include a copious amount of red and green LEDs in ours. Do any of you take your Christmas light display on the go? We’d love to see them, so be sure to let us know in the comments.

Stick around to see a short video of [Marco’s] hat in action.

Continue reading “Head-mounted Light Display Takes Holiday Cheer On The Go”