A 2D Image Makes A 3D Print

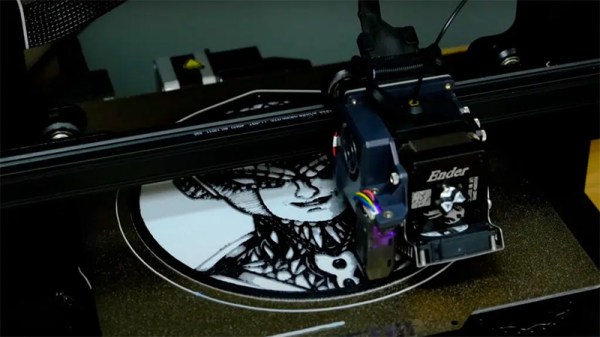
When you imagine 3D printed art, it’s easy to envision the different kinds of sculptures and figurines posted online. While these projects take plenty of time and creativity on their own, [César Galera] shows us a different way to make 3D printed art by turning 2D images into fully textured 3D prints.

This project follows a similar technique that stems from lithophanes, which produces an image from light that passes through the object. [César] instead details in the video below the break how to use the ItsLitho tool to build completely opaque black and white images using a multicolored printer.

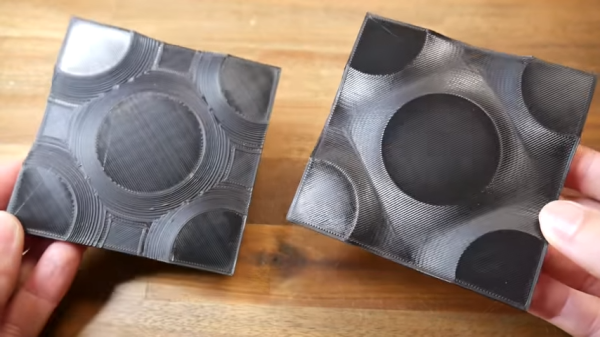
Lithophanes are built (or printed) by mapping topography to make light easier or harder to pass through in certain places. Areas that appear darker are thicker with more layers, and areas that appear lighter have less. It’s a nifty optical illusion, but these kinds of art blocks aren’t actually multicolored themselves.

The trick is to develop the 3D model using the lithophane tool first to create the different elevations (ensuring that the lowest elevation is still thick enough to be opaque), but retain the different colors on the model when it’s exported. Multi-colored 3D printers will then be able to add gray and black filament as it prints higher and higher elevation. If you don’t have a multi-colored printer, you can add pauses on the 3D print file to switch out filaments after a few layers to achieve a similar effect.

We’re always on the lookout to see the different things we can print, and being able to turn digital artwork into a 3D model is a great example!

Continue reading “A 2D Image Makes A 3D Print”

Bend Your Vase Mode Prints By Hacking The GCode

[Stefan] from CNCKitchen wanted to make some bendy tubes for a window-mountable ball run, and rather than coming up with some bent tube models, it seemed there might be a different way to achieve the desired outcome. Starting with a simple tube model designed to be quickly printed in vase mode, he wrote a Python script which read in the G-Code, and modified it allow it to be bent along a spline path.

Vase mode works by slowly ramping up the Z-axis as the extruder follows the object outline, but the slicing process is still essentially the same, with the object sliced in a plane parallel to the bed. Whilst this non-planar method moves the Z-axis in sync with the horizontal motion (although currently limited to only one plane of distortion, which simplifies the maths a bit) it is we guess still technically a planar solution, but just an inclined plane. But we digress, non-planar in this context merely means not parallel to the bed, and we’ll roll with that.

[Stefan] explains that there are quite a few difficulties with this approach. The first issue is that on the inside of the bend, the material flow rate needed to be scaled back to compensate. But the main problem stems from the design of the extruder itself. Intended for operating parallel to the bed, there are often a few structures in the way of operating at an angle, such as fan mounts, and the hotend itself. By selecting an appropriate machine and tweaking it a bit, [Stefan] managed to get it to work at angles up to 30 degrees off the horizontal plane. One annoyance was that the stock nozzle shape of his E3D Volcano hotend didn’t lend itself to operating at such an inclination, so he needed to mount an older V6-style tip with an adapter. After a lot of tuning and fails, it did work and the final goal was achieved! If you want to try this for yourselves, the code for this can be found on the project GitHub.

If you want to learn more about non-planar printing, we’ve covered the process of non-planar slicing a while back, and if you think your 2.5D printer doesn’t quite have the range for really funky print paths, then you may want to look into a robot arm based printer instead.

Continue reading Bend Your Vase Mode Prints By Hacking The GCode”

How’s That 2.5D Printer Working For You?

We’ve noticed a trend lately that advanced 3D printing people are calling their normal print setup as 2.5D, not 3D. The idea is that while the machine has 3 axes, the actual geometry generation is typically only in the X and Y axis. The Z axis simply lifts up to the next layer unless you are working in vase mode. [Teaching Tech] wanted to experiment with real 3D printing where the Z axis actually helps build the shape of the printed object, not just advancing with each step.

As it turns out his first investigation linked back to one of our early posts on the topic. There’s been more recent work though, and he found that too. It took a little surgery to get more Z clearance, but nothing too serious — just a movement of a fan.

Continue reading “How’s That 2.5D Printer Working For You?”

2.5D Printing?

Casio — the company famous for calculators, watches, and calculator watches — is touting a 2.5D printer. We aren’t sure we are impressed with the marketing hype name, but it is an interesting innovation for people prototyping new designs. The printer can create material that appears to be leather, fabric, and other materials. With some additional work, the printer can even mimic hard materials like stone or wood. You can see a video about the machine below.

The Mofrel printer uses special “digital sheets” that appear to be thick paper or PET plastic, but are really a sandwich of different materials. When you heat an area of the sheet, particles inside the sandwich expand allowing the printer to apply a texture.

Continue reading “2.5D Printing?”