3D Printering: Treating Filament Like Paint Opens Wild Possibilities

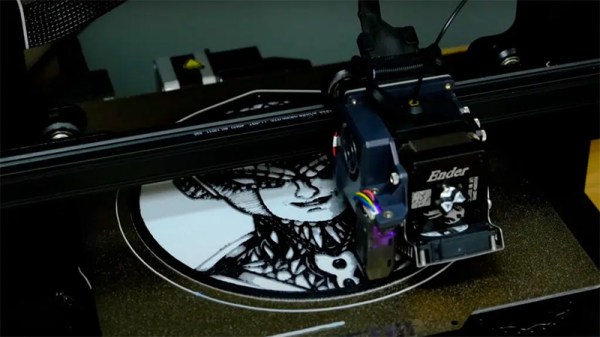
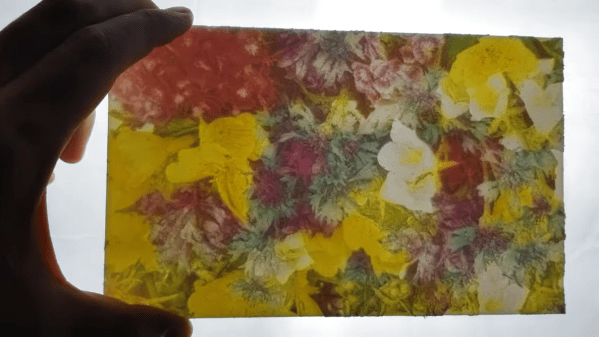
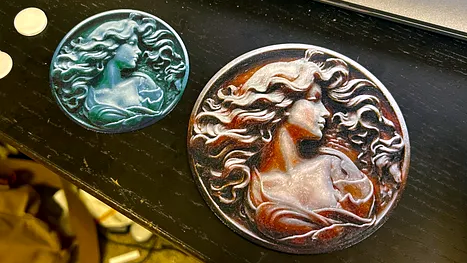
New angles and concepts in 3D printing are always welcome, and we haven’t seen anything quite like [Horn & Rhode]’s 3D prints that do not look anything like 3D prints, accomplished with an experimental tool called HueForge. The concept behind it is simple (though not easy), and the results can be striking when applied correctly.
3D prints that really don’t look 3D-printed.

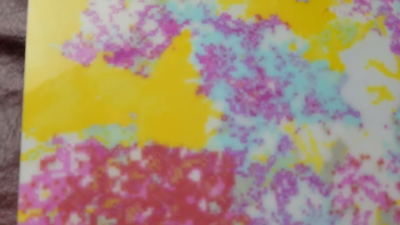
The idea is this: colored, melted filament is, in a sense, not that different from colored paint. Both come in various colors, are applied in thin layers, and blend into new colors when they do so. When applied correctly, striking imagery can emerge. An example is shown here, but there are several more both on the HueForge project page as well as models on Printables.

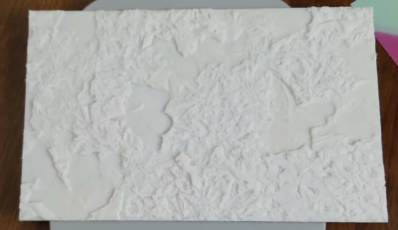
Instead of the 3D printer producing a 3D object, the printer creates a (mostly) flat image similar in structure to a lithophane. But unlike a lithophane, these blend colors in clever and effective ways by printing extremely thin layers in highly precise ways.

Doing this effectively requires a software tool to plan the color changes and predict how the outcome will look. It all relies on the fact that even solid-color filaments are not actually completely opaque — not when printed at a layer height of 0.08 mm, anyway — and colors will, as a result, blend into one another when layered. That’s how a model like the one shown here can get away with only a few filament changes.

Of course, this process is far from being completely automated. Good results require a solid amount of manual effort, and the transmissivity of one’s particular filament choices plays a tremendous role in how colors will actually blend. That’s where the FilaScope comes in: a tool to more or less objectively measure how well (or how poorly) a given filament transmits light. The results plug into the HueForge software to better simulate results and plan filament changes.

When done well, it’s possible to create things that look nothing at all like what we have come to expect 3D-printed things to look. The cameo proof-of-concept model is available here if you’d like to try it for yourself, and there’s also an Aztec-style carving that gives a convincing illusion of depth.

[Horn & Rhode] point out that this concept is still searching for a right-sounding name. Front-lit lithophane? Reverse lithophane? Filament painting? Color-blended bas-relief? If you have a better idea, we urge you not to keep it to yourself because [Horn & Rhode] absolutely want to hear from you.

A 2D Image Makes A 3D Print

When you imagine 3D printed art, it’s easy to envision the different kinds of sculptures and figurines posted online. While these projects take plenty of time and creativity on their own, [César Galera] shows us a different way to make 3D printed art by turning 2D images into fully textured 3D prints.

This project follows a similar technique that stems from lithophanes, which produces an image from light that passes through the object. [César] instead details in the video below the break how to use the ItsLitho tool to build completely opaque black and white images using a multicolored printer.

Lithophanes are built (or printed) by mapping topography to make light easier or harder to pass through in certain places. Areas that appear darker are thicker with more layers, and areas that appear lighter have less. It’s a nifty optical illusion, but these kinds of art blocks aren’t actually multicolored themselves.

The trick is to develop the 3D model using the lithophane tool first to create the different elevations (ensuring that the lowest elevation is still thick enough to be opaque), but retain the different colors on the model when it’s exported. Multi-colored 3D printers will then be able to add gray and black filament as it prints higher and higher elevation. If you don’t have a multi-colored printer, you can add pauses on the 3D print file to switch out filaments after a few layers to achieve a similar effect.

We’re always on the lookout to see the different things we can print, and being able to turn digital artwork into a 3D model is a great example!

Continue reading “A 2D Image Makes A 3D Print”

Christmas Lithophanes Make Neat Decorations

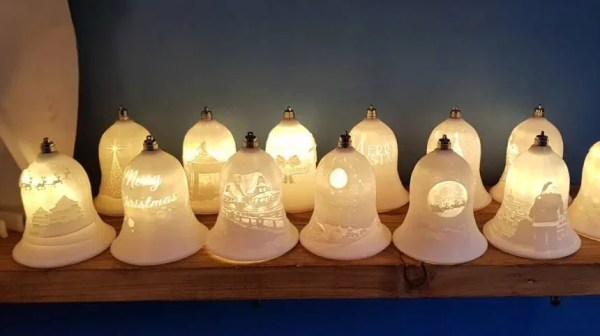
Lithophanes are neat little artistic creations that use variations in the thickness of a material to reveal an image when lit from behind. 3D printing is a great way to make lithophanes, and they can make for beautiful Christmas decorations, too!

It’s easy to make lithophane decorations for your Christmas tree with the help of the ItsLitho tool. The online application takes any image you upload, and can generate lithophane geometry that you can 3D print at home. Print your custom bell or bauble, add the printed hooks, and then the final decoration can be backlit to reveal its image by inserting an LED from a string of Christmas lights.

The result is a beautiful, glowing decoration that displays a detailed image when lit up. All you need is a few images and a 3D printer to produce decorations as unique gifts for your family and friends.

We’ve seen the technique put to other uses too, such as in this convincing lamp designed after our very own Moon. Video after the break.

Continue reading “Christmas Lithophanes Make Neat Decorations”

Math, Optics, And CNC Combine To Hide Secret Images In Acrylic

Magic mirrors, with an LCD panel hidden behind a partially reflectively mirror, are popular for a reason — they’re a good-looking way to display useful information. A “Magic Window,” however, is an entirely different thing — and from the look of it, a far cooler one.

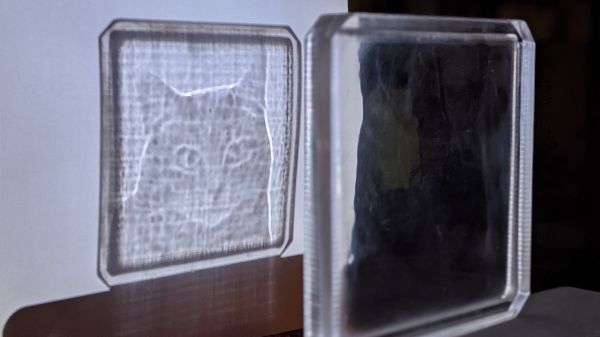
If you’ve never seen a Magic Window before, don’t worry — it’s partially because you’re not supposed to see it. A Magic Window appears to be a clear piece of glass or plastic, one with a bit of a wave in it that causes some distortion when looking through it. But as [Matt Ferraro] explains, the distortion encodes a hidden image, visible only when light passes through the window. It looks a bit like a lithophane, but it’s projected rather than reflected, and it relies on an optical phenomenon known as caustics. If you’ve ever seen the bright and dark patches cast on the bottom of a swimming pool when sunlight hits the surface, you’ve seen caustics.

As for how to hide an image in a clear window, let’s just say it takes some doing. And some math; Snell’s Law, Fermat’s Theorem, Poisson’s Equation — all these and more are mentioned by [Matt] by way of explanation. The short story is that an image is morphed in software, normalized, and converted into a heightmap that’s used to generate a toolpath for a CNC router. The design is carved into a sheet of acrylic by the router and polished back to clarity with a succession of sandpaper grits. The wavy window is then ready to cast its hidden shadow.

Honestly, the results are amazing, and we marvel at the skills needed to pull this off. Or more correctly, that [Matt] was able to make the process simple enough for anyone to try.

Continue reading “Math, Optics, And CNC Combine To Hide Secret Images In Acrylic”

Lithophane Lamp Has Us Over The Moon

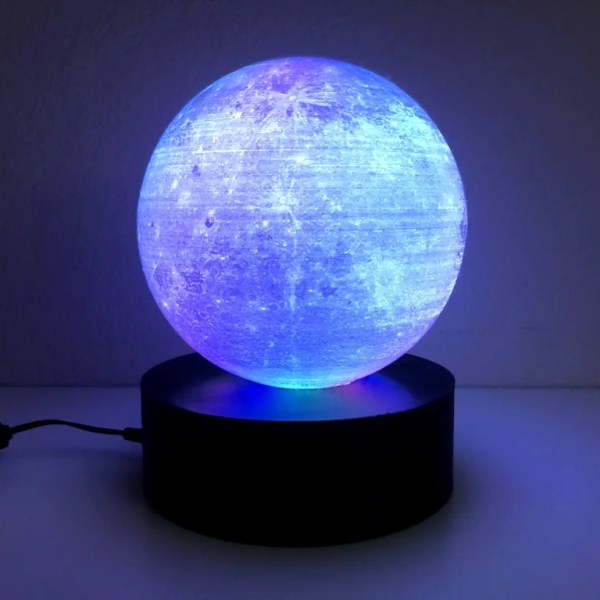
Lithophanes are artistic creations which rely on the varying thickness of a material that is then backlit to reveal an image. While these were often made in porcelain in the past, these days we have the benefit of 3D printing on our side. The principle can be deftly applied to everything from flat planes to spheres, with [Tiffany Lo] demonstrating a great application of the latter with her 3D printed moon lamp.

The basic concept is to take a 2D image of the lunar surface, and then use it to generate a height mapped sphere for 3D printing. When lit from within, the sphere will appear as per the surface of the moon. The sphere geometry was generated with the Lithophane Sphere Maker online tool combined with NASA data of the moon intended for computer graphics purposes. The sphere was then printed on a typical FDM printer before being assembled upon a base with LEDs inside for backlighting.

The result is an attractive moon lamp that both recalls the heavy rock that follows us in a tidally-locked orbit, and yet can be switched off at night to make it easier to sleep. Unfortunately, it’s impractical to turn off the shine from the real moon, and we suspect nobody is working on the problem.

We’ve seen other moon lamps before; they’re a great starting point because the moon’s greyscale tones work well as a lithograph. More advanced techniques are likely necessary for those eager to create lamps of the gas giants; if you’ve done so, be sure to drop us a line.

New (mis)Use For Lithophanes: Miniature Diorama Backgrounds

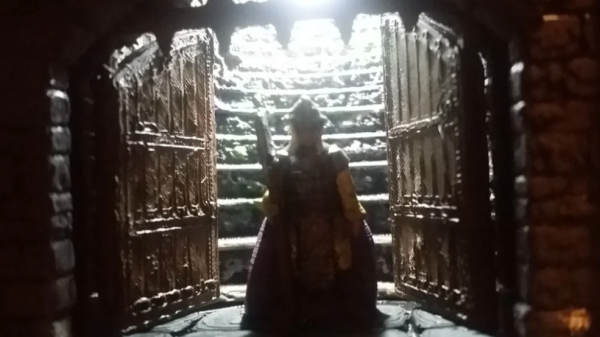
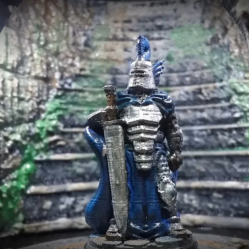
What’s better than a well-lit photo of a 3D-printed miniature? A photo of the miniature in a mini diorama, of course. [OrionDeHunter] shows off a clever technique that has something in common with old-timey photo stages and painted backgrounds, and (mis)uses 3D-printed lithophanes to pull it off. What [OrionDeHunter] does is use a curved and painted lithophane as a stand-in for a background, and the results look great!

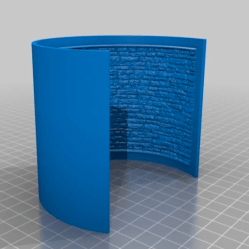
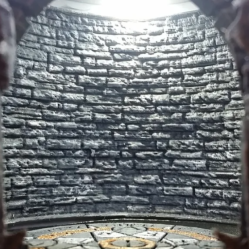
Lithophanes are intended to be illuminated from behind to show an image, with thin areas showing as lighter and thicker areas darker, but when it comes to high contrast patterned images like brick walls, the same things that make a good lithophane just happen to also make a pretty good 3D model in the normal sense. No 3D scanning or photogrammetry required.

Here is the basic process: instead of creating a 3D model of a brick wall from scratch, [OrionDeHunter] simply converted an image of a brick wall (or stairs) into a curved lithophane with an online tool. The STL model of the lithophane is then 3D printed, painted, and used as a swappable background. When macro shots of the miniatures are taken, the curved background looks just right and allows for some controlled lighting. It’s a neat trick, and well applied in this project. Some sample images demonstrating how it works are just under the break.

Lithophanes were originally made using marble or thin porcelain, but a modern spin has been put on the technique with 3D printing. Enterprising hackers have even discovered ways to add color, too.

Lithophanes Ditch The Monochrome With A Color Layer

3D printed lithophanes are great, if a bit monochromatic. [Thomas Brooks] (with help from [Jason Preuss]) changed all that with a tool for creating color lithophanes but there’s a catch: you’ll need a printer capable of creating multi-color prints to do it.

A video (embedded below) begins with an intro but walks through the entire process starting around the 1:26 mark. The lithophane is printed as a single piece and looks like most other 3D printed lithophanes from the front, but the back is different. The back (which is the bottom printed layer) is made of up multiple STL files, one for each color, and together creates something that acts as a color filter. When lit from behind, light passes through everything and results in an image that pops with color in ways that lithophanes normally do not.

The demo print was created with a printer equipped with a Palette 2, an aftermarket device that splices together filament from different spools to create multicolored prints, but we think a Prusa printer with an MMU (multi material upgrade) should also do the trick.

[Thomas] already has a lot of ideas on how to improve the process, but these early results are promising. Need a gift? Lithophanes plus LED strips make great lamps, and adding a cheap clock movement adds that little extra something.

Continue reading “Lithophanes Ditch The Monochrome With A Color Layer”