Tribed 3D Printer Configuration Doesn’t Ever Need To Be Leveled

[Jeremie Francois] has been thinking about ways to improve tool height adjustment and bed leveling in his 3D printer for a long time. His dream was to never ever think about Z height again. A dream that’s shared by many. These days, a lot of 3D printers have a mechanism for auto leveling in the software of the 3D printer. This works pretty well, but for various mechanical reasons, it’s better to have the bed itself be level.

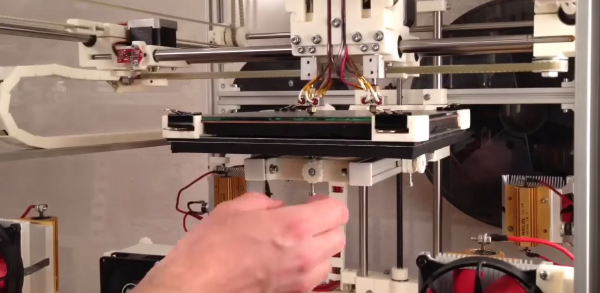
[Jeremie]’s approach is pretty clever. Since you can define any plane mathematically with three points, he has three Z-axis lead screws. This lets him tilt the bed at any angle he likes. Once he had the mechanics in place, he added some force sensitive resistors, an Arduino, and wrote an extension for the popular Marlin firmware. That’s when the problems started.

It turns out that solidly mounting the bed to the resistors transmitted way too many vibrations. The solution was a layer of neoprene rubber. The neoprene also acts as a cushion, so the nozzle won’t break the glass bed during the leveling procedure.

The video after the break is a bit wavy, due to YouTube’s terrible auto-stabilizing software, but if you watch closely, you can see the system at work.

Continue reading “Tribed 3D Printer Configuration Doesn’t Ever Need To Be Leveled”

semi auto bed leveling

Semi-Automatic Bed Leveling Your 3D Printer

Two of the most important prerequisites for successful 3D printing is making sure the bed is level and correctly setting the Z=0 height. Getting both of these right almost guarantees great adhesion since the first print layer is not only at the right distance from the build platform but also at a consistent distance for the entire bottom surface of the part.

Manual bed leveling is tedious, requiring the user to move the print nozzle to different points around the build platform, adjust some screws and make sure the nozzle is a piece-of-paper’s thickness higher than the platform. If you want to get complicated, there is an automatic option that probes the build platform and makes height corrections in the software. The probes come in several flavors, two common methods being a deployed mechanical switch (usually mounted to a servo) or force sensors under the build platform that sense when the nozzle touches the build platform. This method also requires some fancy firmware finesse to get working correctly.

[Jonas] posted a video showing the semi-automatic bed leveling capability of his printer. The build platform is held a bit high by springs that surround each of the 3 screws that support the bed assembly. The nozzle is moved directly over one of the 3 screws and then moved down until it noticeably presses on the build platform, compressing the support spring. A thumb wheel is then tightened at that location, locking the bed in place. The same process is performed for the other 2 support points. The result is a perfectly level build surface. Check the video out after the break to see just how quick this procedure is!

We’ve seen a somewhat similar concept that uses a clever gimbal and lock system under the bed.

Continue reading “Semi-Automatic Bed Leveling Your 3D Printer”

Printer bed leveling with a solenoid probe

Bed Leveling With A Solenoid Actuator

Ah, the woes of printer bed leveling. Unless you have a fancy 3D printer, bed leveling is a tedious task. [Rupin] got tired of messing around with his printer, so he decided to make his very own bed leveling sensor.

The goal was to create a Z-axis probe that works as both an auto-leveling sensor and as an end stop. He originally was trying to design something using a servo motor probe, but ended up chucking the idea since the motor was noisy and calibration was difficult.

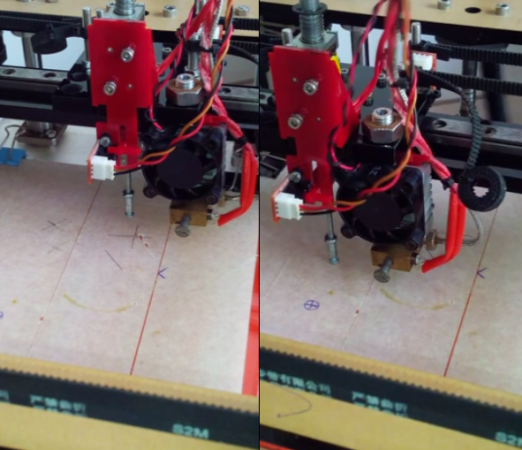
He’s since switched over to use a solenoid actuator with an optoisolator to determine the position. The actuator extends an M3 screw which will touch the bed — as the position is adjusted, it is possible to adjust the bed using software for a perfectly level bed, every time.

Continue reading “Bed Leveling With A Solenoid Actuator”

Lulzbot & Lime Green Begonias

Lulzbot, or more specifically Aleph Objects, had a booth at Maker Faire this year, and unlike a lot of other 3D printer manufacturers they’re not afraid to show off what they currently have in development. The latest is code-named Begonia, although when it makes it to production it will probably be called the Lulzbot Mini. It’s a smaller version of their huge Taz 3D printer that trades build volume for a lower price.

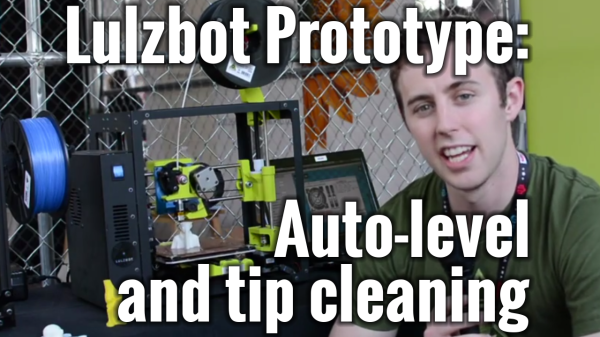
The Lulzbot Mini will have a 6x6x6 inch build volume, heated bed, and all the other features you would expect in its larger counterpart. One interesting feature is automated nozzle cleaning and bed leveling. At the start of every print run, the nozzle runs over a small felt pad at the back of the build plate, touches off four metal washers at each corner, and recalculates the GCode for a level print. You can check out a demo of that in the video above.

Also in the works in the Lulzbot labs is a controller panel with an SD card, display, and (I think) a touch interface. Lulzbot didn’t have a demo of this, but rest assured, we’ll post something on that when it’s released. The last time we saw Lulzbot we heard of a 3D scanner project they’re working on that will turn any physical object into an .STL file, without having to mess about in Meshlab. Development on this project is stalled, but that is a very difficult problem. Can’t fault them for that.

Oh, the price for the unannounced Lulzbot Mini? Somewhere around $1300-1400.

Continue reading “Lulzbot & Lime Green Begonias”

MakerBot Files Patents, Internet Goes Crazy

In the past month, a few patent applications from MakerBot were published, and like everything tangentially related to the prodigal son of the 3D printer world, the Internet arose in a clamor that would be comparable only to news that grumpy cat has died. That’s just an analogy, by the way. Grumpy cat is fine.

The first patent, titled, Three-dimensional printer with force detection was filed on October 29th, 2013. It describes a 3D printer with a sensor coupled to the hot end able to sense a contact force between the nozzle and build plate. It’s a rather clever idea that will allow any 3D printer to perform software calibration of the build plate, ensuring everything is printed on a nice, level surface. Interestingly, [Steve Graber] posted an extremely similar design of a bed leveling probe on October 6th, 2013. In [Steve]’s video, you can see his bed level probe doing just about everything the MakerBot patent claims, all while being uploaded to YouTube before the patent application.

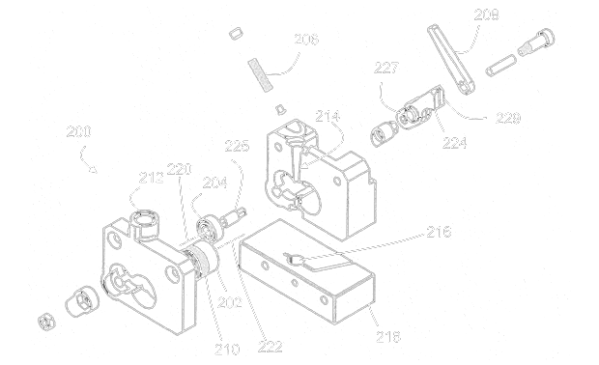
When it rains it pours, and the Quick-release extruder patent application, filed on October 28, 2013, bears this out. It claims an extruder that includes, “a bistable lever including a mechanical linkage to the bearing, the bearing engaged with the drive gear when the bistable lever is in a first position and the bearing disengaged from the drive gear when the bistable lever is in a second position.” Simple enough, a lever with two positions, where one presses a bearing against a drive gear, and the other position disengages the bearing from a drive gear. Here’s something that was published on Thingiverse in 2011 that does the same thing. Hugely famous RepRap contributor [whosawhatsis] has weighed in on this as well.

It is important to note that these are patent applications. Nothing has been patented yet. The US Patent and Trademark Office does seem to have a lot of rubber stamps these days, so what is the average Internet denizen to do? Here are easy to follow, step-by-step instructions on how to notify the USPTO of prior art. Remember, just because prior art does not completely invalidate a patent application’s claims doesn’t mean you shouldn’t send it in. It is a patent examiner’s job to review the prior art.

So there you go. MakerBot applies for patents, people complain, but not to the USPTO. Highly relevant video and transcription below.

Continue reading “MakerBot Files Patents, Internet Goes Crazy”

Automated Bed Leveling For 3D Printers Is Now Solved

The latest and greatest feature for 3D printers – besides being closed source, having no meaningful technical specs, and being on track towards pulling in $10 Million on a Kickstarter – is automated bed leveling. This amazingly useful feature makes sure your prints have proper adhesion to the bed, reduce print errors, and put even inexpensive printers into the realm of extremely expensive professional machines. Automated bed leveling has been extremely hard to implement in the past, but now [Scottbee] has it figured out with a working prototype on his Makerbot Replicator 2X.

Earlier attempts at automated bed leveling used some sort of probe on the tool head to measure the build plate, calculate its flatness and orientation in space, and compensate for any tilt in software. [Scottbee]’s solution to the problem took a different tack: instead of trying to compensate for any odd orientation of the build surface in software, he’s simply making the bed level with a series of springs and cam locks.

[Scottbee]’s device levitates the build plate on three springs, and replaces the jack screws with three “gimballing pins” and pin locks. With the pin locks disengaged, the bed plate is pressed down with the printer’s nozzle. By moving the extruder across the build plate and locking the pins in place one by one, [Scottbee]’s device defines the plane of the build plate along three points. This makes the build platform parallel to the extruder nozzle, and also has a nice benefit of setting the distance from the build platform to the nozzle precisely with incredible repeatability.

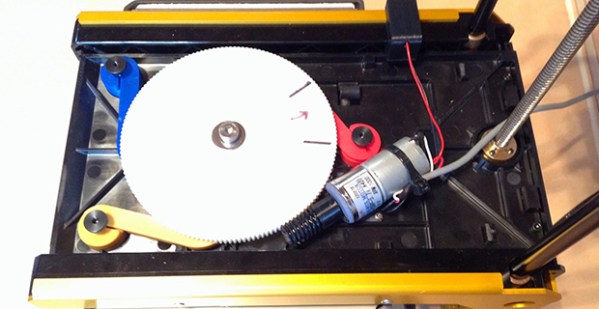
The mechanics of locking the three gimballing pins in place  only requires a single DC gear motor, driven by an extra fan output on the Makerbot’s electronics. It’s simple, and with a bit of rework, it looks like most of the device could also be 3D printed.

An awful lot of RepRaps and 3D printers out there already use three points to attach the build plate to a frame. With a little bit of effort, this same technique could be ported and made a bit more generic than the Makerbot-based build seen above. It’s amazingly simple, and we can’t wait to see this applied to a normal RepRap.

Thanks [Josh] for the tip.