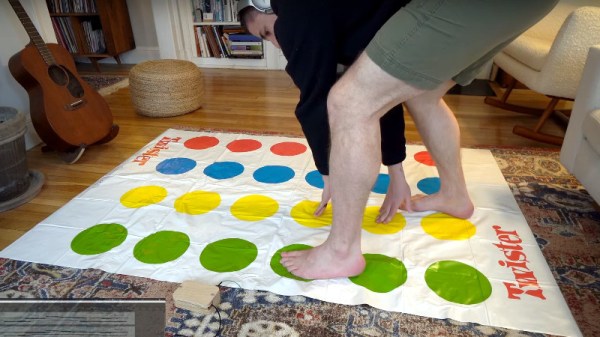
Twister, the mildly embarrassing but strangely enjoyable floor contortion game that most of us have vague youthful memories of from Christmas parties. Could a Twister mat be used as an input device? [Guy Dupont] took those 24 coloured dots and made just that, after a conversation with a friend.
Wiring up a floor-sized plastic mat isn’t as easy as it might seem, and early experiments with copper foil and capacitive touch sensor chips proved to be a failure. The replacement came in the form of force sensitive resistors, read by a brace of MCP3008 multiplexed analogue-to-digital converters. These are then read by an ESP32 that does all the MIDI magic. We’re treated in the video below the break to full details including the entertaining sight of him playing Twister to a beat, prompted by a robotic-voiced random move generator, and we can see that this devices has some potential.
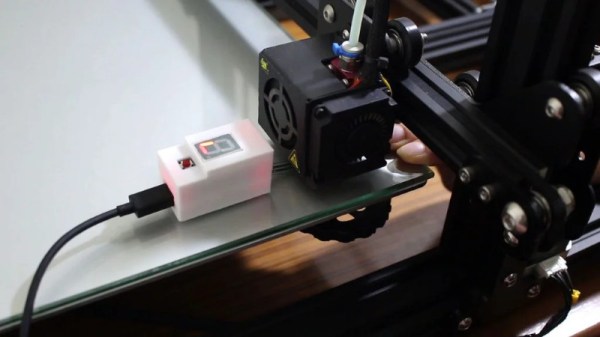
How do you know if your 3D printer bed is levelled? Oh, don’t worry – you’ll know. Without a level bed, filament won’t stick properly to the build surface and you’ll run into all sorts of other problems. Knowing how tricky it can be to get the bed just right, [Antzy] built a tool to help.
The device, which he calls the FS-Touch, is based around an Arduino Pro Micro fitted with a force sensitive resistor. This allows the distance between the bed and nozzle to be measured based on the force read by the resistor when placed in between the two.
Using the tool is simple. First, the bed is brought roughly into alignment using the typical paper method. Then, a reading is taken from one corner of the bed, and the measurement saved for reference. The other corners can then be set to the same level, with the aid of LEDs to guide the user in which direction to turn the adjustment knobs.
Measuring force in this way has the potential of being more repeatable than the somewhat difficult paper method. It promises to ease the task for users that may be struggling to get their bed in proper shape. Of course, automated bed levelling makes things even easier again. Video after the break.
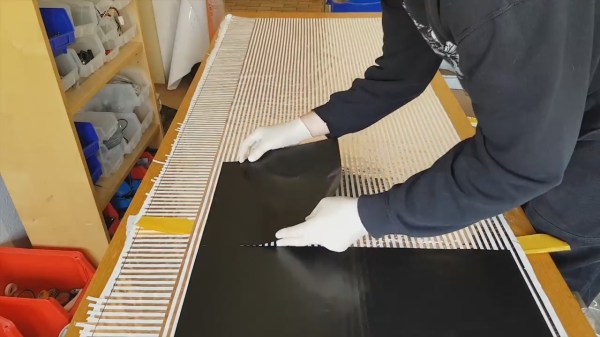
Hackers often find uses for pressure sensitive materials, detecting footfalls during walking or keypresses in a synthesizer being two examples. [Marco Reps] decided he’d make a hi-res, body-sized pressure sensitive mat mainly for computer-guided physiotherapy, though he wouldn’t rule out using it for gaming (twister anyone?). That meant making the equivalent of a body-sized matrix circuit of around 7000 sensors, as well as a circuit board with a multitude of shift registers. The result has a surprisingly good resolution, capable of making clearly distinguishable the heel, arch and front part of a foot.
His choice of pressure sensitive material was Velostat, a polymeric foam available as large sheets. The foam is impregnated with carbon black to make it electrically conductive, but being a foam, its resistance changes when pressure is applied. The first layer of the mat is made up of one centimeter wide strips of copper tape laid out lengthwise and spaced one centimeter apart. That’s followed by the Velostat and then another layer of copper tape oriented horizontally this time. The pressure sensors are the sandwiches formed by where the tapes overlap. In the first video below he shows how he measured and graphed the Velostat’s dynamic range to help decide to use one centimeter squares. He also puts together a smaller prototype, with good results.
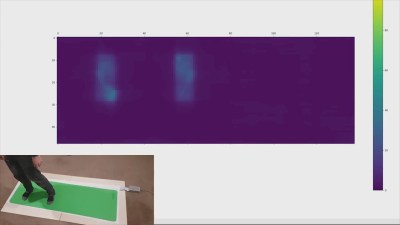
Testing the mat
For the body-sized mat, we count around 50 by 140 overlapping areas for a total of around 7000 one square centimeter sensors. And of course to measure each sensor in that large matrix, as you can imagine, he made up a custom circuit board with shift registers. The board works by applying positive voltage to the columns one-by-one, while each time going through all the rows and reading their voltages. Making the board was in itself was an adventure, taking a chance on a Chinese manufacturer asking only $2. But watch the second video below where he evaluates the result, including trying unsuccessfully to delaminate a board. Sadly he forgot to include places on the board for diodes, one for each column, and fixing that is another adventure he walks us through. Patience was definitely a prerequisite here, not only for making the mat, and fixing the diode problem, but also for connecting up 96-pin ribbon cables. We applaud his efforts, and his results. Check out the second video below for the making of the large mat and the circuit board.
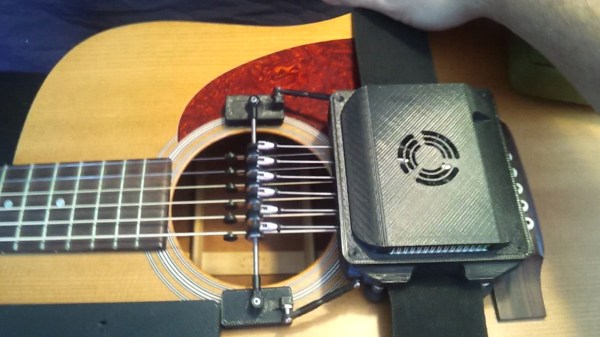
Due to a skiing accident, [Joe]’s new friend severed the motor nerves controlling her left arm. Sadly she was an avid musician who loved to play guitar — and of course, a guitar requires two hands. Or does it? Pressing the string to play the complex chords is more easily done using fingers, but strumming the strings could be done electromechanically under the control of a foot pedal. At least that’s the solution [Joe] implemented so beautifully when his friend’s family reached out for help.
There are just so many things to enjoy while reading through [Joe]’s project logs on his hackaday.io page, which he’s entered into the Hackaday Prize. He starts out with researching how others have solved this problem. Then he takes us through his first attempts and experiments. For example, an early discovery is how pressing the strings on the fretboard pulls the string down where the picks are located, causing him to rethink his initial pick design. His criteria for the pick actuators leads him to make his own. And the actuators he made are a thing of beauty: quiet, compact, and the actuator body even doubles as part of a heat sink for his custom controller board. During his pick design iterations he gets great results using spring steel for flexibility leading up to the pick, but thinking of someday going into production, he comes up with his own custom-designed, laser-cut leaf springs, different for each string. Needing Force Sensitive Resistors (FCRs) for the foot pedal, he iterates to making his own, laying out the needed interlinked traces on a PCB (using an Eagle script) and putting a piece of conductive rubber over it all. And that’s just a sample of the adventure he takes us on.
In terms of practicality, he’s made great efforts to make it compact and easy to set up. The foot pedal even talks to the control board on the guitar wirelessly. Non-damaging adhesives attach magnets and velcro to the guitar so that the control board and pick bridge can be precisely, yet easily, attached single-handedly. The result is something easy to manage by someone with only one working hand, both for set-up and actual playing. See it for yourself in the video below.
The Peanuts cartoon character Schroeder liked to bang out Beethoven a toy piano. Now, thanks to this hack from [Liam Lacey], Schroeder can switch to Skrillex. That’s because [Liam] built a polyphonic synth into a toy piano. It’s an impressive build that retains the look and feel of the piano, right down to a laser-etched top panel with knobs that match the glossy black styling.
The brains of the synthesizer is a Beaglebone Black using the Maximillian synthesis library. To capture the key presses, he used Velostat, a pressure-sensitive material that changes resistance under pressure. This is probably the only toy piano in the world with fully polyphonic velocity and aftertouch. The build also includes MIDI support, with two ports on the back. [Liam]’s build log is full of more details than we can even summarize here.
This beautiful build won [Liam] first place in the Element 14 Music Tech competition, and it is a well-deserved prize for a clean and elegant way to update a vintage piano.
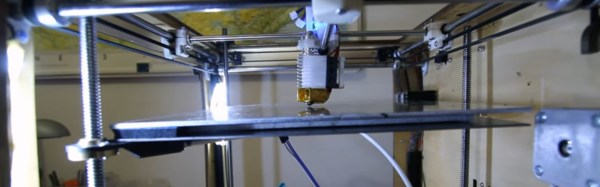
[Jeremie Francois] has been thinking about ways to improve tool height adjustment and bed leveling in his 3D printer for a long time. His dream was to never ever think about Z height again. A dream that’s shared by many. These days, a lot of 3D printers have a mechanism for auto leveling in the software of the 3D printer. This works pretty well, but for various mechanical reasons, it’s better to have the bed itself be level.
[Jeremie]’s approach is pretty clever. Since you can define any plane mathematically with three points, he has three Z-axis lead screws. This lets him tilt the bed at any angle he likes. Once he had the mechanics in place, he added some force sensitive resistors, an Arduino, and wrote an extension for the popular Marlin firmware. That’s when the problems started.
It turns out that solidly mounting the bed to the resistors transmitted way too many vibrations. The solution was a layer of neoprene rubber. The neoprene also acts as a cushion, so the nozzle won’t break the glass bed during the leveling procedure.
The video after the break is a bit wavy, due to YouTube’s terrible auto-stabilizing software, but if you watch closely, you can see the system at work.
When we think of wearable technologies, ballet shoes aren’t the first devices that come to mind. In fact, the E-Traces pointé shoes by [Lesia Trubat] may be the first ever “connected ballet shoe.” This project captures the movement and pressure of the dancer’s feet and provides this data to a phone over Bluetooth.
The shoes are based on the Lilypad Arduino clone, which is designed for sewing into wearables. It appears that 3 force sensitive resistors are used as analog pressure sensors, measuring the force applied on the ground by the dancer’s feet. A Lilypad Accelerometer measures the acceleration of the feet.
This data is combined in an app running on an iPhone, which allows the dancer to “draw” patterns based on their dance movements. This creates a video of the motion based on the dance performed, and also collects data that can be used to analyze the dance movements after the fact.
While these shoes are focused on ballet, [Lesia] points out that the same technique could be extended to other forms of dance for both training and visualization purposes.