The header image above shows a completely unsupported 3D-printed bridge, believe it or not. You’re looking at the bottom of the print. [Make Wonderful Things] wondered whether unsightly unsupported bridges could be improved, and has been busy nailing down remarkably high-quality results by exhaustive testing of different settings.
It all started when they thought that unsupported bridges looked a lot as though they were made from ropes stretched between two points. Unlike normal layers, these stretched extrusions didn’t adhere to their neighbors. They are too far apart from one another, and there’s no “squish” to them. But could this be overcome?
His experiments centered mainly around bridge printing speed, temperature, and bridge flow. That last setting affects how much the extrusion from the hot end is adjusted when printing a bridge. He accidentally increased it past 1.0 and thought the results were interesting enough to follow up on; it seemed that a higher flow rate when printing a bridge gave the nudge that was needed to get better inter-line adhesion. What followed was a lot of testing, finally settling on something that provided markedly better results than the stock slicer settings. Markedly better on his test pieces, anyway.
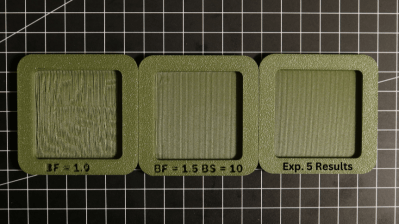
The best results seem to come from tweaking the Bridge Flow rate high enough that extrusions attach to their neighbors, printing slowly (he used 10 mm/sec), and ensuring the bridged area is as consistent as possible. There are still open questions, like some residual sagging at corners he hasn’t been able to eliminate, but the results otherwise look great. And it doesn’t even require laying one’s printer on its side!
All the latest is on the project page where you can download his test models, so if you’re of a mind to give it a try be sure to check it out and share your results. Watch a short video demonstrating everything, embedded just under the page break.
Thanks to [Hari] for the tip!
Continue reading “Better 3D-Printed Bridges Are Possible, With The Right Settings”


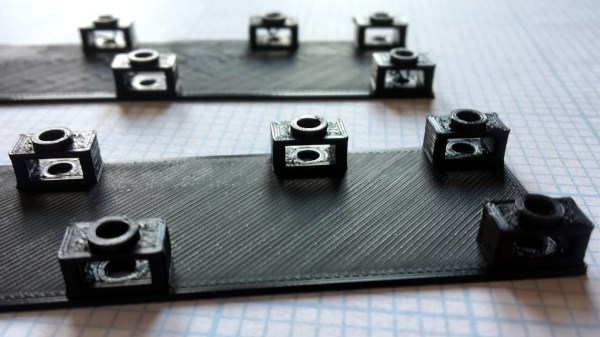
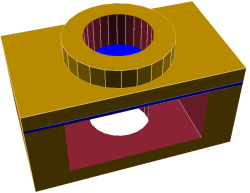 To solve this [Tommy] added what he calls a “sacrificial bridge”, shown as blue in the CAD image. He essentially gives the hole a flat bottom, so that the printer first lays down a thin but solid bridge as a foundation. Then, the portion with the round hole is printed on top of that. With this small design change, the print becomes much more reliable with no support structure required.