Arduino Does Multitouch

A lot of consumer gadgets use touch sensors now. It is a cheap and reliable way to replace a variety of knobs and switches on everything from headphones to automobiles. However, creating a custom touch controller for a one-off project can be daunting. A recent ACM paper shows how just about any capacitive sensor can work as a multitouch sensor with nothing more than an Arduino although a PC running processing interprets the data for higher-level functions.

The key is that the Arduino excites the grid using PWM and then examines the signal coming out of the grid. Finger poking changes the response quite a bit and the Arduino can sense it using the analog to digital converters onboard. You can find the actual software kit online. The tutorial document is probably more interesting than the ACM paper if you only want to use the kit.

The optimum drive frequency is 10 MHz. The examples rely on harmonics of a lower frequency PWM signal to get there. The analog conversion, of course, isn’t that fast but since your finger touch rate is relatively slow, they treat the signal as an amplitude-modulated input which is very easy to decode.

The sensors can be conductive ink, thread, or copper strips. There are several example applications, including a 3D printed bunny you can pet, a control panel on a sleeve, and an interactive greeting card.

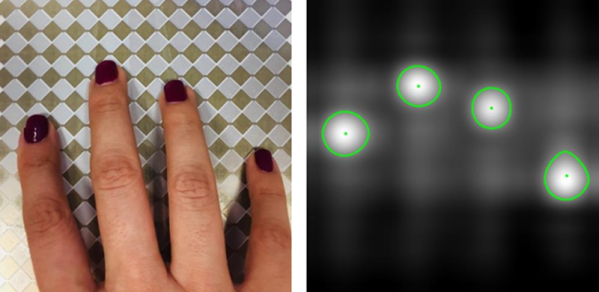
The sensor forms an image and OpenCV detects the actual touch configuration. It appears you can use the raw data from the Arduino, too, but it might be a little harder.

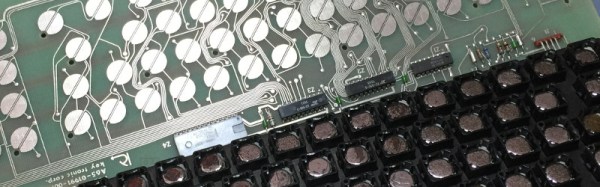
We imagine aluminum foil would work with this technique. If you get to the point of laying out a PCB, this might come in handy.

Metalized Gift Wrap Saves A Classic Keyboard

What do you do when you decide that running CP/M on a Commodore 128 with a 5.25″ drive “Isn’t CP/M enough”? If you are [FozzTexx], you reach for your trusty TRS-80 Model II, with its much more CP/M-appropriate 8″ drive.

There was one small snag with the TRS-80 though, its keyboard didn’t work. It’s a capacitive device, meaning that instead of each key activating a switch, it contains a capacitive sensor activated by a piece of aluminized Mylar film on a piece of foam. Nearly four decades of decay had left the foam in [FozzTexx]’s example sadly deflated, leaving the keys unable to perform. Not a problem, he cast around for modern alternatives and crafted replacements from a combination of foam weather strip and metalized gift wrap.

Care had to be taken to ensure that the non-metalized side of the gift wrap faced the capacitive sensor pads, and that the weather strip used had the right thickness to adequately fill the gap. But the result was a keyboard that worked, and for a lot less outlay and effort than he’d expected. We would guess that this will be a very useful technique for owners of other period machines with similar keyboards.

What is CP/M, I hear you ask? Before there was Linux, Windows, and MacOS, there was DOS, and before DOS, there was CP/M. In the 1970s this was the go-to desktop operating system, running on machines powered by Intel’s 8080 and its derivatives like the Zilog Z80 in the TRS-80. When IBM needed an OS for their new PC they initially courted CP/M creators Digital Research, but eventually they hired a small software company called Microsoft instead, and the rest is history. Digital Research continued producing CP/M and its derivatives, as well as an MS-DOS clone and the GEM GUI that may be familiar to Atari ST owners, but were eventually absorbed into Novell in the 1990s.

We’ve featured a few capacitive keyboards here at Hackaday before, including this similar repair to a Compaq from the 1980s, and this look at a classic IBM terminal keyboard.