Building A 3D Scanner With A 3D Printer

Using a 3D printer to make high quality parts is a great way to improve the look and appeal of any project. If you want to replicate something exactly, though, you’ll need either a very good set of calipers and a lot of time or a 3D scanner. Using the 3D scanner and the 3D printer go along very well together, especially if you use your 3D printer to build your 3D scanner too.

This project comes to us from [Vojislav] who spent the past two years perfecting this 3D scanner. Using a vast array of 3D printed parts, this build looks professional on every level. It also boasts a Raspberry Pi Zero and a fleet of camera modules, not to mention its own LED lighting. [Vojislav] has provided the printer files and the software needed to run it on the project page. It all runs through command line and python code, but that shouldn’t be a big hurdle.

While there is no video of it in action, it seems like all the parts are there for a solid 3D scanner, provided you have access to a 3D printer that can churn out the parts you’ll need. If you need something larger, there are some other options available as well that really take your photogrammetry skills to the next level.

Rotary Dial Becomes USB Keyboard

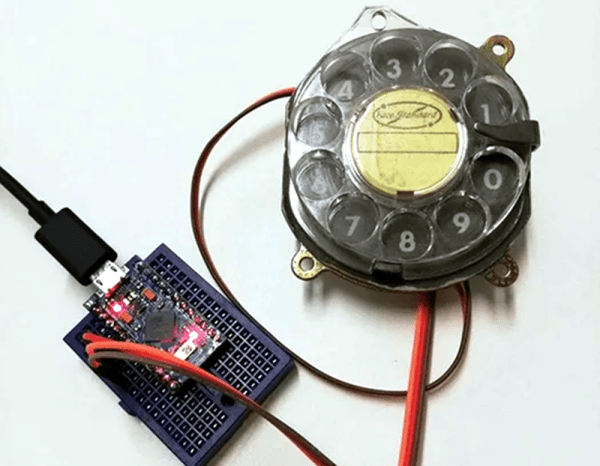
[Max] had a rotary dial from an old telephone and — unsurprisingly — had nothing in particular to do with it. The simple answer? Use an Arduino Leonardo to turn it into a USB keyboard device.

Of course, the Leonardo can easily impersonate a USB keyboard, so that’s the easy part of the project. Interfacing to the dial requires an understanding of how the phone system works.

While today, TouchTone phones are most common, they were quite uncommon for many years. Early phones required you to have an operator connect your circuit to another person’s circuit. Unfortunately for the operators, the system was inherently unscalable and also cost prohibitive.

There were a variety of schemes tried and — supposedly — an undertaker who was angry that the operator was connecting his customers to her husband’s competing mortuary invented the dial telephone.

The details are pretty simple. A typical dial has two contacts. There’s a normally open contact that closes when you spin the dial to any position. It says closed until the spring returns the dial to the home position.

The other contact is normally closed and makes or breaks the phone line. Each time the dial rewinds past a position, the contact opens briefly. Of course, this is a mechanical system, so the software has to debounce the inputs, but that’s easy enough.

If you don’t have access to a dial, you could always print one. Sort of.

Hackaday Links Column Banner

Hackaday Links: November 17, 2019

Friday, November 15, 2019 – PASADENA. The 2019 Hackaday Superconference is getting into high gear as I write this. Sitting in the Supplyframe HQ outside the registration desk is endlessly entertaining, as attendees pour in and get their swag bags and badges. It’s like watching a parade of luminaries from the hardware hacking world, and everyone looks like they came ready to work. The workshops are starting, the SMD soldering challenge is underway, and every nook and cranny seems to have someone hunched over the amazing Hackaday Superconference badge, trying to turn it into something even more amazing. The talks start on Saturday, and if you’re not one of the lucky hundreds here this weekend, make sure you tune into the livestream so you don’t miss any of the action.

The day when the average person is able to shoot something out of the sky with a laser is apparently here. Pablo, who lives in Argentina, has beeing keeping tabs on the mass protests going on in neighboring Chile. Huge crowds have been gathering regularly over the last few weeks to protest inequality. The crowd gathered in the capital city of Santiago on Wednesday night took issue with the sudden appearance of a police UAV overhead. In an impressive feat of cooperation, they trained 40 to 50 green laser pointers on the offending drone. The videos showing the green beams lancing through the air are quite amazing, and even more amazing is the fact that the drone was apparently downed by the lasers. Whether it was blinding the operator through the FPV camera or if the accumulated heat of dozens of lasers caused some kind of damage to the drone is hard to say, and we’d guess that the drone was not treated too kindly by the protestors when it landed in the midsts, so there’s likely not much left of the craft to do a forensic analysis, which is a pity. We will note that the protestors also trained their lasers on a police helicopter, an act that’s extremely dangerous to the human pilots which we can’t condone.

In news that should shock literally nobody, Chris Petrich reports that there’s a pretty good chance the DS18B20 temperature sensor chips you have in your parts bin are counterfeits. Almost all of the 500 sensors he purchased from two dozen vendors on eBay tested as fakes. His Github readme has an extensive list that lumps the counterfeits into four categories of fake-ness, with issues ranging from inaccurate temperature offsets to sensors without EEPROM that don’t work with parasitic power. What’s worse, a lot of the fakes test almost-sorta like authentic chips, meaning that they may work in your design, but that you’re clearly not getting what you paid for. The short story to telling real chips from the fakes is that Maxim chips have laser-etched markings, while the imposters sport printed numbers. If you need the real deal, Chris suggests sticking with reputable suppliers with validated supply chains. Caveat emptor.

A few weeks back we posted a link to the NXP Homebrew RF Design Challenge, which tasked participants to build something cool with NXP’s new LDMOS RF power transistors. The three winners of the challenge were just announced, and we’re proud to see that Razvan’s wonderfully engineered broadband RF power amp, which we recently featured, won second place. First place went to Jim Veatch for another broadband amp that can be built for $80 using an off-the-shelf CPU heatsink for thermal management. Third prize was awarded to a team lead by Weston Braun, which came up with a switch-mode RF amp for the plasma cavity for micro-thrusters for CubeSats, adorably named the Pocket Rocket. We’ve featured similar thrusters recently, and we’ll be doing a Hack Chat on the topic in December. Congratulations to the winners for their excellent designs.

Tangible Programming Brings Code Into The Real World

We love the idea of [Amos]’s Tangible Programming project. It reminds us of those great old Radioshack electronics labs where the circuitry concepts took on a physical aspect that made them way easier to digest than abstractions in an engineering textbook.

MIT Scratch teaches many programming concepts in an easy to understand visual way. However, fundamentally people are tactile creatures and being able to literally feel and see the code laid out in front could be groundbreaking for many young learners. Especially those with brains that favor physical touch and interaction such as ADHD or Asperger’s minds.

The boards are color-coded and communicate via an I2C bus. Each board’s logic and communication is handled by an ATTiny or ATMega. The current processing is visible through LEDs or even an OLED display. Numbers are input either through thumbwheel switches or jumpers.

The code concepts will, of course, be simple and focused due to the physical nature of the blocks. Integer arithmetic, simple loops, and if/else conditionals. Quite a lot of concepts can be built around this and it could be a natural diving board into the aforementioned Scratch and eventually an easy to learn language like python.

Arduino Does Multitouch

A lot of consumer gadgets use touch sensors now. It is a cheap and reliable way to replace a variety of knobs and switches on everything from headphones to automobiles. However, creating a custom touch controller for a one-off project can be daunting. A recent ACM paper shows how just about any capacitive sensor can work as a multitouch sensor with nothing more than an Arduino although a PC running processing interprets the data for higher-level functions.

The key is that the Arduino excites the grid using PWM and then examines the signal coming out of the grid. Finger poking changes the response quite a bit and the Arduino can sense it using the analog to digital converters onboard. You can find the actual software kit online. The tutorial document is probably more interesting than the ACM paper if you only want to use the kit.

The optimum drive frequency is 10 MHz. The examples rely on harmonics of a lower frequency PWM signal to get there. The analog conversion, of course, isn’t that fast but since your finger touch rate is relatively slow, they treat the signal as an amplitude-modulated input which is very easy to decode.

The sensors can be conductive ink, thread, or copper strips. There are several example applications, including a 3D printed bunny you can pet, a control panel on a sleeve, and an interactive greeting card.

The sensor forms an image and OpenCV detects the actual touch configuration. It appears you can use the raw data from the Arduino, too, but it might be a little harder.

We imagine aluminum foil would work with this technique. If you get to the point of laying out a PCB, this might come in handy.

UNIX Version 0, Running On A PDP-7, In 2019

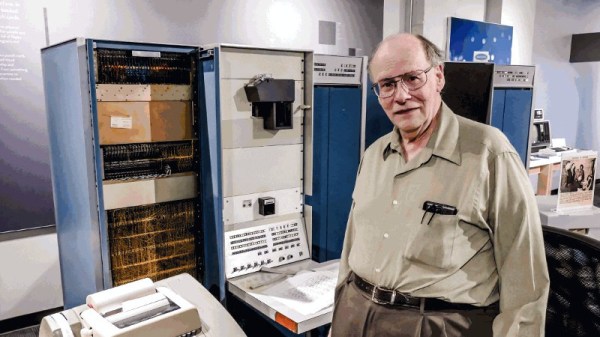
WIth the 50th birthday of the UNIX operating system being in the news of late, there has been a bit of a spotlight shone upon its earliest origins. At the Living Computers museum in Seattle though they’ve gone well beyond a bit of historical inquiry though, because they’ve had UNIX (or should we in this context say unix instead?) version 0 running on a DEC PDP-7 minicomputer. This primordial version on the original hardware is all the more remarkable because unlike its younger siblings very few PDP-7s have survived.

The machine running UNIX version 0 belongs to [Fred Yearian], a former Boeing engineer who bought his machine from the company’s surplus channel at the end of the 1970s. He restored it to working order and it sat in his basement for decades, while the vintage computing world labored under the impression that including the museum’s existing machine only four had survived — of which only one worked. [Fred’s] unexpected appearance with a potentially working fifth machine, therefore, came as something of a surprise.

To load the OS a disk emulator was connected to the machine, and for possibly the first time in many decades a new UNIX version 0 device driver was written to enable it to be used. The first login was the user “dmr”, a homage to UNIX co-creator Dennis M. Ritchie.

Continue reading “UNIX Version 0, Running On A PDP-7, In 2019”

The ESP32, Laid Bare

Most readers will be familiar with the ESP32, Espressif’s dual-core processor with integrated WiFi and Bluetooth. Few of us though will have explored all of its features, including its built-in encryption facilities and secure booting capability. With these, a developer can protect and secure their code, and keep their devices secure.

That sense of security may now be illusory though, thanks to [LimitedResults] who has developed a series of attacks on the chip that compromise its crypto core, secure boot, and flash encryption. This enables both the chance of arbitrary code execution and firmware extraction on locked-down ESP32 devices.

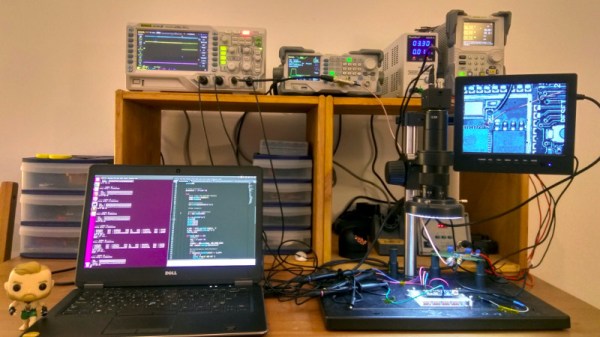
To achieve all this he used a glitching technique on the device’s power supply, inserting a carefully timed glitch in the rail to coincide with a particular instruction being executed. For those of us who are not experts in this technique, he provides a basic primer with a description of his home-made glitcher made using a CMOS switch chip.

It appears that there is no solution to this attack short of new silicon, however, it should be borne in mind that it’s something that depends upon a specialist hacker with a well-equipped bench, and is thus only likely to be a significant headache to manufacturers. But it undermines a key feature of a major line of microcontrollers, and as such it remains a significant piece of work.