DIY Super-Bright Outdoor TV With Watercooling

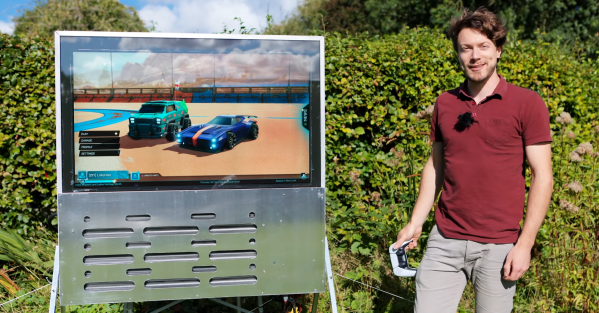
Watching TV or playing a console game is usually not an outdoor activity, helped by the fact that you can’t see anything on your average TV in direct sunlight. However, with some basic fabrication skills, [Matt] from [DIY Perks] demonstrates how to upgrade an LCD TV to be viewable in the brightest conditions by upgrading its backlight, and adding a simple water-cooling system in the process. Full build video after the break.

An LCD panel doesn’t produce any light but acts as a filter for the backlight behind it, which is just a widely spaced array of white LEDs. The core of the build is upgrading the backlight, so [Matt] picked up a large 4K TV with a partially faulty backlight for a very affordable price. The new backlight consists of a set of high-brightness LED panels, screwed to a sheet of aluminum. The LEDs generate a lot of heat, so [Matt] cools the back of the aluminum sheet with a budget-friendly water cooling system built from a car radiator, small water pump, and some clear plastic tubing. Everything is housed in an industrial-looking enclosure made from aluminum sheet, aluminum extrusions, and an acrylic back panel. To protect the LCD panel, it’s glued to a sheet of tempered glass from an old coffee table.

The final product performs very well, even in direct sunlight, and is also weatherproof. [DIY Perks] is known for projects that work as well as they look, like his triple-screen luggable PC or massive bellow-cooled PC. Continue reading “DIY Super-Bright Outdoor TV With Watercooling”

Artwork Spans Fifty Years Of Display Technology

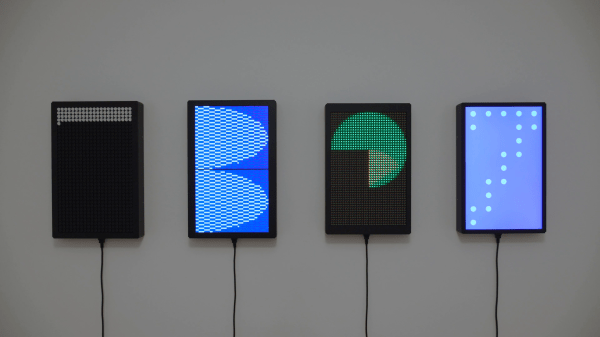
Swiss artist and designer [Jürg Lehni] was commissioned to create an artwork called Four Transitions which has been installed in the HeK (House of electronics Arts) in Basel. This piece visually depicts the changes in technologies used by public information displays, such as those in airports and train stations. As the title of the installation suggests, four different technologies are represented:

  • Flip-Dot, early 1960s, 15 each 7 x 7 modules arrayed into a 21 x 35 pixel panel
  • LCD, 1970s and 1980s, two each 36 x 52 modules arrayed into 52 x 76 pixel panel
  • LED, 2000s, six each 16 x 16 RGB modules arrayed into a 32 x 48 pixel panel
  • TFT, current, one 24 inch module, 1200 x 1920 pixel panel

The final work is quite striking, but equally interesting is the summary of the the design and construction process that [Jürg] provides on Twitter. We hope he expands this into a future, more detailed writeup — if only to learn about reverse engineering the 20 year old LCD controller whose designer was in retirement. His tweets also gives us a tantalizing glimpse into the software, controllers, and interconnections used to drive all these displays. There is quite a lot of interesting engineering going on in the background, and we look forward to future documentation from [Jürg].

You may recognize [Jürg] as the creator of Hektor, a graffiti output device from 2002 which we’ve referenced over the years in Hackaday. Check out the short video below of the displays in operation, and be sure to unmute the volume so you can listen to the satisfying sound of 735 flip-dots changing state. [Jürg] also gives in interview about the project in the second video below. Thanks to [Niklas Roy] for sending in the tip about this most interesting exhibition.

Continue reading “Artwork Spans Fifty Years Of Display Technology”

Reverse Engineering A Huge LED Display

muchosLEDs
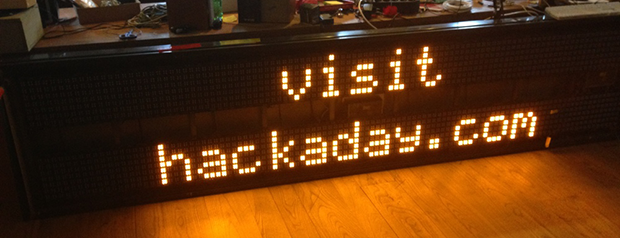
In a fit of awesome salvaging, [Piet] picked up a huge, 16 character, 2 line display. It’s monstrous, designed for outdoor installations; road signs, train stations, and the like. It also draws 23 Watts when nothing is being displayedmaking this the perfect piece of salvaged equipment to reverse engineer.

The display was originally connected to a computer running proprietary software. The protocol between the display and computer is also proprietary, giving [Piet] the choice of either reverse engineering the protocol, or reverse engineering the hardware and building a new driver board. For anyone with a soldering iron, the second option is the simplest.

Disassembling the display, [Piet] found each character in the display was its own board with a 7×14 array of pixels, each with four LEDs. The rows and columns of each character are addressed with a shift register, and with an Arduino, [Peit] got a single character working.

The Arduino would struggle to display all the characters in the display, so a Raspi was pulled out, a driver and frame generator written, and the whole thing connected to Twitter It’s a beautifully display that draws 200 Watts when its scanning the pixels, and a wonderful reuse of disused hardware. Video below.

Continue reading “Reverse Engineering A Huge LED Display”