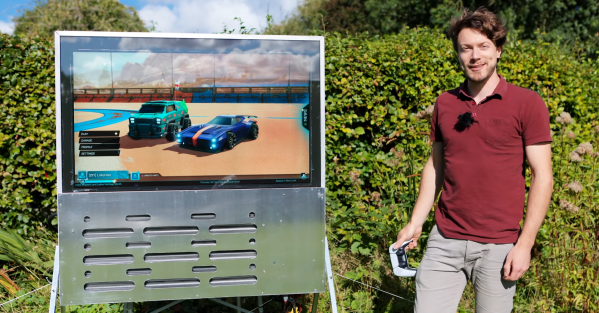
Watching TV or playing a console game is usually not an outdoor activity, helped by the fact that you can’t see anything on your average TV in direct sunlight. However, with some basic fabrication skills, [Matt] from [DIY Perks] demonstrates how to upgrade an LCD TV to be viewable in the brightest conditions by upgrading its backlight, and adding a simple water-cooling system in the process. Full build video after the break.
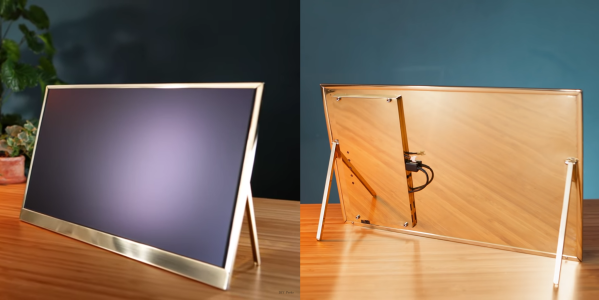
An LCD panel doesn’t produce any light but acts as a filter for the backlight behind it, which is just a widely spaced array of white LEDs. The core of the build is upgrading the backlight, so [Matt] picked up a large 4K TV with a partially faulty backlight for a very affordable price. The new backlight consists of a set of high-brightness LED panels, screwed to a sheet of aluminum. The LEDs generate a lot of heat, so [Matt] cools the back of the aluminum sheet with a budget-friendly water cooling system built from a car radiator, small water pump, and some clear plastic tubing. Everything is housed in an industrial-looking enclosure made from aluminum sheet, aluminum extrusions, and an acrylic back panel. To protect the LCD panel, it’s glued to a sheet of tempered glass from an old coffee table.
The final product performs very well, even in direct sunlight, and is also weatherproof. [DIY Perks] is known for projects that work as well as they look, like his triple-screen luggable PC or massive bellow-cooled PC. Continue reading “DIY Super-Bright Outdoor TV With Watercooling”