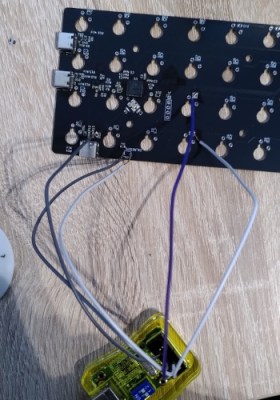
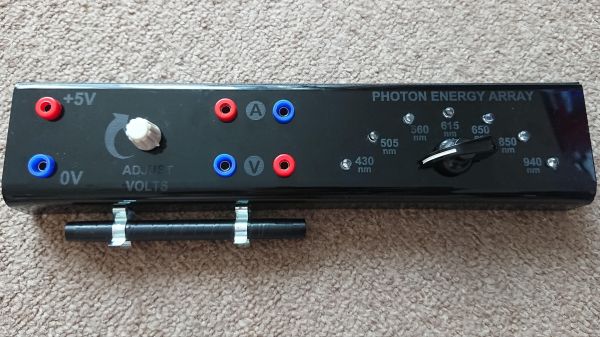
A Planck-inspired 40% ortholinear keyboard.

DIY Keyboard Can Handle Up To Three Host Devices

Here’s a story that may be familiar: [der-b] is a Linux developer who is forced two carry two laptops — one for work with unavoidable work stuff on it, and one for software development. Unfortunately this leads to keyboard confusion between the two when one is connected to an external display.

In an attempt to overcome this, [der-b] designed a keyboard that can be connected to more than one device at a time, despite ultimately thinking that this will lead to another layer of confusion. The point was to try to make something as lightweight as possible, since carrying two laptops is already a struggle. As a bonus, this project was a learning experience for soldering SMD parts.

The keyboard itself is based on the Planck and uses an ATMega32u4 running QMK firmware, so that means it’s a 40% ortholinear with 48 keys total. [der-b] used low-profile Cherry MX switches to keep things sleek.

In order to switch between different host devices, [der-b] uses shortcuts as you’ll see in the short video after the break. This is accomplished with a FSUSB36 IC on the USB connections between the ATMega and the host.

[der-b] encountered a spate of issues while building this keyboard, which you can read all about in the blog post. We love to see transparency when it comes to your write-ups, especially when the projects become learning experiences. (Aren’t they all?) But if 48 keys aren’t nearly enough for you, check out this learning-experience keyboard build.

Continue reading “DIY Keyboard Can Handle Up To Three Host Devices”

Measuring Planck’s Constant With LEDs And A DMM

The remarkable thing about our universe is that it’s possible to explore at least some of its inner workings with very simple tools. Gravity is one example, to which [Galileo]’s inclined planes and balls bear witness. But that’s classical mechanics: surely the weirdness that is quantum mechanics requires far more sophisticated instrumentation to explore, right?

That’s true enough — if you consider a voltmeter and a Mark 1 eyeball to be sophisticated. That’s pretty much all you need for instruments to determine Planck’s constant to a decent degree of precision, the way that [poblocki1982]’s did. There’s a little more to it, of course; the method is based on measuring the voltage at which LEDs of various wavelengths start shining, so a simple circuit was built to select an LED from the somewhat grandly named “photon energy array” and provide a way to adjust and monitor the voltage and current.

By performing the experiment in a dark room with adapted eyes, or by using an opaque tube to block out stray light, it’s possible to slowly ramp the voltage up until the first glimmer of light is seen from each LED. Recording the voltage and the wavelength gives you the raw numbers to calculate the Planck constant h, as well as the Planck error Ξ”h, with the help of a handy spreadsheet. [poblocki1982] managed to get within 11% of the published value — not too shabby at all.

Does this all still sound too complicated for you? Maybe a Watt balance made from Lego is more your speed.