Build A Shapeoko The Hard Way

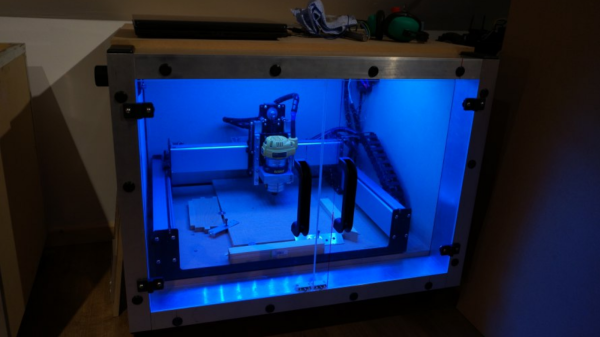
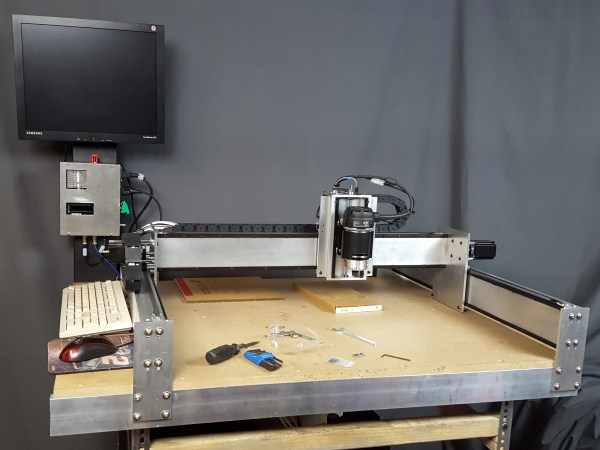
[Caleb Peters] looked at the Shapeoko 3 CNC kit, a kit designed to make building an entry level CNC router a possibility for anyone, a kit to take the guesswork out of the equation, a kit that removes all those difficult technical barriers. He looked at all of that ease and thought, “nah.” He wanted to learn! So he decided to build one the hard way. Like the early American Pioneers, he’d build his Shapeoko from scratch, suffering piously all the while.

His goal was to build an improved iteration of the Shapeoko 3, for less than the price of the kit. The first problem was the rails the gantry would run on. Inventables wasn’t going to sell him the rails, and he wasn’t sure if the delrin wheels used would be able to hold the weight of his heavier design. After some strife he determined that aluminum hard coat rails and steel wheels should last long enough, and if the aluminum wore away, the more expensive steel rails were a drop-in replacement.

Similar problems were overcome at each step. He couldn’t exactly copy the Shapeoko design. The Shapeoko’s steel pieces can only be made on a larger machine like a waterjet or industrial laser. He did have a knee mill and managed to cleverly avoid the need with some slight redesign. He kept at it, doing cool things like drilling a hole through the housing of a wood router, used as the spindle, and putting a hall-effect sensor just behind the commutator and brush assembly to get a spindle rpm reading.

Fortunately for us, he documented it all very well and filmed a nine part video series; the last of which you can see after the break.

Continue reading “Build A Shapeoko The Hard Way”

DIY Shapeoko 3 Enclosure

Setting up a desktop CNC brings along two additional problems that need to be resolved – noise and dust. [Nick] upgraded from a Shapeoko2 to the Shapeoko3 and decided to build a fresh dust and noise proof enclosure for his CNC , and it turned out way better than he had anticipated.

When trying to build something like this, aluminium extrusions seem like the obvious choice for the structure. Instead, he opted for low-cost steel frame shelving units. The 3mm thick steel frame results in a nice rigid structure. The top and bottom were lined with 18mm thick MDF panels. For the two sides and back, he choose 60mm noise dampening polyurethane foam lined with 6mm MDF on both sides, and held together with spray adhesive and tight friction fit in the frame.

The frame was a tad shallower and caused the spindle of the Shapeoko3 to stick out the front. To take care of this, he installed an additional aluminium frame to increase the depth of the enclosure. This also gave him a nice front surface on which to mount the 10mm thick polycarbonate doors. The doors have magnetic latches to hold them close, and an intentional gap at the top allows air to enter inside the enclosure. A 3D printed outlet port was fixed to the side wall, where he can attach the vacuum hose for dust collection. The final step was to add a pair of industrial door handles and a bank of blue LED strip lights inside the enclosure for illumination.

It’s a simple build, but well executed and something that is essential to keep the shop clean and dampen noise.