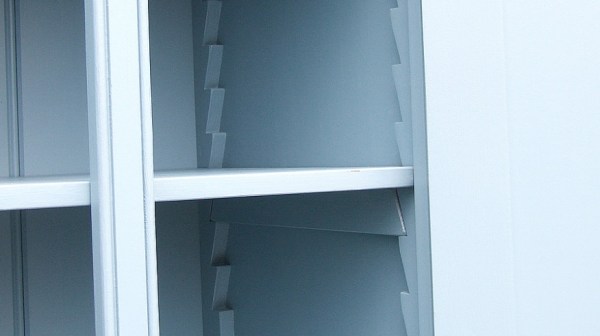
A blue cabinet. Inside, along the front and back are wooden sawteeth holding a cleat. On the cleat sits the shelf itself.

Adjusting Shelves Like It’s 1899

In most modern homes, any adjustable shelves or cabinets have metal shelf pins set inside conveniently spaced holes. Before the accoutrements of modern life, like easily replicated metal parts, you may have found a sawtooth shelf doing the same job with just wood.

The system comprises three parts: a series of “sawteeth” running up and down the front and back edge of a cabinet, a cleat to sit between the teeth, and a shelf with notched corners that can then be set down on the cleats on either side.

While not as convenient as running a drill through a shelf pin jig, this method has a certain charm and sturdiness that isn’t present in more modern methods of making adjustable shelves. We can see this being particularly useful for restoration projects of homes from the 19th Century or earlier where you want some of those aforementioned accoutrements without things looking too anachronistic.

If you want some shelving that’s decidedly more 21st Century, check out this MP3 Player Shelf or this Smart Shelf with Serious Functionality.

Throw Out That Box? No, Build A Shelving Unit

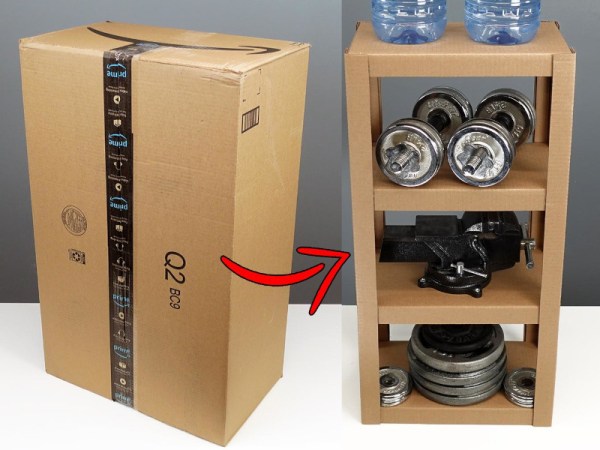
Are you one of those people who hoards cardboard for someday, and then periodically breaks it all down and puts it out for recycling because you haven’t done anything with it yet? Well, load up a new blade in the utility knife and fire up that hot glue gun, because the [Cardboard Ninja]’s gonna show you how to make a shelving unit from the biggest box in your collection.

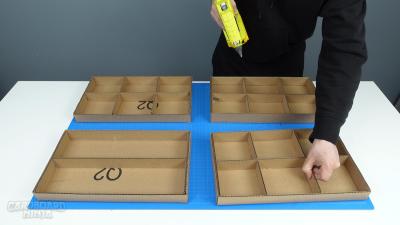
[Cardboard Ninja] goes about the build quite smartly, cutting the legs from the four long bends already in the cardboard. This is repeated in the shelves, which are made from the box’s sides — [Cardboard Ninja] takes advantage of the bends when it comes to cutting out the shelves and creates the other three with the edge of a metal ruler. The rest of the cardboard is devoted to supports for shelves and legs.

While you could use this unit to hold all the other, smaller boxen you have lying around, that would be a gross under-utilization. You see, the way this is put together, it can hold upwards of 133 lbs (60 kg) total, provided the rules of weight distribution are followed, and the heaviest things are on the bottom shelf.

That does seem like a lot of weight, but given that this was constructed by someone who has a holster for their utility knife and calls themselves [Cardboard Ninja], I think we can trust their stress tests and just go with it. Given that, it’s always a good idea to anchor shelving units to the wall.

You know, this would make a pretty good entry into the second Challenge of this year’s Hackaday Prize. Remember: this is the final weekend to enter, and the window closes at 7AM Pacific on Sunday, so get hackin’!

Continue reading “Throw Out That Box? No, Build A Shelving Unit”

DIY Shapeoko 3 Enclosure

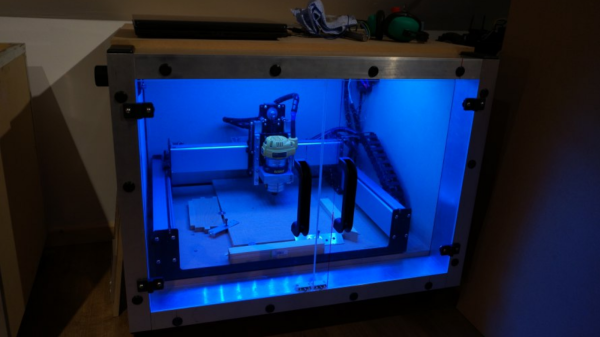
Setting up a desktop CNC brings along two additional problems that need to be resolved – noise and dust. [Nick] upgraded from a Shapeoko2 to the Shapeoko3 and decided to build a fresh dust and noise proof enclosure for his CNC , and it turned out way better than he had anticipated.

When trying to build something like this, aluminium extrusions seem like the obvious choice for the structure. Instead, he opted for low-cost steel frame shelving units. The 3mm thick steel frame results in a nice rigid structure. The top and bottom were lined with 18mm thick MDF panels. For the two sides and back, he choose 60mm noise dampening polyurethane foam lined with 6mm MDF on both sides, and held together with spray adhesive and tight friction fit in the frame.

The frame was a tad shallower and caused the spindle of the Shapeoko3 to stick out the front. To take care of this, he installed an additional aluminium frame to increase the depth of the enclosure. This also gave him a nice front surface on which to mount the 10mm thick polycarbonate doors. The doors have magnetic latches to hold them close, and an intentional gap at the top allows air to enter inside the enclosure. A 3D printed outlet port was fixed to the side wall, where he can attach the vacuum hose for dust collection. The final step was to add a pair of industrial door handles and a bank of blue LED strip lights inside the enclosure for illumination.

It’s a simple build, but well executed and something that is essential to keep the shop clean and dampen noise.

Upgrading A Hackerspace’s Shelving

shelving

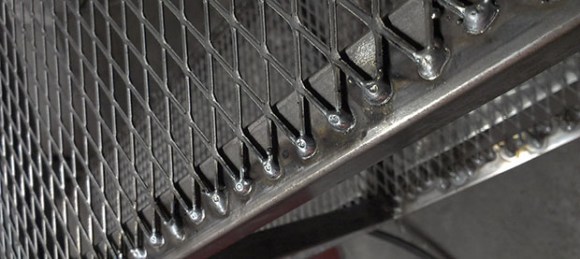
Shelving is probably one of the most underappreciated items in the shop. Think about it; would you rather have a place to store boxes, or a fancy new thickness planer, laser cutter, or pick and place machine. The folks over at the 23B hackerspace were growing tired of their disintegrating Ikea shelving unit and decided to make some shelves. They didn’t phone this one in, either: these shelves will be around far longer than you or I.

[Chris], the creator of these wonderfully useful pieces of metal, was inspired by a video featuring [Jamie Hyneman] of Mythbusters fame. An entire 80 foot section of M5 Industries, [Jamie]’s shop, is covered in shelving units constructed out of square steel tubing, put together in a way that’s easy to construct and able to handle amazing amounts of random stuff.

The new shelves for the 23B shop follow a similar design as the shelves over at M5, only a bit smaller in scale. It’s a wonderful beginner’s project for a welding and fabrication class, and more than sturdy enough to handle a few pull-ups.

Add A Clean Room To Your Workshop

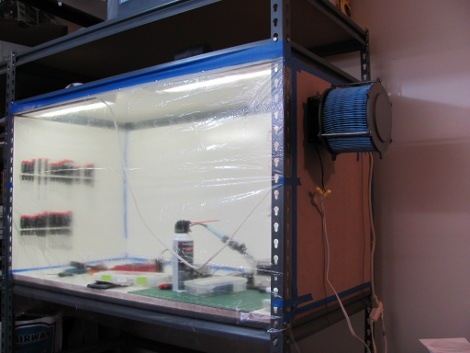
I Heart Robotics has posted a guide for building your own clean room. They’ve been clever with their materials, starting with heavy-duty shelving to provide the framework. We like that idea, it allows you to position your workspace at whatever height you desire.

The side walls are MDF painted with white enamel. Light, power, and tools are mounted to these walls. To keep things clean, a ventilation system uses a vacuum filter and 12V fans to keep filtered air moving in and dirty air out.

Maybe now we’ll be able to pull off that window hack without killing our hard drive.

[Thanks Mawitö and Ciric]