Everyone’s first microcontroller project is making an LED blink. It’s become the de-facto “Hello World” of hardware hacking. There’s something about seeing wires you connected and the code you wrote come together to make something happen in the real world. More than just pixels on a screen, the LED is tangible. It’s only a short jump from blinking LEDs to making things move. Making things move is like a those gateway drug – it leads to bigger things like robots, electric cars, and CNC machines. Computer Numerical Control (CNC) is the art of using a computer to control movement. The term is usually applied to machine tools, which cut, engrave, or perform other operations on wood, plastic, metal and other materials. In short, tools to make more things. It’s no surprise that hackers love CNCs. This week’s Hacklet is all about some of the best CNC projects on Hackaday.io!
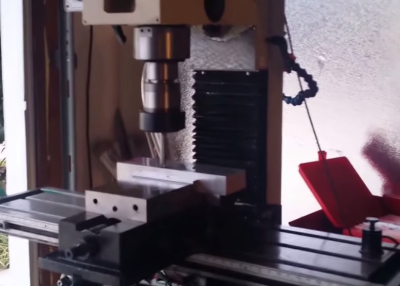 We start with [Charliex] and Grizzly G0704 CNC Conversion. [Charliex] wanted a stout machine capable of milling metal. He started with a Grizzly G0704, which is small compared to a standard knee mill, but still plenty capable of milling steel. [Charliex] added a Flashcut CNC conversion kit to his mill. While they call them “conversion kits” there is still quite a bit of DIY ingenuity required to get a system like this going. [Charliex] found his spindle runout was way out of spec, even for a Chinese mill. New bearings and a belt conversion kit made things much smoother and quieter as well. The modded G0704 is now spending its days cutting parts in [Charliex’s] garage.
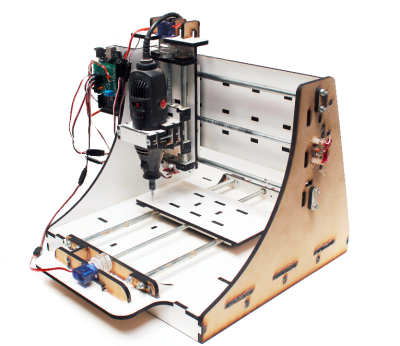 Next up is [brashtim] with Makesmith CNC. Makesmith was [brashtim’s] entry in the 2014 Hackaday prize. While it didn’t win the prize, Makesmith did go on to have a very successful Kickstarter, with all the machines shipping in December of 2014. The machine itself is unorthodox. It uses closed loop control like large CNC machines, rather than open loop stepper motors often found in desktop units. The drive motors are hobby type servos. We’re not talking standard servos either – [brashtim] picked microservos. By using servos, common hardware store parts, and laser cut acrylic, [brashtim] kept costs down. The machine performs quite well though, easily milling through wood, plastic, foam, and printed circuit boards.
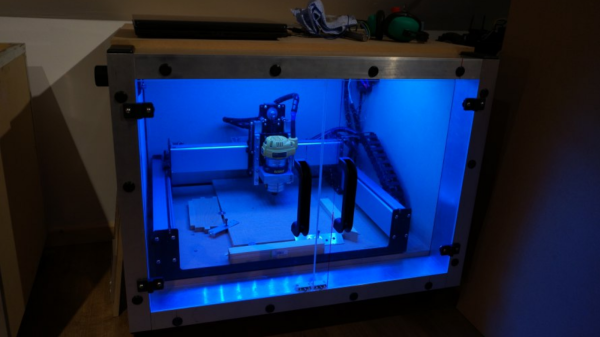
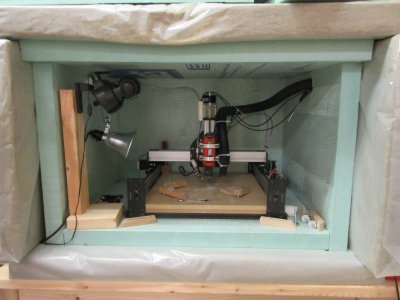 Next we have [Kenji Larsen] with Reactron material processor: Wireless CNC mill. [Kenji] started with a Shapeoko 2, and gave it the Reactron treatment. The stock controller was replaced with a Protoneer shield, which is connected to the Reactron network via a HopeRF radio module. The knockoff rotary tool included with the kit was replaced with a DeWalt DW660 for heavy-duty jobs, or a quieter Black and Decker RTX-6. A tool mounted endoscope keeps an eye on the work. [Kenji] mounted the entire mill in a custom enclosure of foam and Roxul insulation. The enclosure deadens the sound, but it also keeps heat in. [Kenji] plans to add a heat exchanger to keep things cool while maintaining relative quiet in his shop.
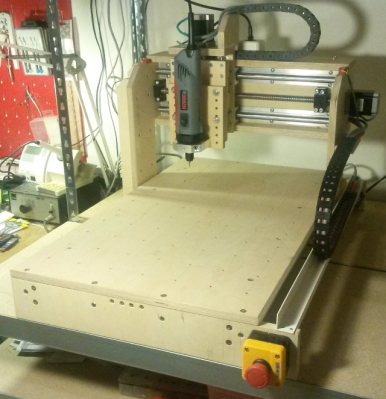 Finally we have a [hebel23] with DIY Multiplex Plywood CNC Router. [hebel23] wanted to build a big machine within a budget – specifically a working area of 400 x 600 x 100 mm and a budget of 800 Euro. As the name implies, [hebel23] used birch plywood as the frame of his machine. He chose high quality plywood rather than the cheap stuff found in the big box stores. This gives the machine a stable frame. The moving components of the machine are also nice – ball screws, linear bearings, and good stepper controllers. The stepper motors themselves are NEMA-23 units, which should give the CNC plenty of power to cut through wood, plastic, and even light cuts on metal. [hebel23] spent a lot of time on the little details of his CNC, like adding an emergency stop switch, and a wire-chain to keep his gantry control wires from ending up tangled up in the work piece. The end result is a CNC which would look great in anyone’s workshop.
If you want more CNC goodness, check out our brand new CNC project list! Did I miss your project? Don’t be shy, just drop me a message on Hackaday.io. That’s it for this week’s Hacklet, As always, see you next week. Same hack time, same hack channel, bringing you the best of Hackaday.io!
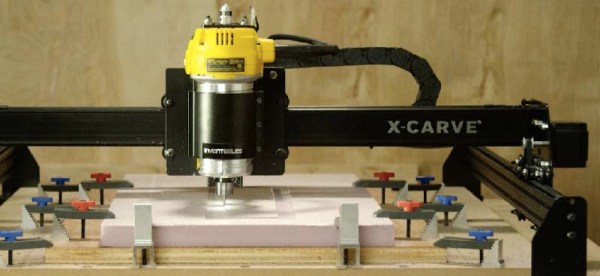
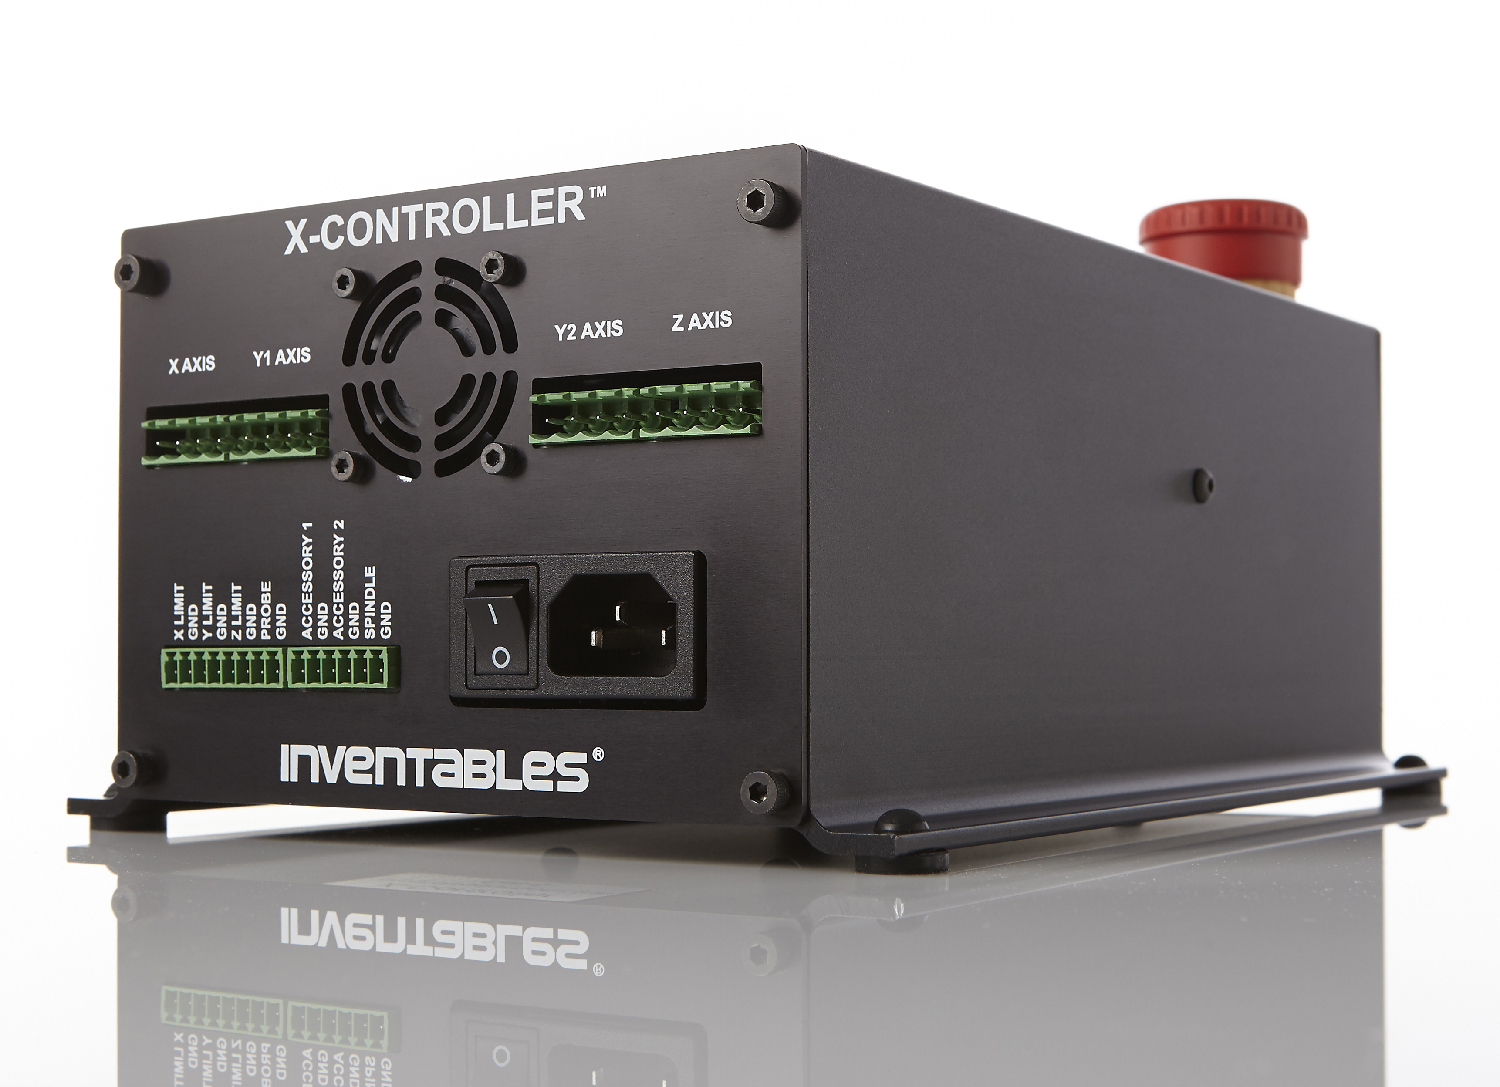 In addition to the 500mm square and 1000mmm square routers previously available, there’s a new, 750mm square machine available. All machines feature a new electronics box for the X-Carve, the X-Controller. This ‘brain box’ is a combined power supply, stepper driver, and motion controller built into a single box. The stepper drivers are able to supply 4A to a motor, is capable of 1/16 microstepping, and has connections for limit switches, spindle control speed, a Z probe, and outputs for vacuums or coolant systems. The underlying controller is based on grbl, making this brain box a very solid foundation for any 3-axis CNC build. The ‘brain box’ format seems to be the way the hobbyist CNC market is going, considering the whispers and rumors concerning Lulzbot selling their Taz6 brainbox independently from a 3D printer.