An opened plastic project box with electronics inside

Smoking Meat Finds Natural Home In The Cloud

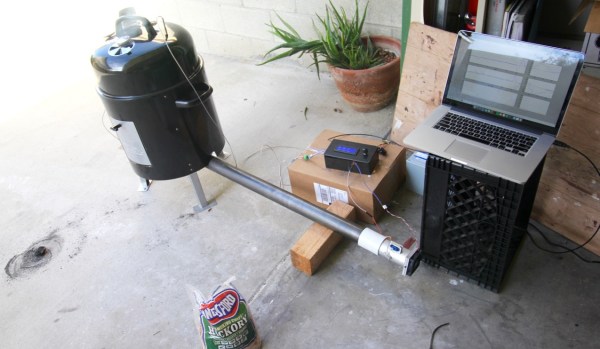
Did you know that backyard barbecues now come with WiFi? It should be no surprise, given the pervasiveness of cloud-enabled appliances throughout the home. However [Carl] wasn’t ready to part with his reliable but oh-so-analog BBQ smoker, so instead he created an affordable WiFi-based temperature monitor that rivals its commercial counterparts.

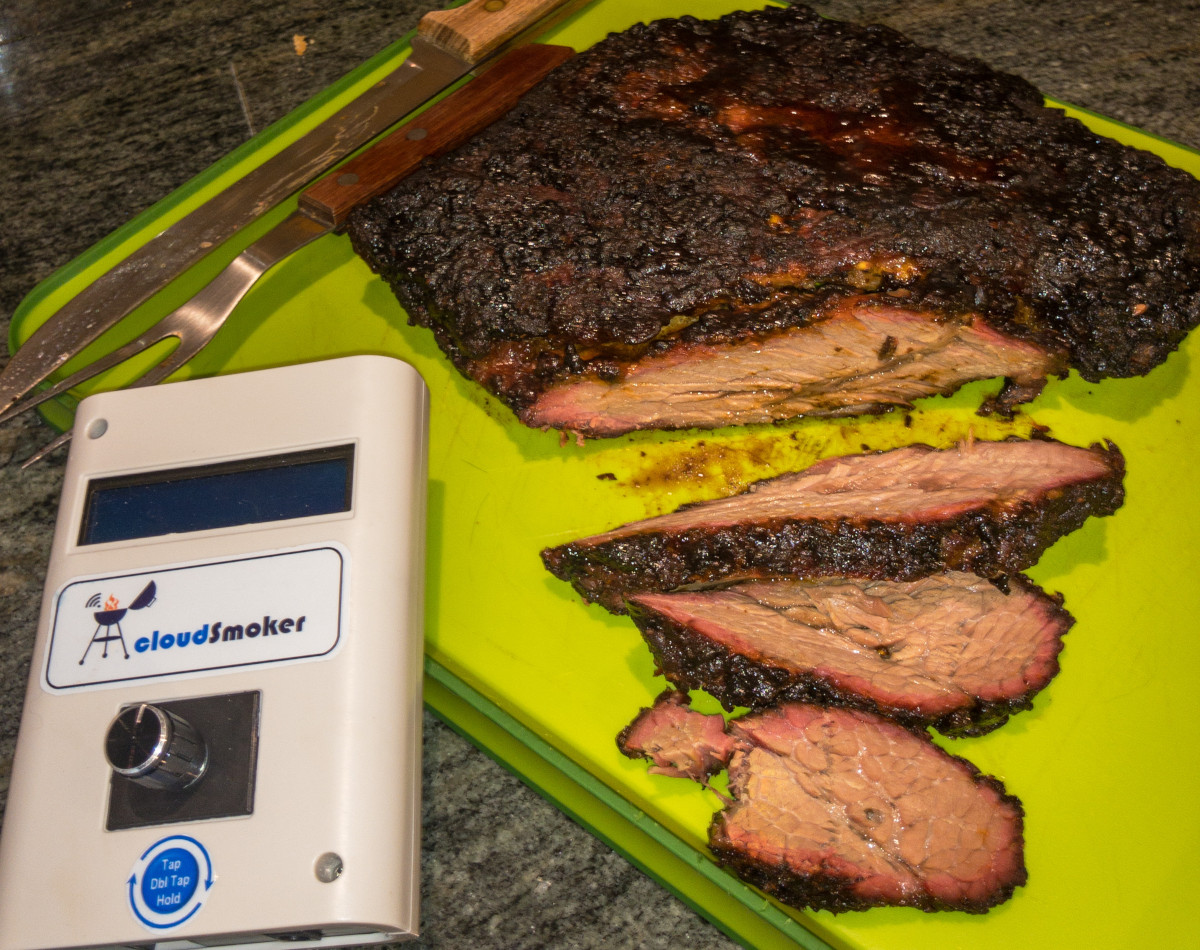
Accurate temperature measurement is essential to smoking meat from both a taste and safety standpoint. In this project, two Maverick ET-732/733 thermistor probes take care of the actual temperature monitoring. One probe is skewered into meat itself, and the other measures the ambient ‘pit’ temperature. Combined, these two gauges ensure that the meat is smoked for exactly the right length of time. [Carl] mentions that adding an extra temperature sensor is trivial for larger setups, but he’s getting by just fine with two data points.

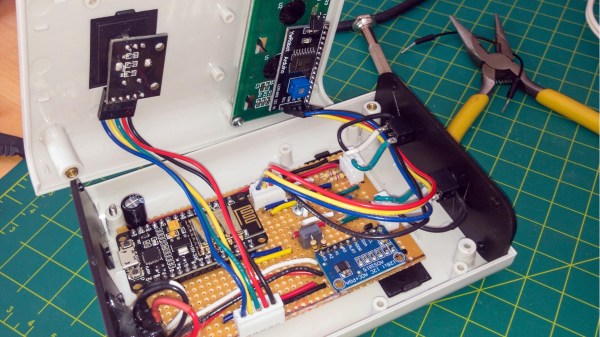
Naturally an ESP8266 does most of the heavy lifting in bridging the gap between smoke and cloud. At the core of this project is utility and practicality – temperature statistics can be viewed on any device with a web browser. Being able to study the temperature trends in this way also makes it easier to predict cooking times. Electronic alerts are also used to notify the chef if the temperature is too hot or cold (among other things). The entire contraption is housed in a smart looking project box that contains an LCD and rotary encoder for configuration.

If this has piqued your culinary interest, check out the extensive documentation recipe over on GitHub and the project Wiki.  We also recommend checking out this project that takes automated meat smoking to the next level.

Got A Cardboard Box? Get Into Food Smoking!

We appreciate a good kitchen hack, and we have always liked TV personality and chef [Alton Brown]’s McGuyver-ish approach to these things. So for anyone who hasn’t seen it, let’s take a moment to highlight how to make (and use) Alton Brown’s Cardboard Box Smoker.

[Alton] himself confesses that over the years it has remained his favorite smoker for a few good reasons. The price is certainly right, but there are a few other things that really stand out in the design. It’s easy to assemble and take down, needing very little storage space compared to a purpose-built smoker. It’s also trivial to monitor the temperature inside: just poke a thermometer probe through the side of the box. Finally, it’s a great way to get some additional use out of an old hot plate and cast iron pan. It’s the kind of thing one could put together from a garage sale and a visit to the dollar store.

The cardboard box is perfectly serviceable, but one may be tempted to kick it up a notch with some upgrades. In that case, check out this tech-upgraded flower pot smoker (also based on an Alton Brown design.)

Reusing and repurposing is a great way to experiment in the kitchen without needing to buy specialized equipment. Here’s another example: Kyoto-style cold brew coffee. It’s thick and rich and brings out different flavor profiles. Curious? Well, normally it requires a special kind of filter setup, but it can also be accomplished with cheesecloth, coffee filters, and a couple of cut-up soft drink bottles. Oh, and some rubber bands and chopsticks if things are too wobbly. Just do yourself a favor and use good quality coffee beans, or better yet, roast them yourself. Just trust us on this one.

See A Cheap Smoker Get An Automation Power Up

[Jason] learned a lot by successfully automating this meat smoker. This is just the first step in [Jason’s] smoker project. He decided to begin by hacking a cheaper charcoal-fed unit first, before setting his sights on building his own automatic pellet-fed smoker. With a charcoal smoker it’s all about managing the airflow to that hot bed of coals.

automated-meat-smoker-air-valve
Custom mount for servo was actually one of the more challenging things to get just right.

[Jason] started by making sure the bottom was sealed off from stray airflow, then he cut a hole into the charcoal pan and attached a length of steel pipe. The opposite end of the pipe has a fan. Inside the pipe there is a baffle separating the fan from the charcoal pan. The servo motor shown here controls that valve.

The pipe is how air is introduced into the smoker, with the fan and valve to control the flow rate. The more air, the higher the temperature. The hunk of pipe was left uncut and works fine but is much longer than needed; [Jason says] the pipe is perfectly cool to the touch only a foot and a half away from the smoker.

With the actuators in place he needed a feedback loop. A thermocouple installed into the lid of the smoker is monitored by an Arduino running a PID control loop. This predicts the temperature change and adjusts the baffle and fan to avoid overshooting the target temp. The last piece of hardware is a temperature probe inside the meat itself. With the regulation of the smoker’s temperature taken care of and the meat’s internal temperature being monitored, the learning (and cooking) process is well underway.

There are many, many smoker automation projects out there. Some smokers are home-made electric ones using flower pots, and some focus more on modifying off the shelf units. In a way, every PID controlled smoker is the same, yet they end up with different problems to solve during their creation. There is no better way to learn PID than putting it into practice, and this way to you get a tasty treat for your efforts.