Upgraded Plasma Thruster Is Smaller, More Powerful

When [Jay Bowles] demoed his first-generation ion thruster on Plasma Channel, the resulting video picked up millions of views and got hobbyists and professionals alike talking. While ionic lifters are nothing new, this robust multi-stage thruster looked (and sounded) more like a miniature jet engine than anything that had come before it. Optimizations would need to be made if there was even a chance to put the high-voltage powerplant to use, but [Jay] was clearly onto something.

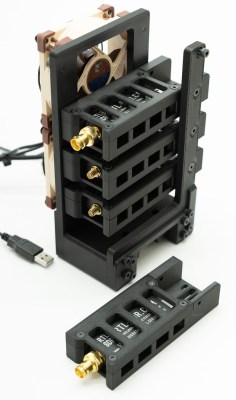
Fast forward six months, and he’s back with his Mark II thruster. It operates under the same core principles as the earlier build, but swaps out the open-frame design and acrylic construction for a rigid 3D printed structure designed to more effectively channel incoming air. The end result is a thruster that’s smaller and has a lower mass, while at the same time boasting nearly double the exhaust velocity of its predecessor. Continue reading “Upgraded Plasma Thruster Is Smaller, More Powerful”

Near-Silent Bellows Uses Water Flow And Magnetic Coupling

Fan noise is a contentious issue among the computer community. Some don’t notice it, others rage against it as an annoyance and distraction. Some turn to liquid cooling, while others look to passive solutions to eliminate the scourge. [Matt] of [DIY Perks] may have found a far more oddball solution, however.

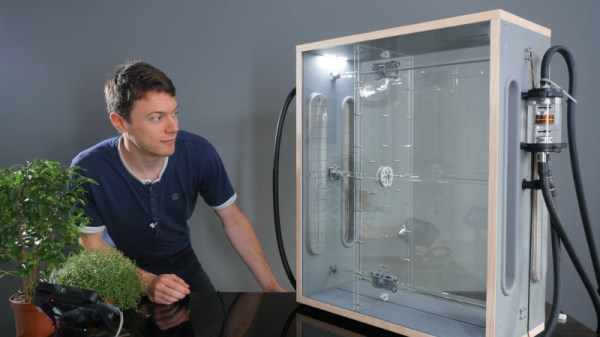
The build is essentially a giant bellows, but the manner in which it operates is unlike anything we’ve seen previously. To shift the large pusher plate inside back and forth, [Matt] initially experimented with building his own linear motor out of coils and magnets. After that failed, he began to tinker with a system of moving a magnet back and forth through a tube with water pressure from a pump, which would then drive the pusher plate through magnetic coupling. This looked promising, but reversing the flow proved difficult. After building his own set of water valves to change the flow direction, the bellows began to work slowly, but with limited performance. Realizing the valves weren’t up to scratch, [Matt] rebuilt the system with 10 pumps, set up in two banks of 5. With the pumps hooked up in series, they supplied plenty of pressure to force the bellows back and forth. Reed switches were used to reverse the flow at either end to make the bellows run continuously.

In testing, the bellows compared well with a bank of four large case fans, though at 20 times the size. Suffice to say this is not exactly a compact solution. We look forward to seeing [Matt] do more with the bellows, with his intention being to use it as the primary cooling system for a computer. Of course, if this looks too complex, you could always consider a mineral oil setup instead. Video after the break.

Continue reading “Near-Silent Bellows Uses Water Flow And Magnetic Coupling”

Building (And Testing) A DIY Air Purifier

Whether it’s the usual pollution of the city, or the fact that your corner of the globe happens to be on fire currently, poor air quality is a part of daily life for many people. One way of combating this issue is with a high quality HEPA filter in your home, but unfortunately that’s not something that everyone can afford to even has access to.

Which is why [Adam Kelly] decided to design this DIY HEPA air purifier that can be built for less than $100. That might still sound like a lot of money, but compared to the $500 sticker price he was seeing for the models recommended by health officials, it’s certainly a step in the right direction. Of course, it’s only a deal if it actually works, so a big part of the project has also been verifying the design’s ability to filter particles out of the air in a timely manner.

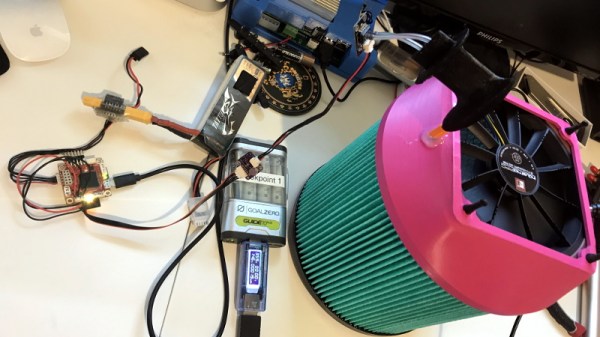
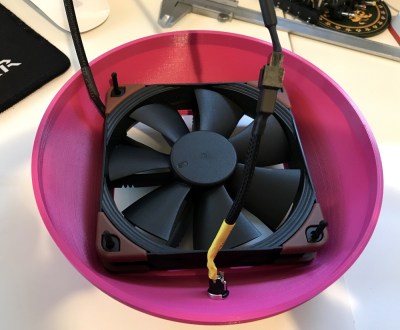
To build his purifier, [Adam] found a HEPA H13 rated replacement filter that was cheap and readily available, and started designing a low-cost way to pulling air through it. He eventually went with a 120 mm computer case fan coupled with a step-up converter that can produce 12 V from a standard USB port. Then he just needed to design a 3D printed “lid” which would position the fan so it draws air through the center of the filter.

In terms of testing, [Adam] wasn’t worried about the purifier’s ability to actually filter out smoke particles; unless the manufacturer lied about the capabilities of the filter itself, that part is a given. But he was curious about how effective the fan would be in terms of circulating air through a room.

By installing a pitot tube from one of his drones into the lid of the purifier, he determined the airflow in the center of the filter to be approximately 160 CFM. By his calculations, that means it should be able to circulate all the air in his 25 cubic meter office around 10 times per hour. That’s a promising start, but [Adam] says he’d still be interested in a more detailed analysis of the design’s performance by anyone who might have the equipment to do so.

As he lives in Australia, this project is more than just a passing fancy for [Adam]. He only has to look out the window to see that the air he’s breathing is filled with smoke from the raging bushfires. They say that necessity is the mother of invention, and breathable air is pretty high up on the list of human necessities. Our hat’s off to anyone who sees their fellow citizens suffering and tries to use their skills to come up with a solution.

CNC’d MacBook Breathes Easy

Sick of his 2011 Macbook kicking its fans into overdrive every time the temperatures started to climb, [Arthur] decided to go with the nuclear option and cut some ventilation holes into the bottom of the machine’s aluminum case. But it just so happens that he had the patience and proper tools for the job, and the final result looks good enough that you might wonder why Apple didn’t do this to begin with.

After disassembling the machine, [Arthur] used double-sided tape and a block of scrap wood to secure the Macbook’s case to the CNC, and cut out some very slick looking vents over where the internal CPU cooler sits. With the addition of some fine mesh he found on McMaster-Carr, foreign objects (and fingers) are prevented from getting into the Mac and messing up all that Cupertino engineering.

[Arthur] tells us that the internal temperature of his Macbook would hit as high as 102 °C (~215 °F) under load before his modification, which certainly doesn’t sound like something we’d want sitting in our laps. With the addition of his vents however, he’s now seeing an idle temperature of 45 °C to 60 °C, and a max of 82 °C.

In the end, [Arthur] is happy with the results of his modification, but he’d change a few things if he was to do it again. He’s somewhat concerned about the fact that the mesh he used for the grill isn’t non-conductive (he’s using shims of card stock internally to make sure it doesn’t touch anything inside), and he’d prefer the peace of mind of having used epoxy to secure it all together rather than super-glue. That said, it works and hasn’t fallen apart yet; basically the hallmarks of a successful hack.

It’s worth noting that [Arthur] is not the first person to struggle with the Macbook’s propensity for cooking itself alive. A few years back we covered another user who added vents to their Macbook, but not before they were forced to reflow the whole board because some of the solder joints gave up in the heat.

Wall fans for circulating hot ceiling air

Winter Is Coming: Keeping Heat Where It’s Needed

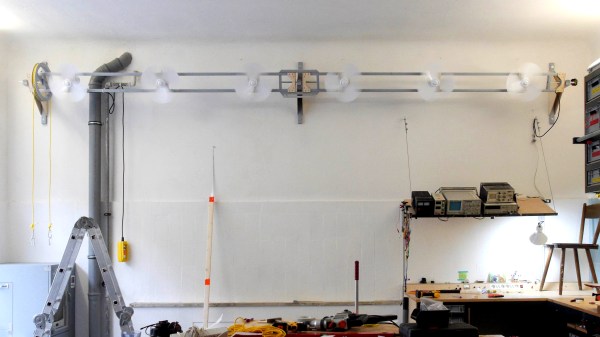
If your workshop has ceilings as high as [Niklas Roy]’s 3.6 meters (11.8 feet), then you’re familiar with his problem. Hot air rises, and there it usually stays until the heat is transferred outdoors. But in the winter time we need that heat indoors and down low. One solution is to install ceiling fans that blow that hot air back down. However, [Niklas] often builds tall things that would collide with those fans. And so he had to hack together some wall hugging fans which will be both high up and out of the way.

Corroded industrial controller

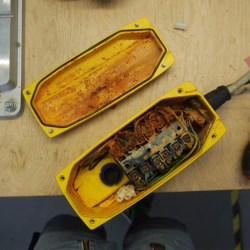
For the fans he’s using six of those ubiquitous standing fans, the ones that normally sit on a post a few feet off the ground and swivel back and forth. Discarding the posts, he mounted the fan bodies to a horizontal wooden frame with a wheel attached to one end, one that he’d made for another project. A rope around the wheel, and hanging down, makes it easy to tilt the fans. For controlling the fans, a friend had given him an old industrial controller, and opening it up, all he saw was corrosion. Cleaning it all out he installed an old Russian 3-position switch from his collection.

In the future he’d like to add a closed-loop control system that would not only turn the fans on and off but also adjusting their speed. For now, however, he reports that it works really well. Check out his page for build photos and more details.

Meanwhile, winter really is coming to these northern latitudes and so here are more hacks to prepare you. For automated shovelling snow, how about an RC controlled 3D printed snow blower. And while you’re snug and warm inside remotely controlling your snow blower, you can still be getting exercise using a DIY bicycle roller. But if you do venture outside, perhaps you’d want to zip around on a dogless dog sleigh.

The Silence Of The Fans

The good thing about using a server-grade machine as your desktop is having raw computing power at your fingertips. The downside is living next to a machine that sounds like a fleet of quadcopters taking off. Luckily, loud server fans can be replaced with quieter units if you know what you’re doing.

Servers are a breed apart from desktop-grade machines, and are designed around the fact that they’ll be installed in some kind of controlled environment. [Juan] made his Dell PowerEdge T710 tower server a better neighbor by probing the PWM signals to and from the stock Dell fans; he found that the motherboard is happy to just receive a fixed PWM signal that indicates the fans are running at top speed. Knowing this, [Juan] was able to spoof the feedback signal with an ATtiny85 and a single line of code. The noisy fans could then be swapped for desktop-grade fans; even running full-tilt, the new fans are quieter by far and still keep things cool inside.

But what to do with all those extra fans? Why not team them up with some lasers for a musical light show?

See A Cheap Smoker Get An Automation Power Up

[Jason] learned a lot by successfully automating this meat smoker. This is just the first step in [Jason’s] smoker project. He decided to begin by hacking a cheaper charcoal-fed unit first, before setting his sights on building his own automatic pellet-fed smoker. With a charcoal smoker it’s all about managing the airflow to that hot bed of coals.

automated-meat-smoker-air-valve
Custom mount for servo was actually one of the more challenging things to get just right.

[Jason] started by making sure the bottom was sealed off from stray airflow, then he cut a hole into the charcoal pan and attached a length of steel pipe. The opposite end of the pipe has a fan. Inside the pipe there is a baffle separating the fan from the charcoal pan. The servo motor shown here controls that valve.

The pipe is how air is introduced into the smoker, with the fan and valve to control the flow rate. The more air, the higher the temperature. The hunk of pipe was left uncut and works fine but is much longer than needed; [Jason says] the pipe is perfectly cool to the touch only a foot and a half away from the smoker.

With the actuators in place he needed a feedback loop. A thermocouple installed into the lid of the smoker is monitored by an Arduino running a PID control loop. This predicts the temperature change and adjusts the baffle and fan to avoid overshooting the target temp. The last piece of hardware is a temperature probe inside the meat itself. With the regulation of the smoker’s temperature taken care of and the meat’s internal temperature being monitored, the learning (and cooking) process is well underway.

There are many, many smoker automation projects out there. Some smokers are home-made electric ones using flower pots, and some focus more on modifying off the shelf units. In a way, every PID controlled smoker is the same, yet they end up with different problems to solve during their creation. There is no better way to learn PID than putting it into practice, and this way to you get a tasty treat for your efforts.