Bearing-reinforced Stepper Tackles Hefty Axial Loads

These days, it’s common among us hackers to load a stepper motor with forces in-line with their shaft–especially when we couple them to leadscrews or worm gears. Unfortunately, steppers aren’t really intended for this sort of loading, and doing so with high forces can destroy the motor. Fear not, though. If you find yourself in this situation, [Voind Robot] has the solution for you with a dead-simple-yet-dead-effective upgrade to get your steppers tackling axial loads without issue.

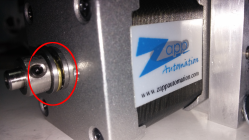
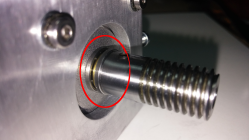
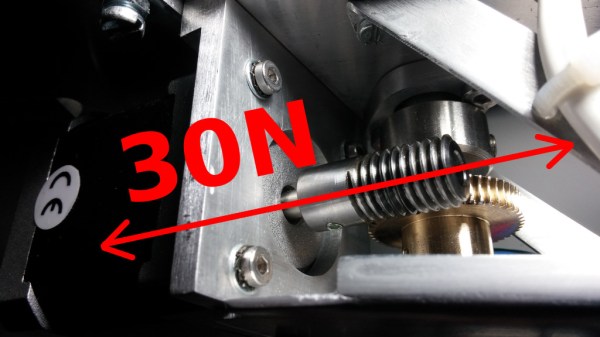
In [Voind Robot’s] case, they started with a worm-gear-drive on a robot arm. In their circumstances, moving the arm could put tremendous axial loads onto the stepper shaft through the worm–as much as 30 Newtons. Such loads could easily destroy the internal stepper motor bearings in a short time, so they opted for some double-sided reinforcement. To alleviate the problem, the introduced two thrust bearings, one on either side of the shaft. These thrust bearings do the work of redirecting the force off the shaft and directly onto the motor casing, a much more rigid place to apply such loads.

This trick is dead simple, and it’s actually over five years old. Nevertheless, it’s still incredibly relevant today for any 3D printer builder who’s considering coupling a leadscrew to a stepper motor for their Z-axis. There, a single thrust bearing could take out any axial play and lead to an overall rigid build. We love simple machine-design nuggets of wisdom like these. If you’re looking for more printer-design tricks, look no further than [Moritz’s] Workhorse Printer article.

Sorter Uses Cardboard To Organize Card Hoard

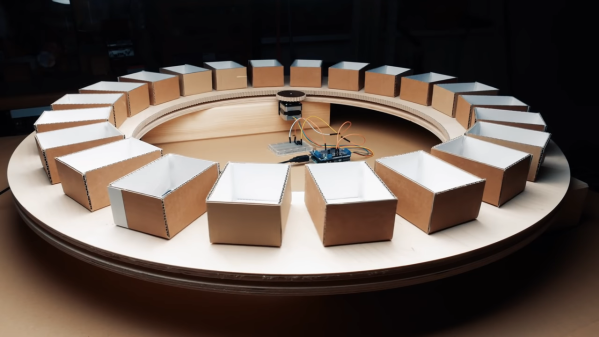
If you collect trading cards of any kind, you know that storage quickly becomes an issue. Just ask [theguymasamato]. He used to be really into trading cards, and got back into it when his kids caught the bug. Now he’s sitting on 10,000+ cards that are largely unorganized except for a few that made it into sleeve pages.  They tried to go through them by hand, but only ended up frustrated and overwhelmed. Then he found out about [Michael Portera]’s Pi-powered LEGO card sorter and got all fired up to build a three-part system that feeds cards in one by one, scans them, and sorts them into one of 22 meticulously-constructed cardboard boxes.

[theguymasamato]’s card sorter is the last stop for a card after the feeder has fed it in from the pile and the scanner has scanned it. The sorter lazy Susans around on a thrust bearing, which is driven by a 3D printed drive wheel attached to a stepper. The stepper is controlled with an Arduino.

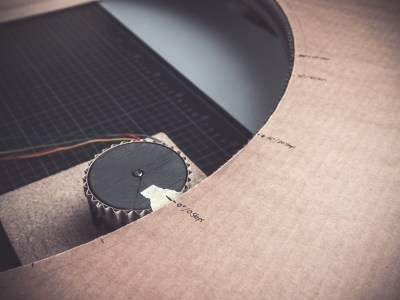
Here’s where it gets crazy: the drive wheel and timing belt are made from the flutes of corrugated cardboard. As in, he used that wavy bit in the middle as gear teeth. Every one of those cardboard teeth is fortified with wood glue, a time-consuming process he vows to never repeat. Instead, [theguymasamato] recommends using shims to shore them up as he did in the card feeder. The whole thing was originally going to be made from cardboard. It proved to be too mushy to support the thrust bearing, so [theguymasamato] switched to MDF.

Right now, the sorter is homed via button press, but future plans for the device include an IR break beam switch. We’re excited for the scanner and can’t wait to see the whole system put together. While [theguymasamato] works on that, position yourself past the break to watch the build video.

Continue reading “Sorter Uses Cardboard To Organize Card Hoard”