Art of 3D printer in the middle of printing a Hackaday Jolly Wrencher logo

3D Printering: Adaptive Bed Leveling

Have you ever read about something and thought, “Gee whiz! Why did I never think about that?” That was my reaction to reading about a feature commonly associated with Klipper called adaptive bed leveling or adaptive mesh leveling. Too bad I don’t typically use Klipper, but it all worked out, and I’ll show you how it might work for you.

What Is It?
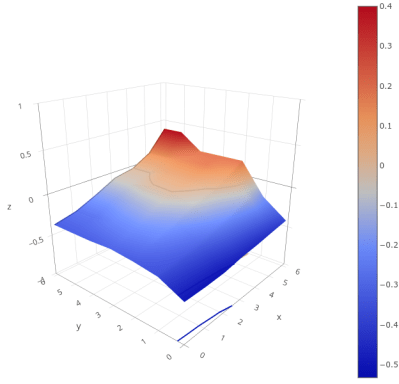
Time to tram your bed!

Once a luxury, most 3D printers now come with some kind of bed level sensor. The idea is that the printer can probe the bed to determine the shape of the build plate and then adjust the build plate accordingly. So if a particular spot on the bed is 0.5 mm too high, the nozzle can rise 0.5 mm when it is in that area. There are several techniques Marlin firmware uses, including what I usually use: UBL. Some people scan the bed once and hope it won’t change much. Others will do a time-consuming scan before each print.

However, adaptive bed leveling is a bit different. The idea is that the printer only probes the area where the part is going to print. If your print bed is 235 mm x 235 mm but your part is 50 mm square, you could just probe the points under the 50 mm square.

This does several things. For a given number of points, there is less motion, so it should be faster. Also, for the same number of points, you will have a much denser mesh and, thus, a better idea of what the bed is at any given point. You could even reduce the number of points based on the size of the part you are printing.

When you think about it, it is a dead simple idea. What’s not to love? For most print jobs, you’ll have less work for the printer, faster prints, and a denser mesh. But how do you do it?

Continue reading “3D Printering: Adaptive Bed Leveling”

Art of 3D printer in the middle of printing a Hackaday Jolly Wrencher logo

3D Printering: Is Hassle-Free Bed Leveling Finally Here?

3D printers have come a long way over the past several years, but the process of bed leveling remains a pain point. Let’s take a look at the different ways the problem has been tackled, and whether recent developments have succeeded in automating away the hassle.

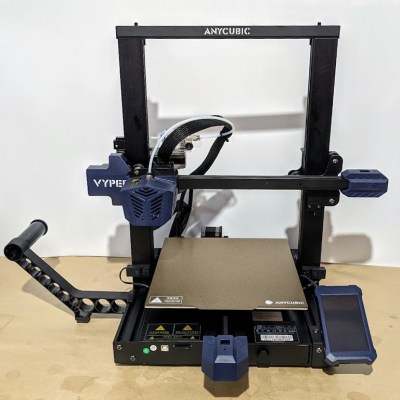
Anycubic Vyper 3D printer, front view
Anycubic Vyper, with an auto-leveling feature we decided to take a closer look at.

Bed leveling and first layer calibration tends to trip up novices because getting it right requires experience and judgment calls, and getting it wrong means failed prints. These are things 3D printer operators learn to handle with time and experience, but they are still largely manual processes that are often discussed in ways that sound more like an art than anything else. Little wonder that there have been plenty of attempts to simplify the whole process.

Some consumer 3D printers are taking a new approach to bed leveling and first layer calibration, and one of those printers is the Anycubic Vyper, which offers a one-touch solution for novices and experienced users alike. We accepted Anycubic’s offer of a sample printer specifically to examine this new leveling approach, so let’s take a look at the latest in trying to automate away the sometimes stubborn task of 3D printer bed leveling.

Continue reading “3D Printering: Is Hassle-Free Bed Leveling Finally Here?”

Manual Mesh Bed Levelling For 3D Printers

In 3D printing, we often talk about leveling the print bed, although that’s not an accurate term. A bed that is level in our terms presents a flat surface that is parallel to the path of the print head, but within reason we care little about that. Instead we care more about it being parallel to the path of the head than it being perfectly flat. If we had a perfectly flat bed — say a sheet of glass — you’d think it might be pretty easy, but for some other materials it could be convex or concave or even have ripples all over the place. [Teaching Tech] shows you how to manually “level” the bed using a mesh but without using an automatic sensor. You can see the technique in the video below.

When you use adjustments to level the bed, you are tramming it, but only the very pedantic use that term for fine adjustment. But no amount of adjusting bed springs will get rid of bulges and ripples. A common solution is to use a sensor to measure the distance to the bed and form a mesh correction. Then, as the printer head moves in the XY plane, the software will adjust the Z-axis to rise over bumps and go down if there is a concave portion of the bed. What [Teaching Tech] is doing, however, is a manual mapping. You won’t need to add a sensor to your printer to take advantage of the method. 

Continue reading “Manual Mesh Bed Levelling For 3D Printers”