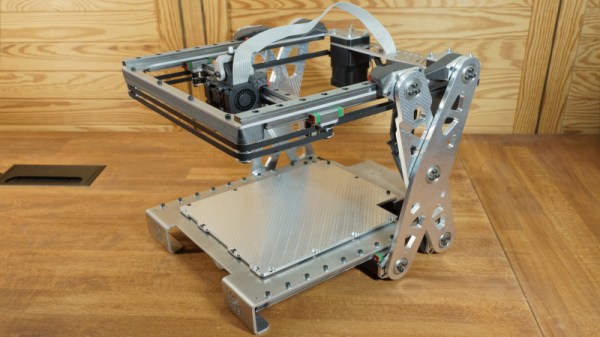
Art of 3D printer in the middle of printing a Hackaday Jolly Wrencher logo

3D Printering: One Bed Level To Rule Them All

In an ideal world, your FDM 3D printer’s bed would be perfectly parallel with the print head’s plane of movement. We usually say that means the bed is “level”, but really it doesn’t matter if it is level in the traditional sense, as long as the head and the bed are the same distance apart at every point. Of course, in practice nothing is perfect.

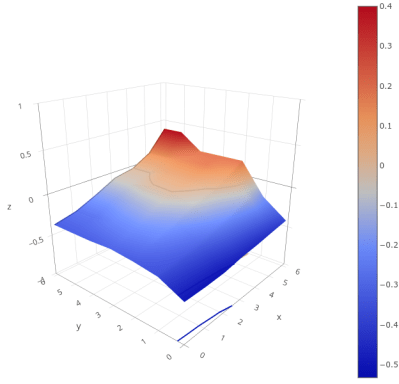
The second best situation is when the bed is perfectly flat, but tilted relative to the print head. Even though this isn’t ideal, software can move the print head up and down in a linear fashion to compensate for the tilt. Things are significantly worse if the bed isn’t itself flat, and has irregular bumps up and down all over.

To combat that, some printer firmware supports probing the bed to determine its shape, and adjusts the print head up and down as it travels across the map. Of course, you can’t probe the bed at every possible point, so the printer will have to interpolate between the measured reference points. Marlin’s bilinear bed leveling is an example.

But if you have enough flash space and you use Marlin, you may want to try unified bed leveling (UBL). This is like bilinear leveling on steroids. Unfortunately, the documentation for this mode is not as plain as you might like. Everything is out there, but it is hard to get started and information is scattered around a few pages and videos. Let’s fix that.

Continue reading “3D Printering: One Bed Level To Rule Them All”

TFT35 Dual Mode 3D Print Control – Hands On

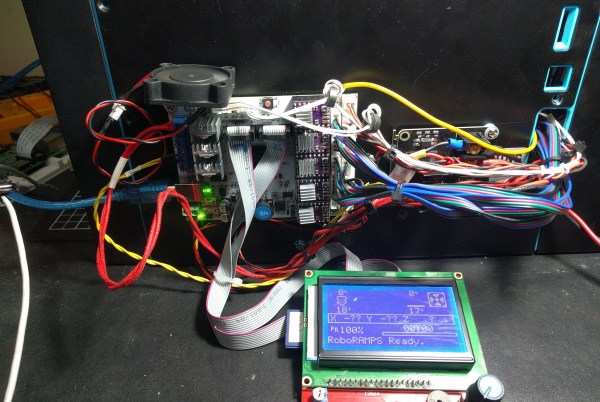
I was rebuilding one of my 3D printers — again — and decided I needed a display upgrade. A color screen is nice, but there are some limitations. I also found there are ways around these limitations, so I wanted to share my thoughts on a dual-mode color touch screen LCD controller for your 3D printer. The screen in question is a TFT35 from BigTree Tech. It is similar to an MKS screen, but it can operate in two different modes, as you will see.

A few years ago, I picked up an Anet A8 which was very inexpensive, especially on sale. Not the best printer, though, because it has that cheap acrylic frame. No problem. A box full of aluminum extrusion later, the printer was reborn. Over time, I’ve completely reworked the extrusion system and the Y-axis, leaving only the motors, bearings, and the controller/display as the original.

That last part was what bothered me. The Anet board is actually pretty capable for a small cheap board. But it is just what the printer needs and nothing more. If you wanted to hack the printer there was very little memory left and only one spare pin for I/O. So it was time to replace the board and why not the controller, too?

Continue reading “TFT35 Dual Mode 3D Print Control – Hands On”

Giant CNC Machine Measures A Full Cubic Meter

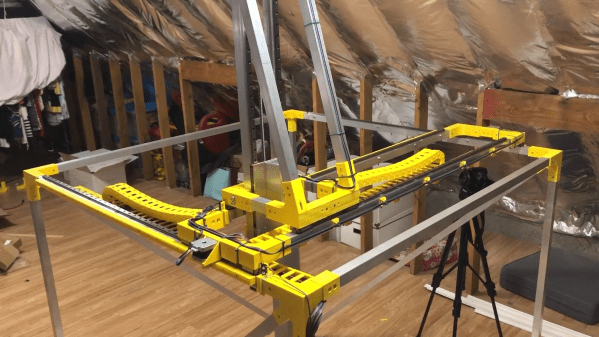
There are plenty of designs for table-top 3D printers, engravers, and general CNC machines out there. However, if you wanna build big things and build them fast, sometimes you need a machine that can handle bigger jobs. This gigantic 1x1x1 m 5-axis CNC machine from [Brian Brocken] absolutely fits the bill.

The build relies on 3D-printed components and aluminium tubing to make it accessible for anyone to put together. [Brian] notes that 25×25 mm tubing with a 2 mm wall thickness does an okay job, but those aiming to minimize deflection would do well to upgrade to 5 mm thickness instead. Stepper motors are NEMA 23 size, though the Y-axis uses a pair of NEMA 17s. This is necessary to deal with the immense size of the machine. Control is thanks to an Arduino Mega fitted with a RAMPS board, running the Marlin firmware.

The plan is to use the machine to test out a variety of CNC machining techniques. It could make for a great maxi-sized 3D printer, and should be able to handle some basic 5-axis milling of very soft materials like foams. This might seem silly on the face of it, but it can be of great use for mold making tasks.

We’ve seen giant CNC routers built before, too, and they can readily be put to great use. Video after the break.

Continue reading “Giant CNC Machine Measures A Full Cubic Meter”

RAMPS Rebuild Keeps Robox 3D Printer Out Of Junk Bin

A 3D printer is a wonderful invention, but it needs maintenance like every machine that runs for long hours. [Rob Ward] had a well-used Robox 3D printer that was in need of some repairs, but getting the necessary replacement parts shipped to Australia was cost-prohibitive. Rather than see a beloved printer be scrapped as e-waste, he decided to rebuild it using components that he could more easily source. Unfortunately the proprietary software and design of the Robox made this a bit difficult, so it was decided a brain transplant was the best path forward.

Step one was to deduce how the motors worked. A spare RAMPS 1.4 board and Arduino Mega2560 made short work of the limit switches and XYZ motors. This was largely accomplished by splicing into the PCBs themselves. The Bowden filament driver motor had a filament detector and an optical travel sensor that required a bit of extra tuning, but now the challenging task was next: extruding.

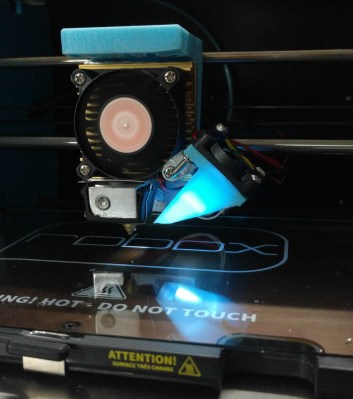
The printer’s new custom hotend.

With a cheap CR10 hot end from an online auction house, [Rob] began modifying the filament feed to feed in a different direction than the Robox was designed for (the filament comes in at a 90-degree angle on the stock Robox). A fan was needed to cool the filament feed line. Initial results were mixed with lots of blockages and clogs in the filament. A better hot end and a machined aluminum bracket for a smoother path made more reliable prints.

The original bed heater was an excellent heater but it was a 240 VAC heater. Reluctant to having high voltages running through his hacked system, he switched them out for 12 VDC adhesive pads. A MOSFET and MOSFET buffer allowed the bed to reach a temperature workable for PLA. [Rob] upgraded to a GT2560 running Marlin 2.x.x.

With a reliable machine, [Rob] stepped back to admire his work. However, the conversion to the feed being perpendicular to the bed surface had reduced his overall build height. With some modeling in OpenSCAD and some clever use of a standard silicone sock, he had a solution that fed the wire into the back of the hot end, allowing to reclaim some of the build height.

It was a long twelves months of work but the write-up is a joy to read. He’s included STL and SCAD files for the replacement parts on the printer. If you’re interested in seeing more machines rebuilt, why not take a look at this knitting machine gifted with a new brain.

X-Printer Fits In A Backpack

3D printers are great for rapid prototyping, but they’re not usually what you’d call… portable. For [Malte Schrader], that simply wouldn’t do – thus, the X-printer was born!

The X-printer is a fused-deposition printer built around a CoreXY design. Its party piece is its folding concertina-style Z-axis, which allows the printer to have a build volume of 160x220x150mm, while measuring just 300x330x105mm when folded. That’s small enough to fit in a backpack!

Getting the folding mechanism to work took some extra effort, with the non-linear Z-axis requiring special attention in the firmware. The printer runs Marlin 1, chosen for its faster compile time over Marlin 2. Other design choices are made with an eye to ruggedness. The aluminium frame isn’t as light as it could be, but adds much needed rigidity and strength. We’d love to see a custom case that you could slide the printer into so it would be protected while stowed.

It’s a build that shows there’s still plenty to be gained from homebrewing your own printer, even in the face of unprecedented options on the market today. We’ve seen other unique takes on the portable printer concept before, too. Video after the break.

Continue reading “X-Printer Fits In A Backpack”

A 32-bit Boost For Your 3D Printer

It might not be the kind of thing you’ve given much thought to, but if you’ve ever used a desktop 3D printer, it was almost certainly being controlled by an 8-bit CPU. In fact, the common RAMPS controller is essentially just a motor driver shield for the Arduino Mega. Surely we can do a bit better than that in 2019?

For his entry into this year’s Hackaday Prize, [Robert] is working on a 32-bit drop-in replacement board which would allow 3D printer owners to easily upgrade the “brain” of their machines. Of course, there are already a few 32-bit control boards available on the market, but these are almost exclusively high-end boards which can be tricky to retrofit into an older machine. It should also go without saying that they aren’t cheap.

With this board, [Robert] is hoping to create a simpler upgrade path for 8-bit printer owners. Being small and cheap is already a pretty big deal, but perhaps equally importantly, his board is running the open source Marlin firmware. Marlin powers the majority of 8-bit desktop 3D printers (even if their owners don’t necessarily realize it) so sticking with it means that users shouldn’t have to change their software configuration or workflow just because they’ve upgraded their controller.

The board is powered by a 72 MHz STM32F103 chip, and uses state-of-the-art Trinamic TMC2208 stepper drivers to achieve near silent operation. The board has an automatic cooling fan to help keep itself cool, and with an XT60 connector for power, it should even be relatively easy to take your printer on the go with suitably beefy RC batteries.

Wood SCARA Arm Gets A Grip

[Ignacio]’s VIRK I is a robot arm of SCARA design with a very memorable wooden body, and its new gripper allows it to do a simple pick and place demo. Designing a robot arm is a daunting task, and the fundamental mechanical design is only part of the whole. Even if the basic framework for a SCARA arm is a solved problem, the challenge of building it and the never-ending implementation details make it a long-term project.

When we first saw VIRK I in all its shining, Australian Blackwood glory, it lacked any end effector and [Ignacio] wasn’t sure of the best way to control it. Since then, [Ignacio] has experimented with Marlin and Wangsamas support for SCARA arms, and designed a gripper based around a hobby servo. It’s as beautiful to see this project moving forward as it is to see the arm moving ping-pong balls around, embedded below.

Continue reading “Wood SCARA Arm Gets A Grip”