Minty FM Transmitter

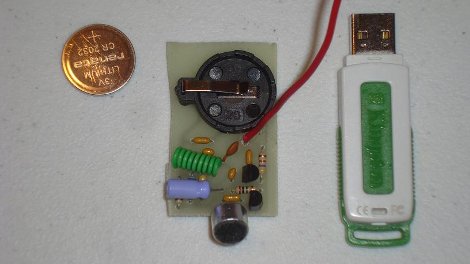
[Chis] wanted an FM transmitter bug device packed in a mint tin, and that is just what he made. Featuring only 17 discrete parts, running off of a 3volt coin cell battery, and small enough to fit inside of a plastic mint box and still have plenty of room for the mints.

Using a simple design the audio enters the device through a electret microphone and hits a transistor for amplification, the signal is then passed to the oscillator section of the circuit which features an LC tank type design which generates the carrier frequency and mixes that with the signal for a range of about 100 feet indoors.

Each section is broken down into steps where it is thoroughly explained with animations, theory, and simulation, if you are wondering how a transistor, wire, and capacitors make an FM transmitter, or if you would like to just make the final project, schematics, pcb files, and assembly instructions are provided as well.

Join us after the break for a short video and be sure to check out the other radio transmitters we have featured as well.

Continue reading “Minty FM Transmitter”

Building Linear Amplifier Prototypes

We know way too little about this subject but hopefully [Bob4analog] helped us learn a little bit more this time around. He’s building his own linear amplifiers on what looks like sheets of MDF. This is an evolving design and the two videos after the break show two different iterations. He’s salvaged several components, like transformers from microwaves, as well as built his own components like the plate choke to the right of the tubes in the image above. In standby, the amp sits at 2800 volts, warming the filament before the unit is switched on.

So what’s he got planned for this? Good question, but it appears that there’s more than enough power to drive a long-range transmitter.

Continue reading “Building Linear Amplifier Prototypes”

555 Based AM Radio Transmitter

Bust out that 555 timer and use it to build your own AM radio transmitter. The circuit that [Rtty21] is using only needs the timer chip, an NPN transistor, three caps, three resistors, and a potentiometer. It generates an amplitude modulation signal around the 600 kHz range which you will be able to pick up with any normal AM radio. From the comments on the article it seems you’ll get around 30-40 feet of range out of the device. We don’t see this as a competitor for the FM spy microphone, but maybe you can use it as a diy baby monitor.

FM Bug Using Salvaged SMD Parts

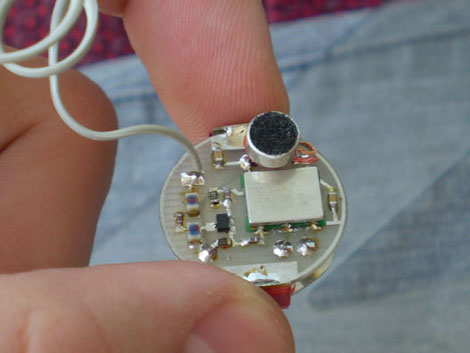
If you’re a soldering ninja this FM transmitter bug is for you. It’s quite similar to the one we looked at yesterday, but this uses 100% salvaged parts. Two phones donated components; a Nokia 3210 for its voltage-controlled oscillator and a Nokia 1611 for the rest of the parts. The bad news is that mobile technology like cellphones use some of the smallest surface mount packages known to man. That’s where the soldering skill come into play. The good news is that if you’ve been scavenging for discarded phones in order to reuse their LCD screens you already have these parts on hand.

[Thanks George]

Tiny FM Transmitter Bugs Rooms

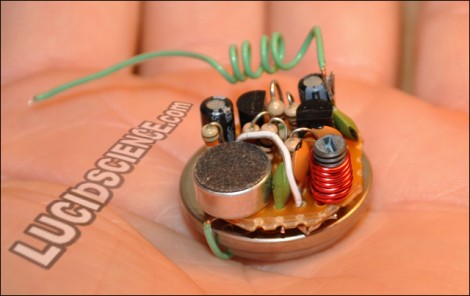
Lucid Science delves into spy-tech once again with this tiny FM transmitter. Their post demonstrates a bit larger version than seen above, using a 9-volt battery and protoboard sized to match which makes for easier soldering. The design uses a microphone, two transistors, enameled wire for the coil, as well as various resistors, capacitors, and a potentiometer. What you end up with is an amazingly clear audio signal that can be picked up with a normal FM radio.

This would make a great project to do with the kids. You can talk about circuit design, practice soldering, and when finished they’ve got an almost miraculous toy to play with. Just be careful what you say around the house, the room might be bugged!

Data Confirmation With RF Communications

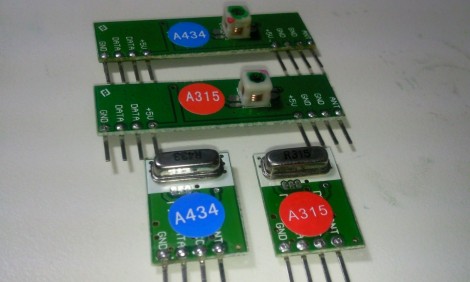
[Rafael] built a system that uses radio frequency for communications. The code he was using with the inexpensive receiver/transmitter pairs already had some error correction but from time to time an entire message would be missed by the receiver. He set out to make these RF communications more robust.

A little more than a year ago we looked at using these same transmitters with an Arduino. [Rafael] has a similar setup but since they are unidirectional he chose to use two pairs for bidirectional communication (each operating at a different frequency to avoid interference). On one end, a computer transmits data to the Arduino which is in a remote location. His confirmation protocol relies on a randomly generated message identifier. The computer will continually transmit the same message. The Arduino continually receives these messages, comparing them with the last successfully received message. If they match, it is considered a successful data transfer and the Arduino transmits a confirmation back to the computer which then starts transmitting the next message.

This isn’t an application-specific protocol. For demonstration purposes [Rafael] built a quick home automation setup that uses it to operate a house lamp.

A Simple FM Transmitter

Here is a low component count FM transmitter. It sacrifices some features, like the ability to adjust the frequency, for simplicity’s sake. The build method is fairly common with amateur radio but we don’t see it around here too much. Each component gets a 5mm-by-5mm copper clad pad which is super glued to the ground plate as an insulator. There’s even a pictorial example of this method if you need some help with visualization.

One of the schematics included in the article shows how to incorporate a condenser microphone into the unit. We guess that makes it pretty easy to add an FM ‘bug’ to your arsenal of covert listening devices. Just make sure to check your local laws before building and using this. We’re not sure what the FCC would think of it here in America so we’re hoping some well-informed readers will educate us with a comment.

[Thanks Bart]