For quite some time now, Marlin has been the firmware of choice for any kind of custom 3D printer, with only Klipper offering some serious competition in the open-source world. [Liam Powell] aims to introduce some more variety with the development of Prunt, a 3D printer control board and firmware stack.
Smooth motion control is Prunt’s biggest advantage: Klipper and Marlin use trapezoidal (three-phase) motion profiles, which aim for acceleration changes with physically impossible rapidity, leading to vibrations and ringing on prints. By contrast, Prunt uses a more physically realistic 31-phase motion profile. This lets the user independently adjust velocity, acceleration, jerk, snap, and crackle (the increasingly higher-order derivatives of position with respect to time) to reduce vibration and create smoother prints. To avoid sharp accelerations, Prunt can also turn corners into 15-degree Bézier curves.
The focus on smooth motion isn’t just a software feature; the Prunt control board uses hardware timers to control step generation, rather than the CPU. This avoids the timing issues which Klipper sometimes faces, and avoids slowing other parts of the program down. The board also seems to have a particular focus on avoiding electrical damage. It can detect short circuits in the heaters, thermistors, fans, and endstops, and can cut power and give the user a warning when one occurs. If the board somehow experiences a serious electrical fault, the USB port is isolated to prevent damage to the host computer. The firmware’s source is available on GitHub.
If you’re more interested in well-established programs, we’ve given a quick introduction to Klipper in the past. We’ve also seen people develop their own firmware for the Bambu Lab X1.
motion control24 Articles
Adjustable Lights Help Peer Inside Chips With IR
If you’re used to working through a microscope, you’ve probably noticed that the angle of the light greatly affects how your workpiece looks. Most of us prefer the relatively flat lighting provided by a ring light, but variable angle side lighting can be useful too, especially when you’re peering inside ICs to make sure the silicon is what it’s supposed to be.
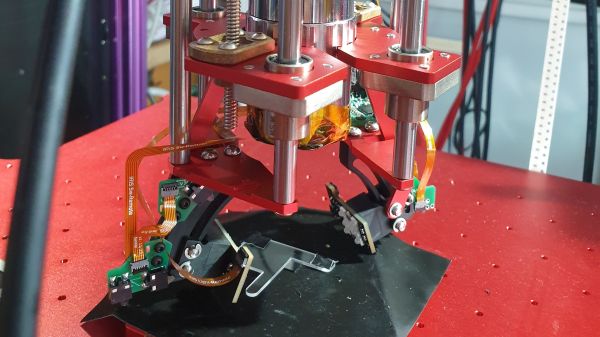
That’s what [Bunnie] is working on these days with his Project IRIS, short for “Infrared in situ,” a non-destructive method for looking inside chip packages. The technique relies on the fact that silicon is transparent to certain wavelengths of light, and that some modern IC packages expose the underside of the silicon die directly to the outside world. Initial tests indicated that the angle of the incident IR light was important to visualizing features on the metal interconnects layered onto the silicon, so [Bunnie] designed a two-axis light source for his microscope. The rig uses curved metal tracks to guide a pair of IR light sources through an arc centered on the focal point of the microscope stage. The angle of each light source relative to the stage can be controlled independently, while the whole thing can swivel around the optical axis of the microscope to control the radial angle of the lighting.
The mechanism [Bunnie] designed to accomplish all this is pretty complex. Zenith angle is controlled by a lead screw driving a connecting rod to the lights on their guide tracks, while the azimuth of the lights is controlled by a separate motor and pulley driving a custom-built coaxial bearing. The whole optical assembly is mounted on a Jubilee motion platform for XYZ control. The brief videos below show the lights being put through their paces, along with how changing the angle of the light affects the view inside a chip.
Continue reading “Adjustable Lights Help Peer Inside Chips With IR”
Quick And Dirty Microscope Motion Control For Focus Stacking
If you’ve spent much time looking through a microscope, you know that their narrow depth of field can be a bit challenging to deal with. Most microscopes are designed to only have a very thin slice of the specimen in focus, so looking at anything above or below that plane requires a focus adjustment. It’s tedious and fussy, and that makes it a perfect target for automation.
The goal behind [ItMightBeWorse]’s microscope mods is “focus stacking,” a technique where multiple images of the same sample taken at different focal planes can be stitched together so that everything appears to be in focus. Rather than twist knobs and take pictures manually, he built a simpler Arduino-based rig to do the job for him. Focus control is through a small stepper motor connected to the fine focus knob of the scope, while the DSLR camera shutter is triggered through a simple relay board. There’s also lighting control, with an RGB LED ring light that can change both the light level on the sample as well as the tint.
The code is very simple, and the setup is quite temporary looking, but the results are pretty impressive. We could do without the extreme closeup of that tick — nasty little arachnids — but the ant at the end of the video below has some interesting details. [ItMightBeWorse] doesn’t mention how the actual stacking is being done, but this CNC-based focus stacking project mentions a few utilities that take help with the post-processing.
Continue reading “Quick And Dirty Microscope Motion Control For Focus Stacking”
Super Simple Camera Slider With A Neat Twist
When you get into making videos of products or your own cool hacks, at some point you’re going to start wondering how those neat panning and rotating shots are achieved. The answer is quite often some kind of mechanical slider which sends the camera along a predefined path. Buying one can be an expensive outlay, so many people opt to build one. [Rahel zahir Ali] was no different, and designed and built a very simple slide, but with a neat twist.
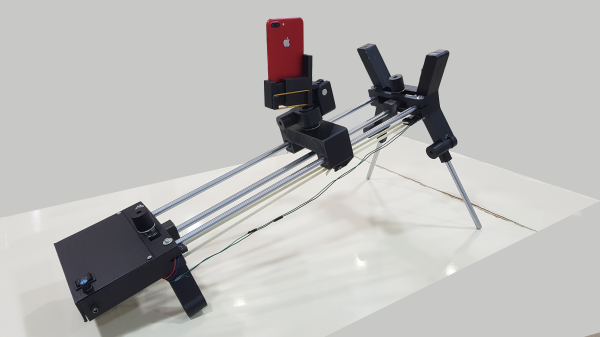
This design uses a geared DC motor, taken from a car windscreen wiper. That’s a cost effective way to get your hands on a nice high-torque motor with an integral reduction gearbox. The added twist is that the camera mount is pivoted and slides on a third, central smooth rod. The ends of this guide rod can be offset at either end, allowing the camera to rotate up to thirty degrees as the slide progresses from one end to the other. With a few tweaks, the slider can be vertically mounted, to give those up-and-over shots. Super simple, low tech and not an Arduino in sight.
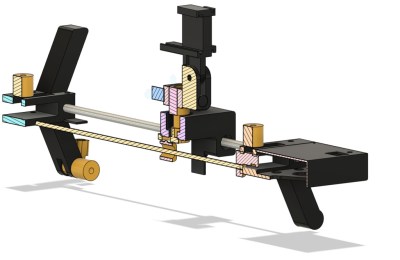 The CAD modelling was done with Fusion 360, with all the models downloadable with source, in case someone needs to adapt the design further. We were just expecting a pile of STLs, so seeing the full source was a nice surprise, given how many open source projects like this (especially on Thingiverse) do often seem to neglect this.
Electronics consist of a simple DC motor controller (although [Rahel] doesn’t mention a specific product, it should not be hard to source) which deals with the speed control, and a DPDT latching rocker switch handles the motor direction. A pair of microswitches are used to stop the motor at the end of its travel. Other than a 3D printer, there is nothing at all special needed to make yourself quite a useful little slider!
We’ve seen a few slider designs, since this is a common problem for content creators. Here’s a more complicated one, and another one.
Continue reading “Super Simple Camera Slider With A Neat Twist”
Robotic Ball-Bouncing Platform Learns New Tricks
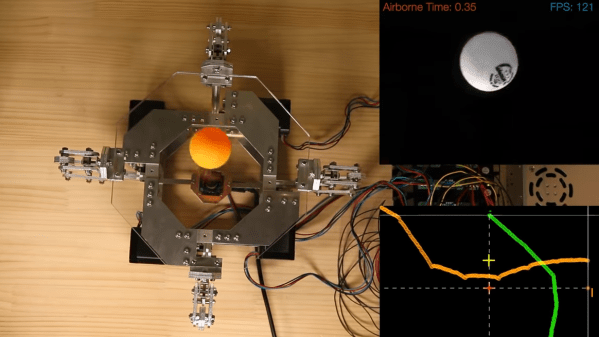
[T-Kuhn]’s Octo-Bouncer platform has learned some new tricks since we saw it last. If you haven’t seen it before, this device uses computer vision from a camera mounted underneath its thick, clear acrylic platform to track a ball in 3D space, and make the necessary (and minute) adjustments needed to control the ball’s movements with a robotic platform in real time.
We loved the Octo-Bouncer’s mesmerizing action when we saw it last, and it’s only gotten better. Not only is there a whole new custom ball detection algorithm that [T-Kuhn] explains in detail, there are also now visualizations of both the ball’s position as well as the plate movements. There’s still one small mystery, however. Every now and again, [T-Kuhn] says that the ball will bounce in an unexpected direction. It doesn’t seem to be a bug related to the platform itself, but [T-Kuhn] has a suspicion. Since contact between the ball and platform is where all the control comes from, and the ball and platform touch only very little during a bounce, it’s possible that bits of dust (or perhaps even tiny imperfections on the ball’s surface itself) might be to blame. Regardless, it doesn’t detract from the device’s mesmerizing performance.
Design files and source code are available on the project’s GitHub repository for those who’d like a closer look. It’s pretty trippy watching the demonstration video because there is so much going on at once; you can check it out just below the page break.
Continue reading “Robotic Ball-Bouncing Platform Learns New Tricks”
Perfecting A 3D Printed Camera Motion Control Rig
If you’ve ever watched one of those high production value YouTube videos and wondered how they’re able to get those smooth shots where the camera seems to be spinning around an object, you were probably looking at the product of an motorized camera motion system. There’s no question these rigs can produce visually striking shots, but their high cost usually keeps them out of the hands of us lowly hackers.
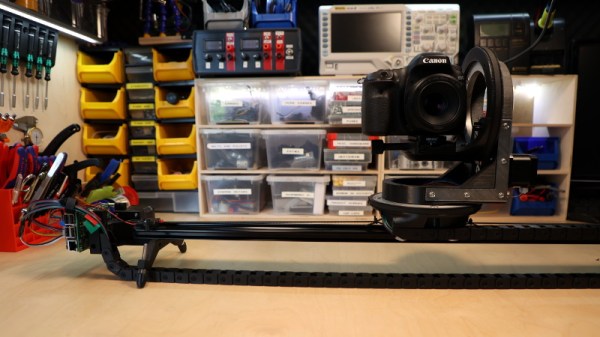
Unless of course you do like [Andy], and build your own. The latest version of this impressive rig features the ability to continuously rotate thanks to commercial 12-wire slip rings, with optical endstops so the machine can still be homed at the beginning of a move. An onboard Raspberry Pi and Arduino Uno are responsible for controlling the stepper motors, the configuration of which ends up being reminiscent of a standard 3D printer.
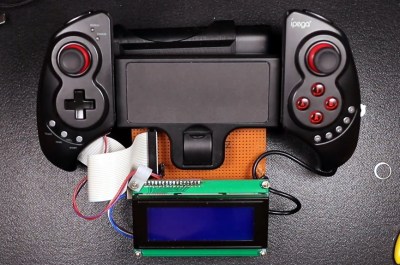
The software [Andy] has come up with lets him synchronize the camera rig with a small rotating platform he built, which allows for even more complex shots as demonstrated in the video below. It also supports a very slick MQTT-enabled remote controller that he built as a previous project, which makes taking direct control over the camera and monitoring its status much easier.
Want to add a little polish to your own project videos? [Andy] has released all of the files and information you’d need to build your own version of his motion control rig, though we wouldn’t blame you for feeling a bit intimidated by this one. It might not be the most elaborate camera motion control system we’ve seen, but it’s certainly up there. If you just want an overhead video and don’t need those fancy tracking shots, perhaps a modified VESA arm would fit the bill.
Continue reading “Perfecting A 3D Printed Camera Motion Control Rig”
Open Source Motion Controller For DIY Drones
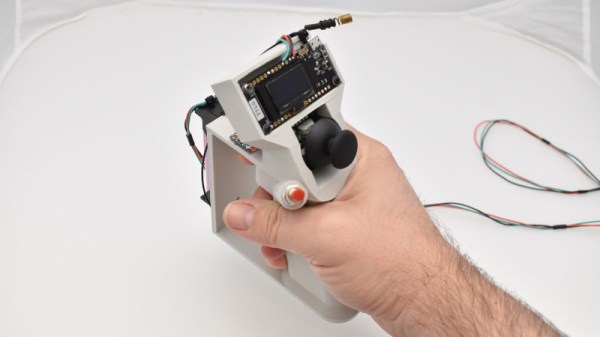
DJI recently introduced a slick motion controller that eschews the traditional dual-stick transmitter and allows you to fly their new “FPV Drone” with just one hand. The fact that it looks like it could double as the control stick for an X-Wing is just an added bonus. Unfortunately, that single model is the only thing the $199 USD controller is currently compatible with. Unwilling to get locked into the DJI ecosystem, [Paweł Spychalski] has developed an open source work-alike motion controller that brings gesture flying to home-built quadcopters and airplanes.
Now to be clear, you’ll still need a traditional transmitter to use this device. Rather than trying to reinvent the wheel, [Paweł] decided to implement his motion controller as an add-on for OpenTX hardware like the RadioMaster TX16S. It simply plugs into the trainer port on the back of the transmitter and acts as a secondary input. This greatly simplifies the design, as it essentially just needs to read angle data from its MPU-6050 gyro/accelerometer and forward it along to OpenTX over the serial port. Plus the fact that it’s connected to the trainer port means you can disable it and return to traditional controls in an instant if anything goes wrong.
Outside of the motion sensing gear, the ESP32-powered peripheral also has a thumb stick and a pair of push buttons nestled into its 3D printed frame. An OLED display provides some user feedback, and a holder for a 18650 cell is mounted to the back side as the controller will need its own power source when [Paweł] gets around to making its connection to the transmitter wireless.
In the video below, [Paweł] takes the motion controller for a test flight and comes away largely satisfied with the results. Some tweaks are in the works as you might expect for a first attempt, but nothing that would prevent you from building your own version today and experiencing what might be the next evolution of RC flying.
Continue reading “Open Source Motion Controller For DIY Drones”


