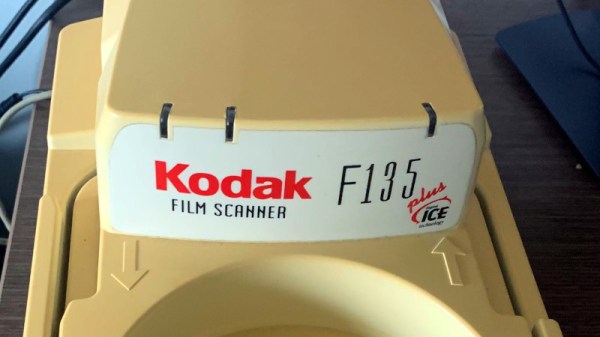
The Coolest 1990s Film Scanner To Work With Windows 11

Unless you happen to be a retro enthusiast, it’s fair to say that any photography you do (whether on your phone or a dedicated camera) is going to be digital. The world of photography has all but completely moved away from film, but the transition was not instantaneous. Instead there was a period of about ten years from the mid-90s when film and digital existed side-by-side in some form. A profitable sideline for photography shops was providing scans of film, and there were a series of high-end scanners aimed at that market.

[Kai Kaufman] shares the experience of making one of these work with a modern Windows version, and it’s interesting both because of the scanner itself and the epic tale of software detective work required to bring it up to date. The scanner in question is a Pakon F135, the product of a Kodak acquisition, and an all-in-one device that simply spools in a roll of film and does all the hard work of identifying the frames, cropping the images, and reading any other data from the film.

You may never have seen one of these machines, but if you ever had your photos on a CD as well as printed back in the day you’ve probably had its output. The problem in 2022 is that these machines have drivers which only work with relatively ancient 32-bit Windows versions, so most of the write-up involves some significant detective work into the drivers.

Not every reader will be an expert on Windows driver de-compilation, but perhaps the most interesting pieces of the puzzle come from his detective work in finding the origin of some components. Example code from Microsoft and from a chip design company both make the job much easier, and the final result is a fully functioning 64-bit driver for the device. Not many people will have a Pakon film scanner, but for those who do it seems life may just have become a bit easier.

Thanks [adilosa] for the tip!

USB On The Teensy 3 From The Ground Up

When implementing USB on a microcontroller, most people are going to reach for V-USB if they’re using an AVR, one of Microchip’s USB libraries if a PIC is involved, or any number of the USB libraries for various ARM processors. [Kevin] had a different idea. As a challenge to himself, he wrote a USB device driver for the Teensy 3.1 microcontroller board, getting as close to the bare metal as he could get.

Writing a USB device driver first required a literature review. There are a few peculiarities in the Freescale K20 family of microcontrollers – the one found in the Teensy 3.1 – that dictate the need for a specific memory layout, using several clocks, and handling all the USB descriptors. [Kevin] started with the clocks, every last one of which must be enabled. The clock is generated by the Multipurpose Clock Generator from a 16MHz crystal, PLL’ed to the frequencies the USB module needs, and sent out over the System Integration Module.

Following the flowcharts and sequences found in the Freescale reference guide told [Kevin] exactly what needed to be done with the startup sequence, and offered a few suggestions on what needed to be done to set up all the interrupts. [Kevin] spent an incredible amount of time documenting, programming, and smashing his head against the keyboard for this tutorial, but he does give everyone a great opportunity to learn from his struggles.

While [Kevin] has a mostly complete USB device driver, his work is far from done. That’s alright, because this project wasn’t meant to be a full-featured driver; it’s still missing real error handling, strings in the configuration, and a real VID/PID. That’s alright, it’s still a great exercise in building something from scratch, especially something that very few people have built successfully.

Oh, blatant Hackaday Store plug for the Teensy 3.1.

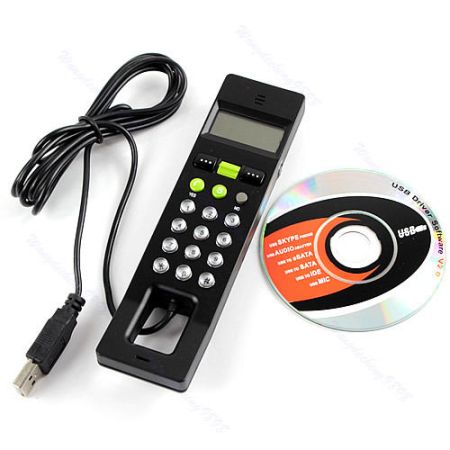
Discovering The Protocol In A USB VoIP Phone

[Daniel] picked up a cheap USB handset to use with his VoIP provider, and included in the box was a CD with all the software that would make this handset work with Windows. [Daniel] is running Linux on his main battlestation, rendering the included CD worthless. Using the handset under Linux would be a problem; although the speaker and mic worked, the buttons and screen did not. No problem, then: [Daniel] just played around with the command line until he figured it out.

The handset presented itself to the Linux box as a soundcard and HID device. The soundcard was obviously the speaker and mic, leaving the buttons and display as the HID device. [Daniel] checked this out by running a hexdump on the HID device and pressed a few buttons. His suspicions were confirmed, and he could easily read the button with a little bit of Python.

With the speaker, mic, and buttons on the handset figured out, [Daniel] turned his attention to the one bit of electronics on the phone he hadn’t yet conquered: the display. After firing some random data at the phone, the display blinked and showed a messy block of pixels, confirming the display was controlled through the HID driver. Loading up usbsnoop to see what the original software does to update the screed showed [Daniel] the data format the display accepts, allowing him to control everything in this VoIP phone.